The LKS Address

Welcome to Our Home Address

  • BLOG
  • SHOP
  • YOUTUBE
  • ABOUT
  • CONTACT

EXPLORE

  • BLOG
  • SHOP
  • YOUTUBE
  • ABOUT
  • CONTACT

Connect

RENOVATION · April 24, 2023

8 WAYS WE CUSTOMIZED OUR IKEA KITCHEN

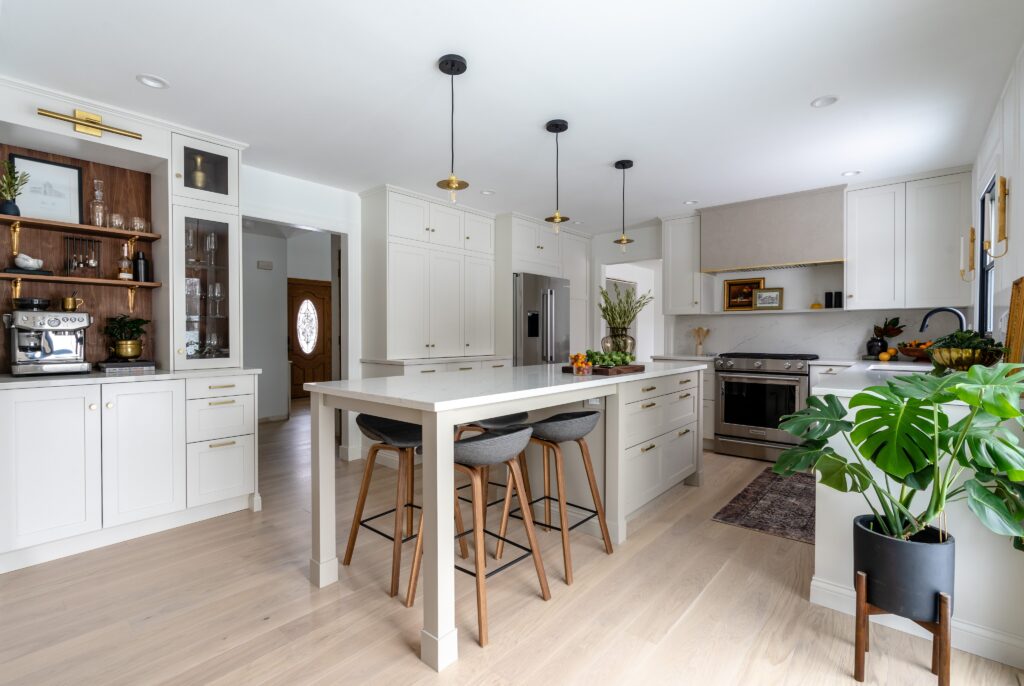
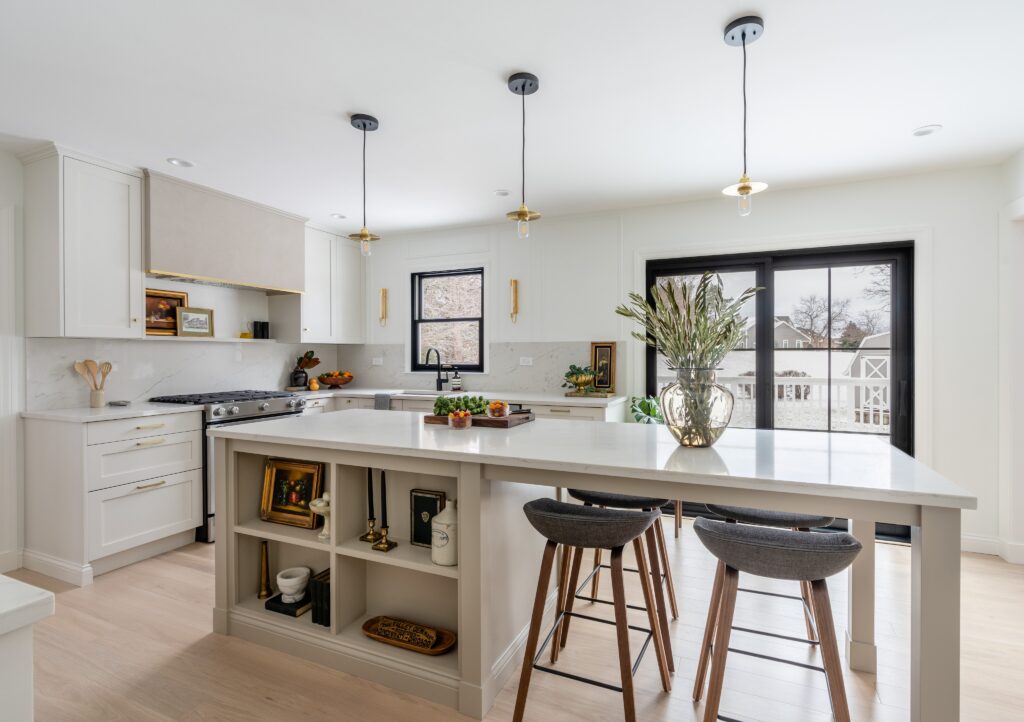
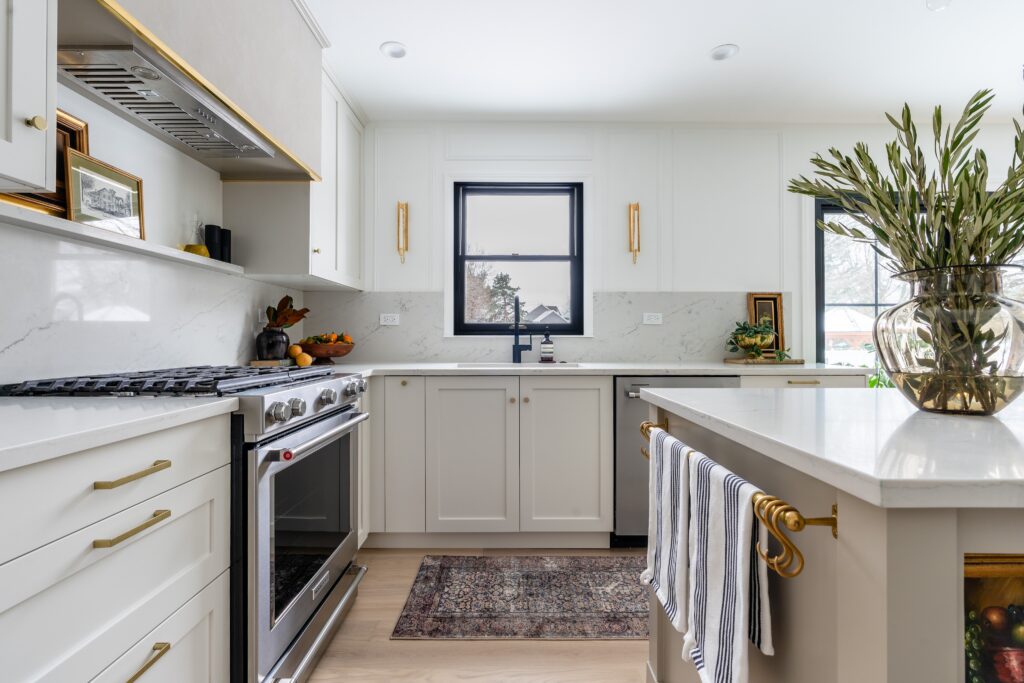
With our latest kitchen renovation, we wanted to push the envelope of our IKEA kitchen, so here are the 8 ways we customized our IKEA kitchen. If you have missed our kitchen reveal, you can check out the full blog post. Our reveal post also contains a list with links to all of the projects we DIYed in our kitchen. All sources for the kitchen are listed here.


Semi-Custom Fronts for IKEA

semi-custom fronts

We knew from the get-go that this time around we’d used semi-custom fronts made for use on IKEA SEKTION boxes. We chose the DIY Shaker (unfinished and paintable) fronts from Semihandmade. We wanted to use the unfinished and paintable fronts for a few reasons. First was we wanted to choose our own cabinet paint colors, second was so that all of the other elements we customized had the same exact color and finish as the door fronts, and third it is more custom and higher quality than off the shelf IKEA fronts. Check out our blog post on installing the kitchen cabinets and painting the cabinet doors.


Countertop Cabinets

countertop cabinets

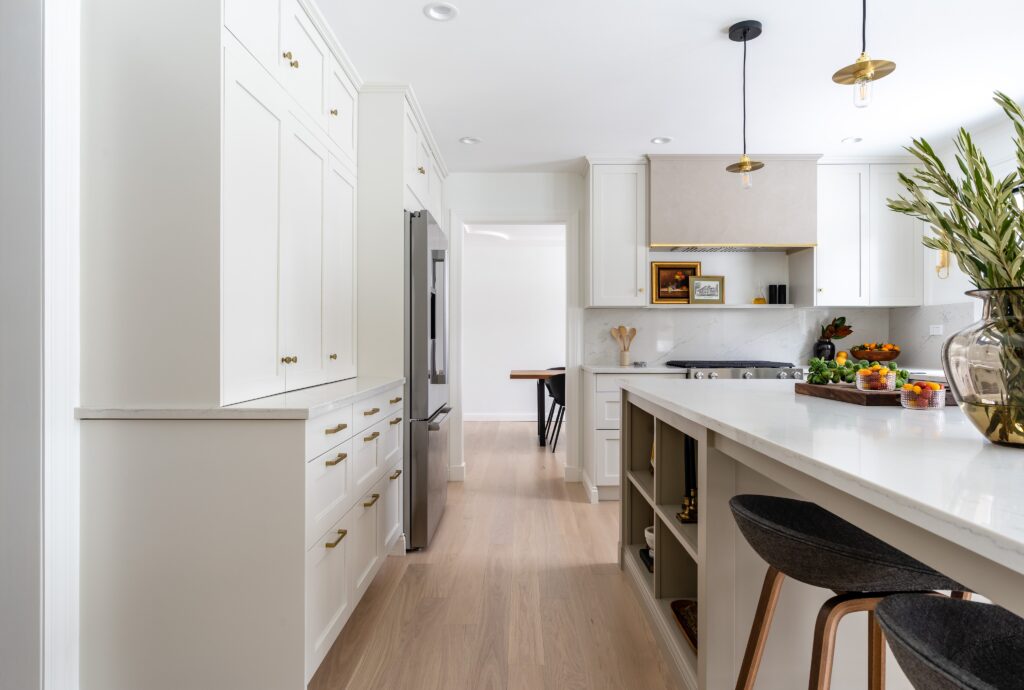
One of our must haves for the new kitchen was countertop cabinets. I love the look of countertop cabinets and we decided to use them at our pantry and storage wall. We installed these without the bottom of the cabinet so that the stone counters were visible inside the cabinet and we can easily slide items in and out. Check out our blog post on installing the kitchen cabinets.

View this post on Instagram

A post shared by The LKS Address • Lauren & Kam (@thelksaddress)


Stacked Cabinets

stacked cabinets

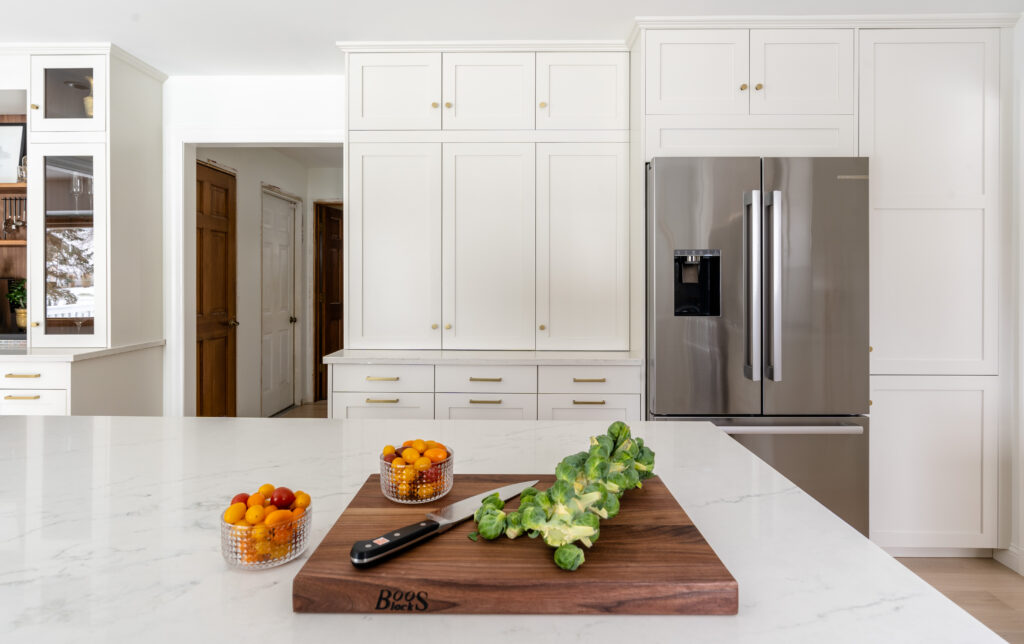
We also utilized stacked cabinets at our pantry wall and our coffee bar. By stacking two sets of upper cabinets on top of each other, we were able to achieve floor to ceiling cabinets for a custom look. Because we were limited to IKEA’s standard cabinet heights, any additional height we needed to make up was dealt with using a trim piece between the stacked cabinets. Check out our blog post on installing the kitchen cabinets.

View this post on Instagram

A post shared by The LKS Address • Lauren & Kam (@thelksaddress)


Baseboards

baseboards

At all of our side cover panels (which we made from scratch using 3/4″ MDF), we brought them down to the floor at each side of all of the end cabinets. This allowed us to wrap baseboards from the side cover panel to the toe-kicks for a built-in look.

View this post on Instagram

A post shared by The LKS Address • Lauren & Kam (@thelksaddress)


Crown Molding

crown molding

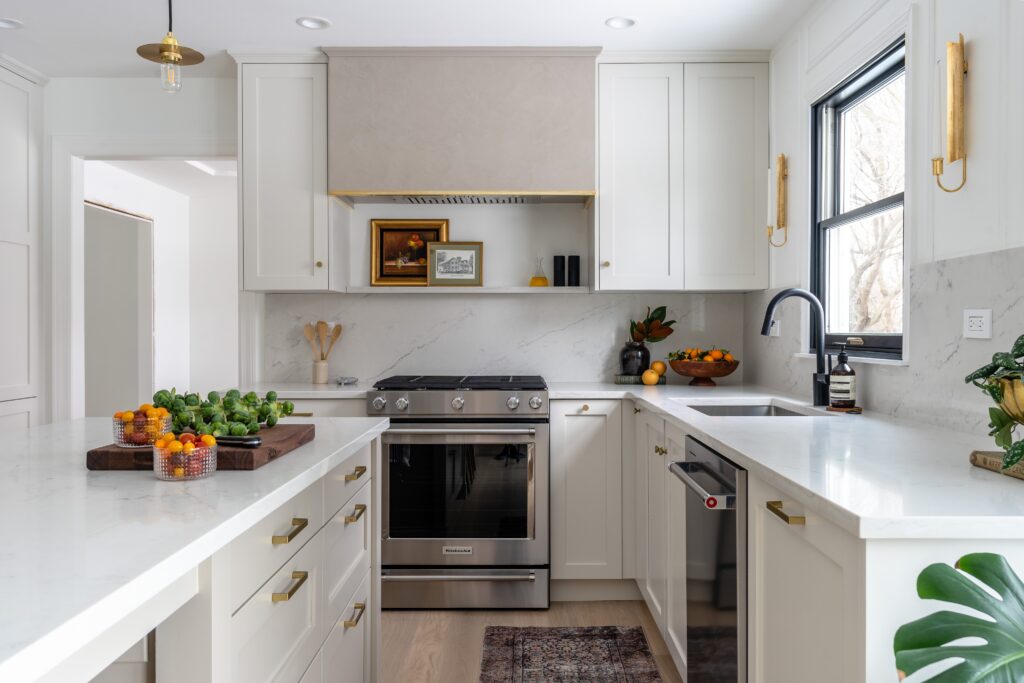
Similar to adding baseboards for a built-in look at the floor, we added crown molding at the top of the upper cabinets where they meet the ceiling. We also used this same crown molding at our range hood so all of the details coordinated. We’ve got more information on how we installed our crown molding on our Instagram, at our IKEA Series highlight.

View this post on Instagram

A post shared by The LKS Address • Lauren & Kam (@thelksaddress)


Walnut Cabinet Interior

walnut interior

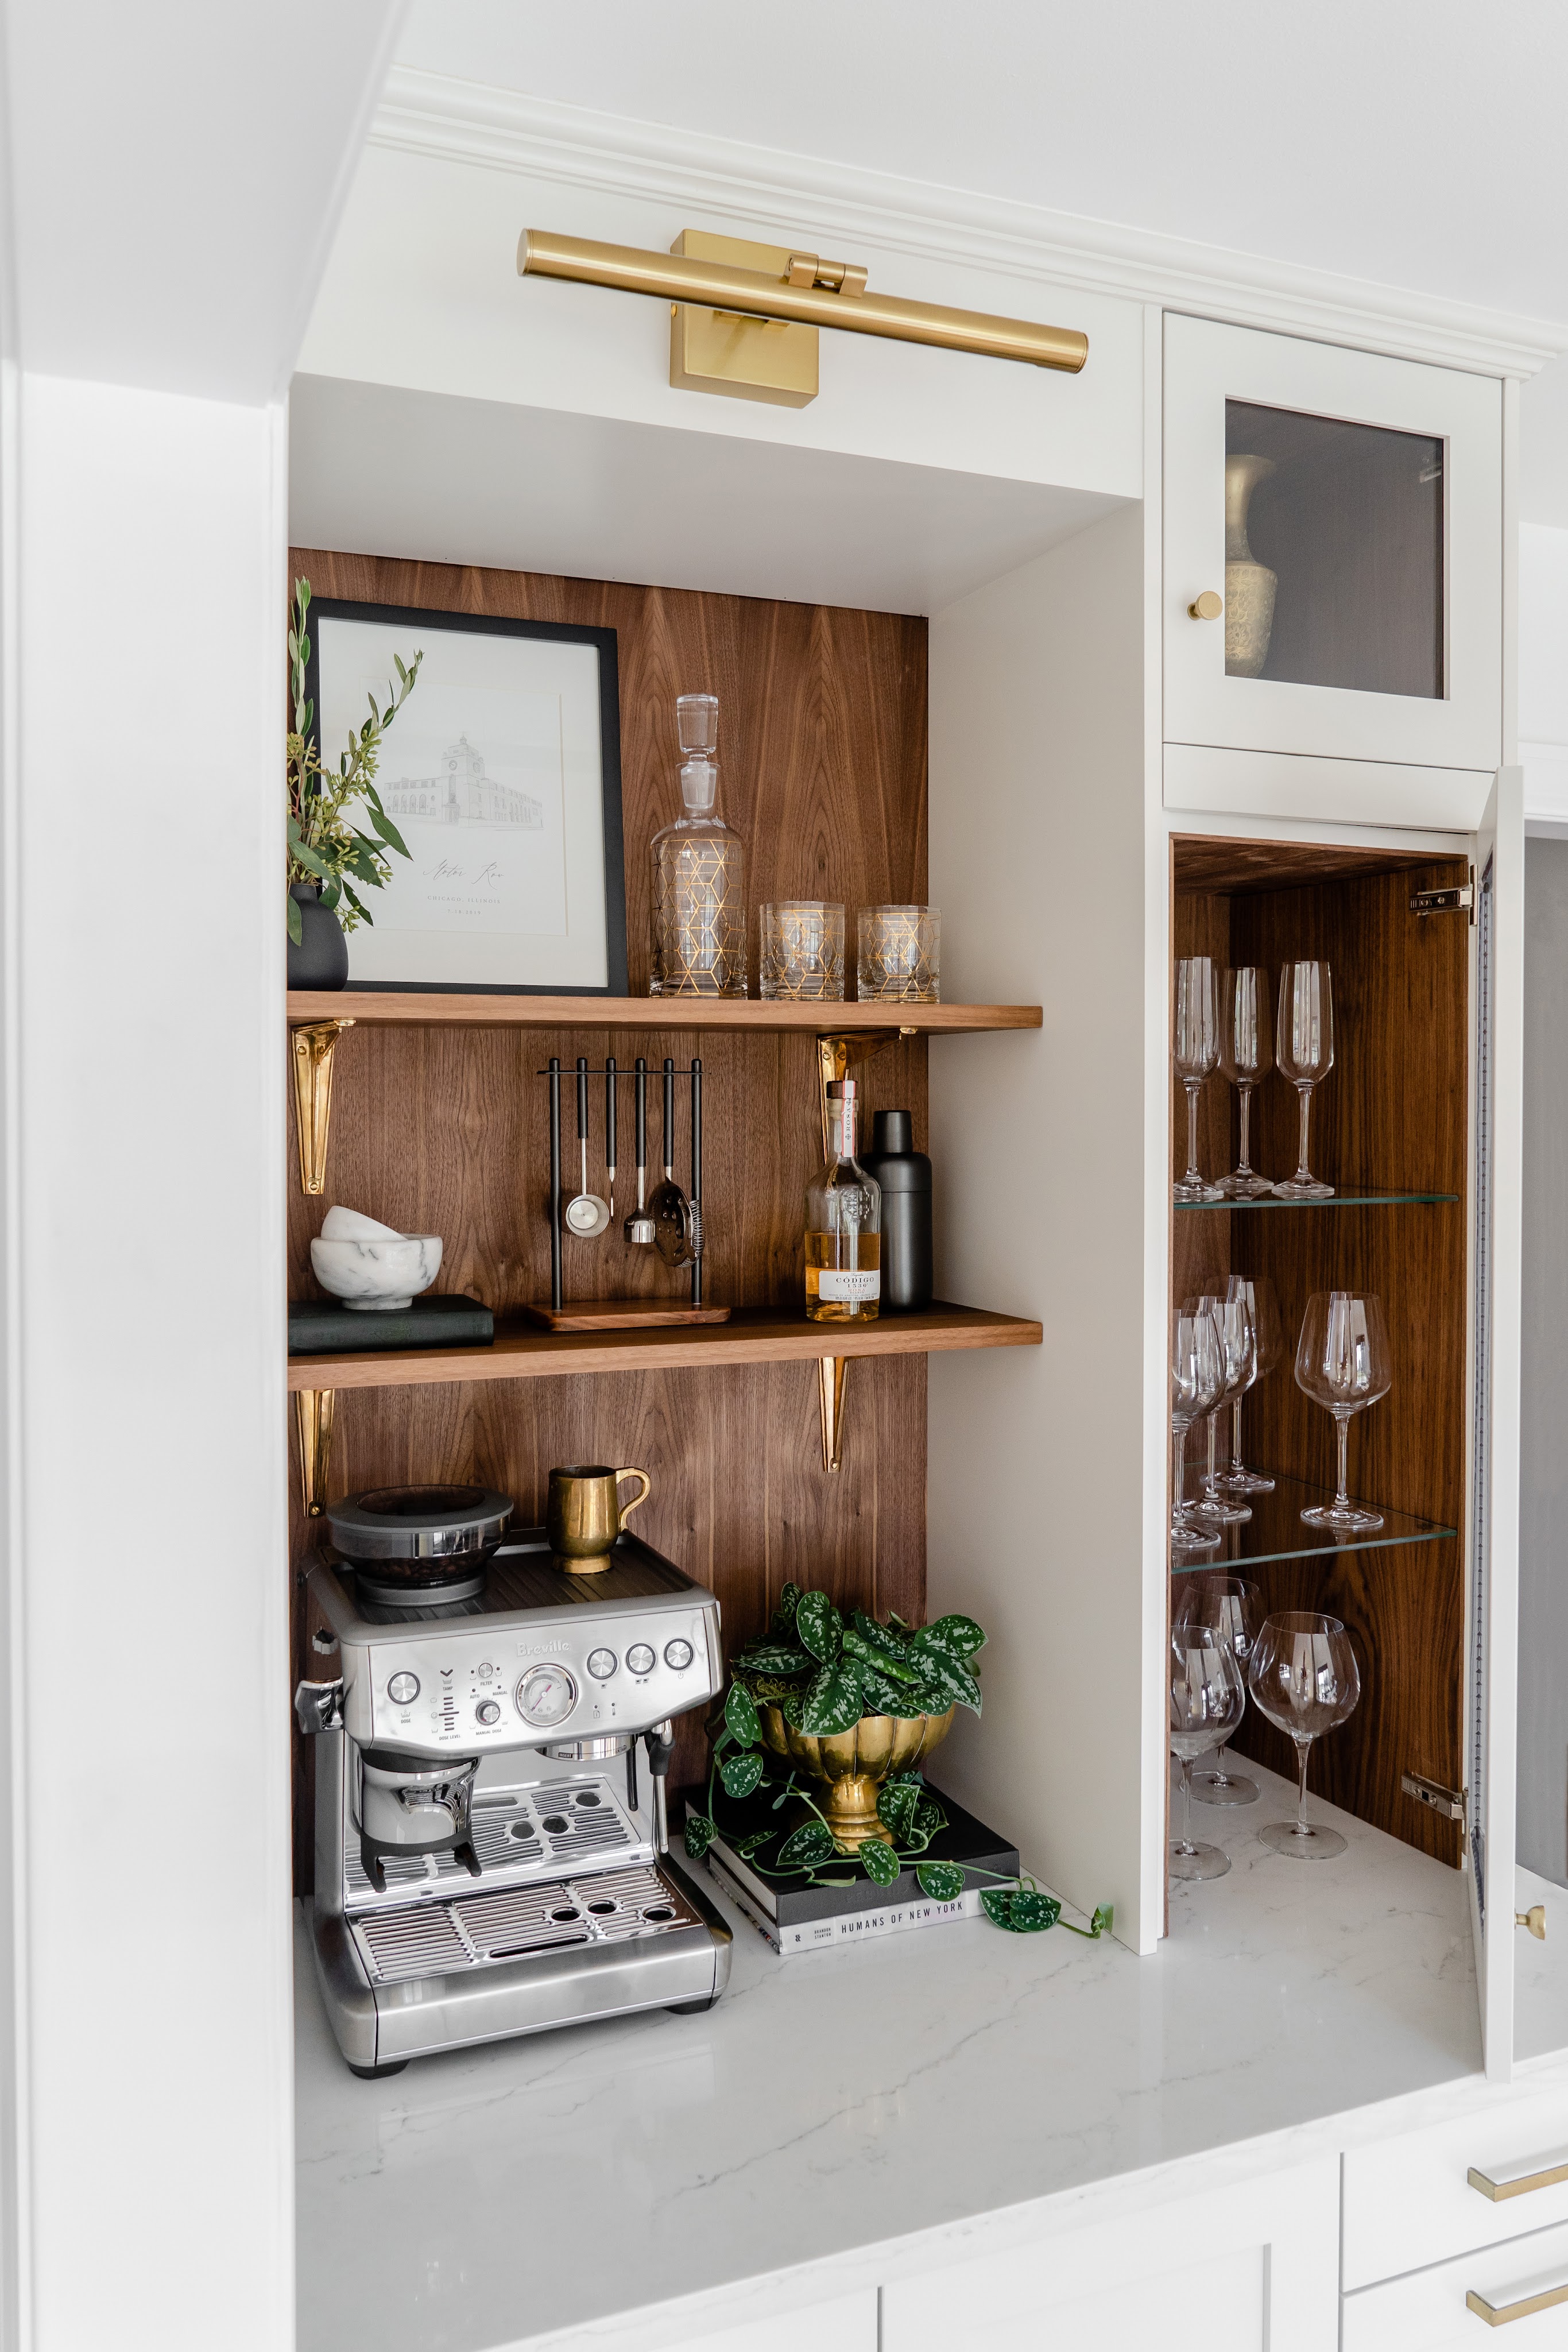
At our coffee bar we used the same DIY Shaker (unfinished and paintable) fronts from Semihandmade, but with glass panel fronts. Because the IKEA SEKTION boxes are just white inside, we decided to line the interior of the cabinet with 1/4″ walnut veneer plywood. This added a richness to our coffee bar and you’d never guess this was an IKEA cabinet, in my opinion! If you’re interested in more info, we’ve got a coffee bar blog post.

View this post on Instagram

A post shared by The LKS Address • Lauren & Kam (@thelksaddress)


Flush Filler Pieces

flush filler pieces

This is a simple one but I think it is very impactful. At most IKEA kitchens I see the filler pieces at the end of cabinets or in-between two cabinets mounted flush with the cabinet box not the cabinet front, because it is easiest to attach that way. For all of our filler pieces, we mount them flush with the cabinet front for a more custom look. We attach 3/4″ blocking to the back our filler piece and use the blocking to attach it to the cabinet box.


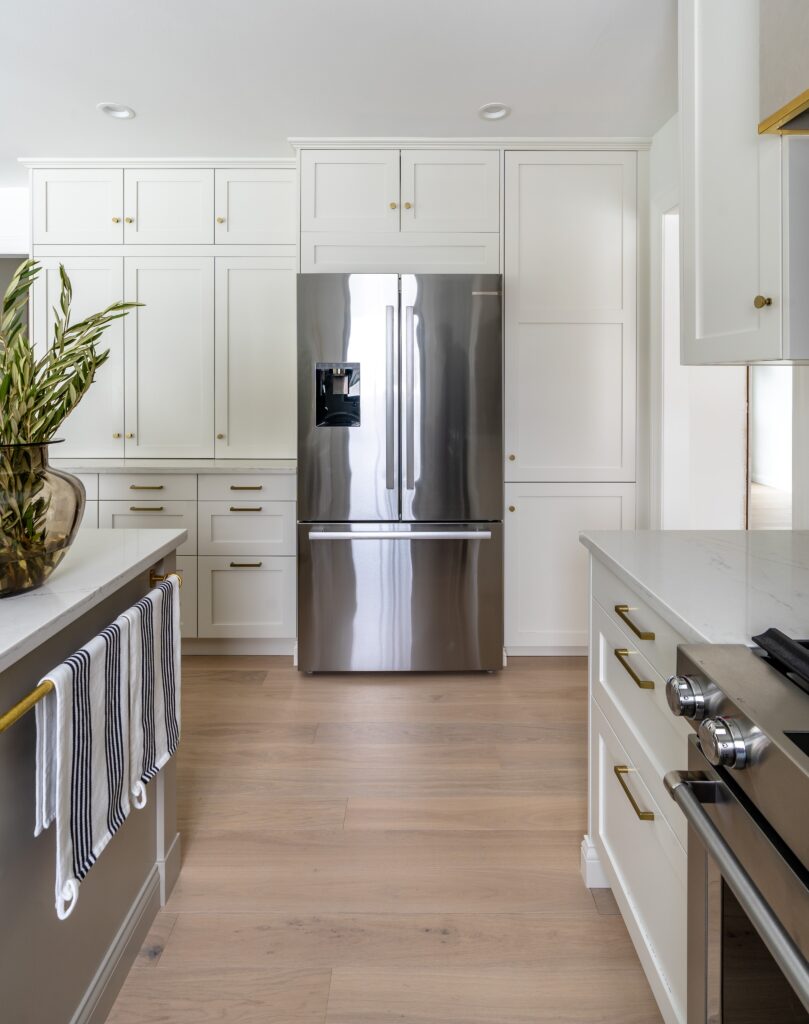
Custom-sized Cabinets, Fronts, and Filler Panels

custom-sized cabinets

We also created custom-sized cabinets, fronts, and filler panels in our kitchen. It’s worth mentioning that this is probably only an option if you’re planning to use semi-custom fronts. The company we ordered our fronts from also offers custom front sizes to use our on custom-sized cabinet. To the left of our sink cabinet we created a 7″ wide cabinet to fill the gap where IKEA did not offer a cabinet size less than 12″. We also used a custom filler panel above our fridge that creates a more custom look.


There you have it, 8 ways we customized our IKEA Kitchen! We hope this recap was helpful for planning your IKEA kitchen or any kitchen for that matter. Leave us a comment below if you decided to use any of these customizations in your kitchen renovation!

Posted By: thelksaddress · In: RENOVATION

OUR KITCHEN DIMENSIONS
PAINTING OUR INTERIOR WOOD DOORS

You’ll Also Love

TIMELESS WOOD FIREPLACE MANTEL
OUR KITCHEN DIMENSIONS
UPGRADING OUR STAIR FROM CARPET TO WOOD FLOORING
About Photo
Hi! We are Lauren and Kameron, the creators behind the LKS Address. Together, we are working to pursue our passions of design, renovation, and architecture.

EXPLORE

  • BLOG
  • SHOP
  • YOUTUBE
  • ABOUT
  • CONTACT

thelksaddress

Let’s build some doors for these bookcases! It’s not a library door unless it has a brass grille, so we couldn’t forget those. We weren’t sure if we’d do doors or not and the build would have been much simpler without them. But we’re glad all of you pushed us to do the doors because we love how they turned out!
°
°
°
°
#LKSAddress #homelibrary #billybookcase #library #ikeahack #darkgreen
Elevating IKEA is one of our favorite things to do Elevating IKEA is one of our favorite things to do and we’re so excited about finishing up the library bookcases! We’ve made it through assembling the Billy bookshelves, rough framing, building our face frame, painting, adding inset detail trim, and installing our picture lights. We’ve only got a few things left to complete, and up next are our semi-custom brass grille doors!
°
°
°
°
#LKSAddress #homelibrary #billybookcase #library #ikeahack #darkgreen
Kam and I have been talking about going to Paris f Kam and I have been talking about going to Paris for years, we finally made it a priority and went to Paris for a week in October! We immediately fell in love with the city and it’s probably my favorite city I have ever visited. We left feeling so inspired. I cannot wait to go back and learn more about Parisian culture. If you’ve been to Paris, tell us your favorite part. If you haven’t been, we’d love to hear one reason you can’t wait to visit!

Paris Highlights:
@jacquemartandre - beautiful house museum
@copains.paris - gluten-free bakery
@veuveclicquot - touring their champagne house
@jentemple - special thanks to Jen for helping start our research with a bunch of personal recommendations!
°
°
°
°
#LKSAddress #Paris #France
Our backyard has undergone quite the transformatio Our backyard has undergone quite the transformation over the past year! From removing our existing deck, pouring a new concrete patio, overhauling the landscaping, installing raised garden beds, and adding finishing touches like our centerpiece urn and outdoor furniture; we wouldn’t have it any other way! It’s truly feels like an extension of our home now. It’s so nice that now when we look outside it just feels like us. What is your favorite part of our backyard project?
°
°
°
°
#LKSAddress #outdoorfurniture #backyardmakeover #outdoorrenovation
Our backyard project is now complete thanks to the Our backyard project is now complete thanks to the finishing touch, our new outdoor furniture. This outdoor furniture from @liveouter is beautiful yet functional and helps to create an extension of our home outdoors. #sponsored

We went with the Charcoal Aluminum Sofa with Armless Chairs 5-seat set and paired that with the new centerpiece of our patio, the OuterStone fire pit. Our favorite part about the seating set is the integral covers, the OuterShell, that will protect our cushions for seasons to come. It makes covering and protecting our new furniture easy and convenient! Have you ever seen anything else like it?
°
°
°
°
#LKSAddress #outdoorfurniture #outdoorliving
Before and after at our front door and covered ent Before and after at our front door and covered entry! This used to be the most disliked part of our exterior. We wanted to lean into traditional elements here to coordinate with our colonial style exterior as we gave it an updated look. Now it feels cohesive with the exterior and our personal style. Special thanks to our partners on this project, @pookylightsus, @peasedoors, and @levelhome. 
°
°
°
°
#LKSAddress #frontdoor #coveredentry #doorhardware
Follow on Instagram

Copyright © 2025 The LKS Address · Theme by 17th Avenue