The LKS Address

Welcome to Our Home Address

  • BLOG
  • SHOP
  • YOUTUBE
  • ABOUT
  • CONTACT

EXPLORE

  • BLOG
  • SHOP
  • YOUTUBE
  • ABOUT
  • CONTACT

Connect

RENOVATION · January 7, 2023

DIY ENGLISH INSPIRED CUSTOM KITCHEN ISLAND

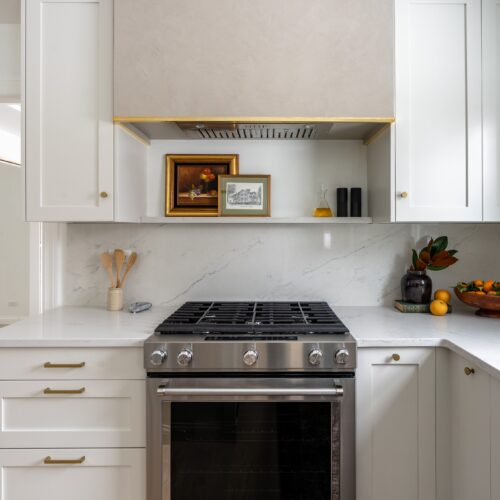
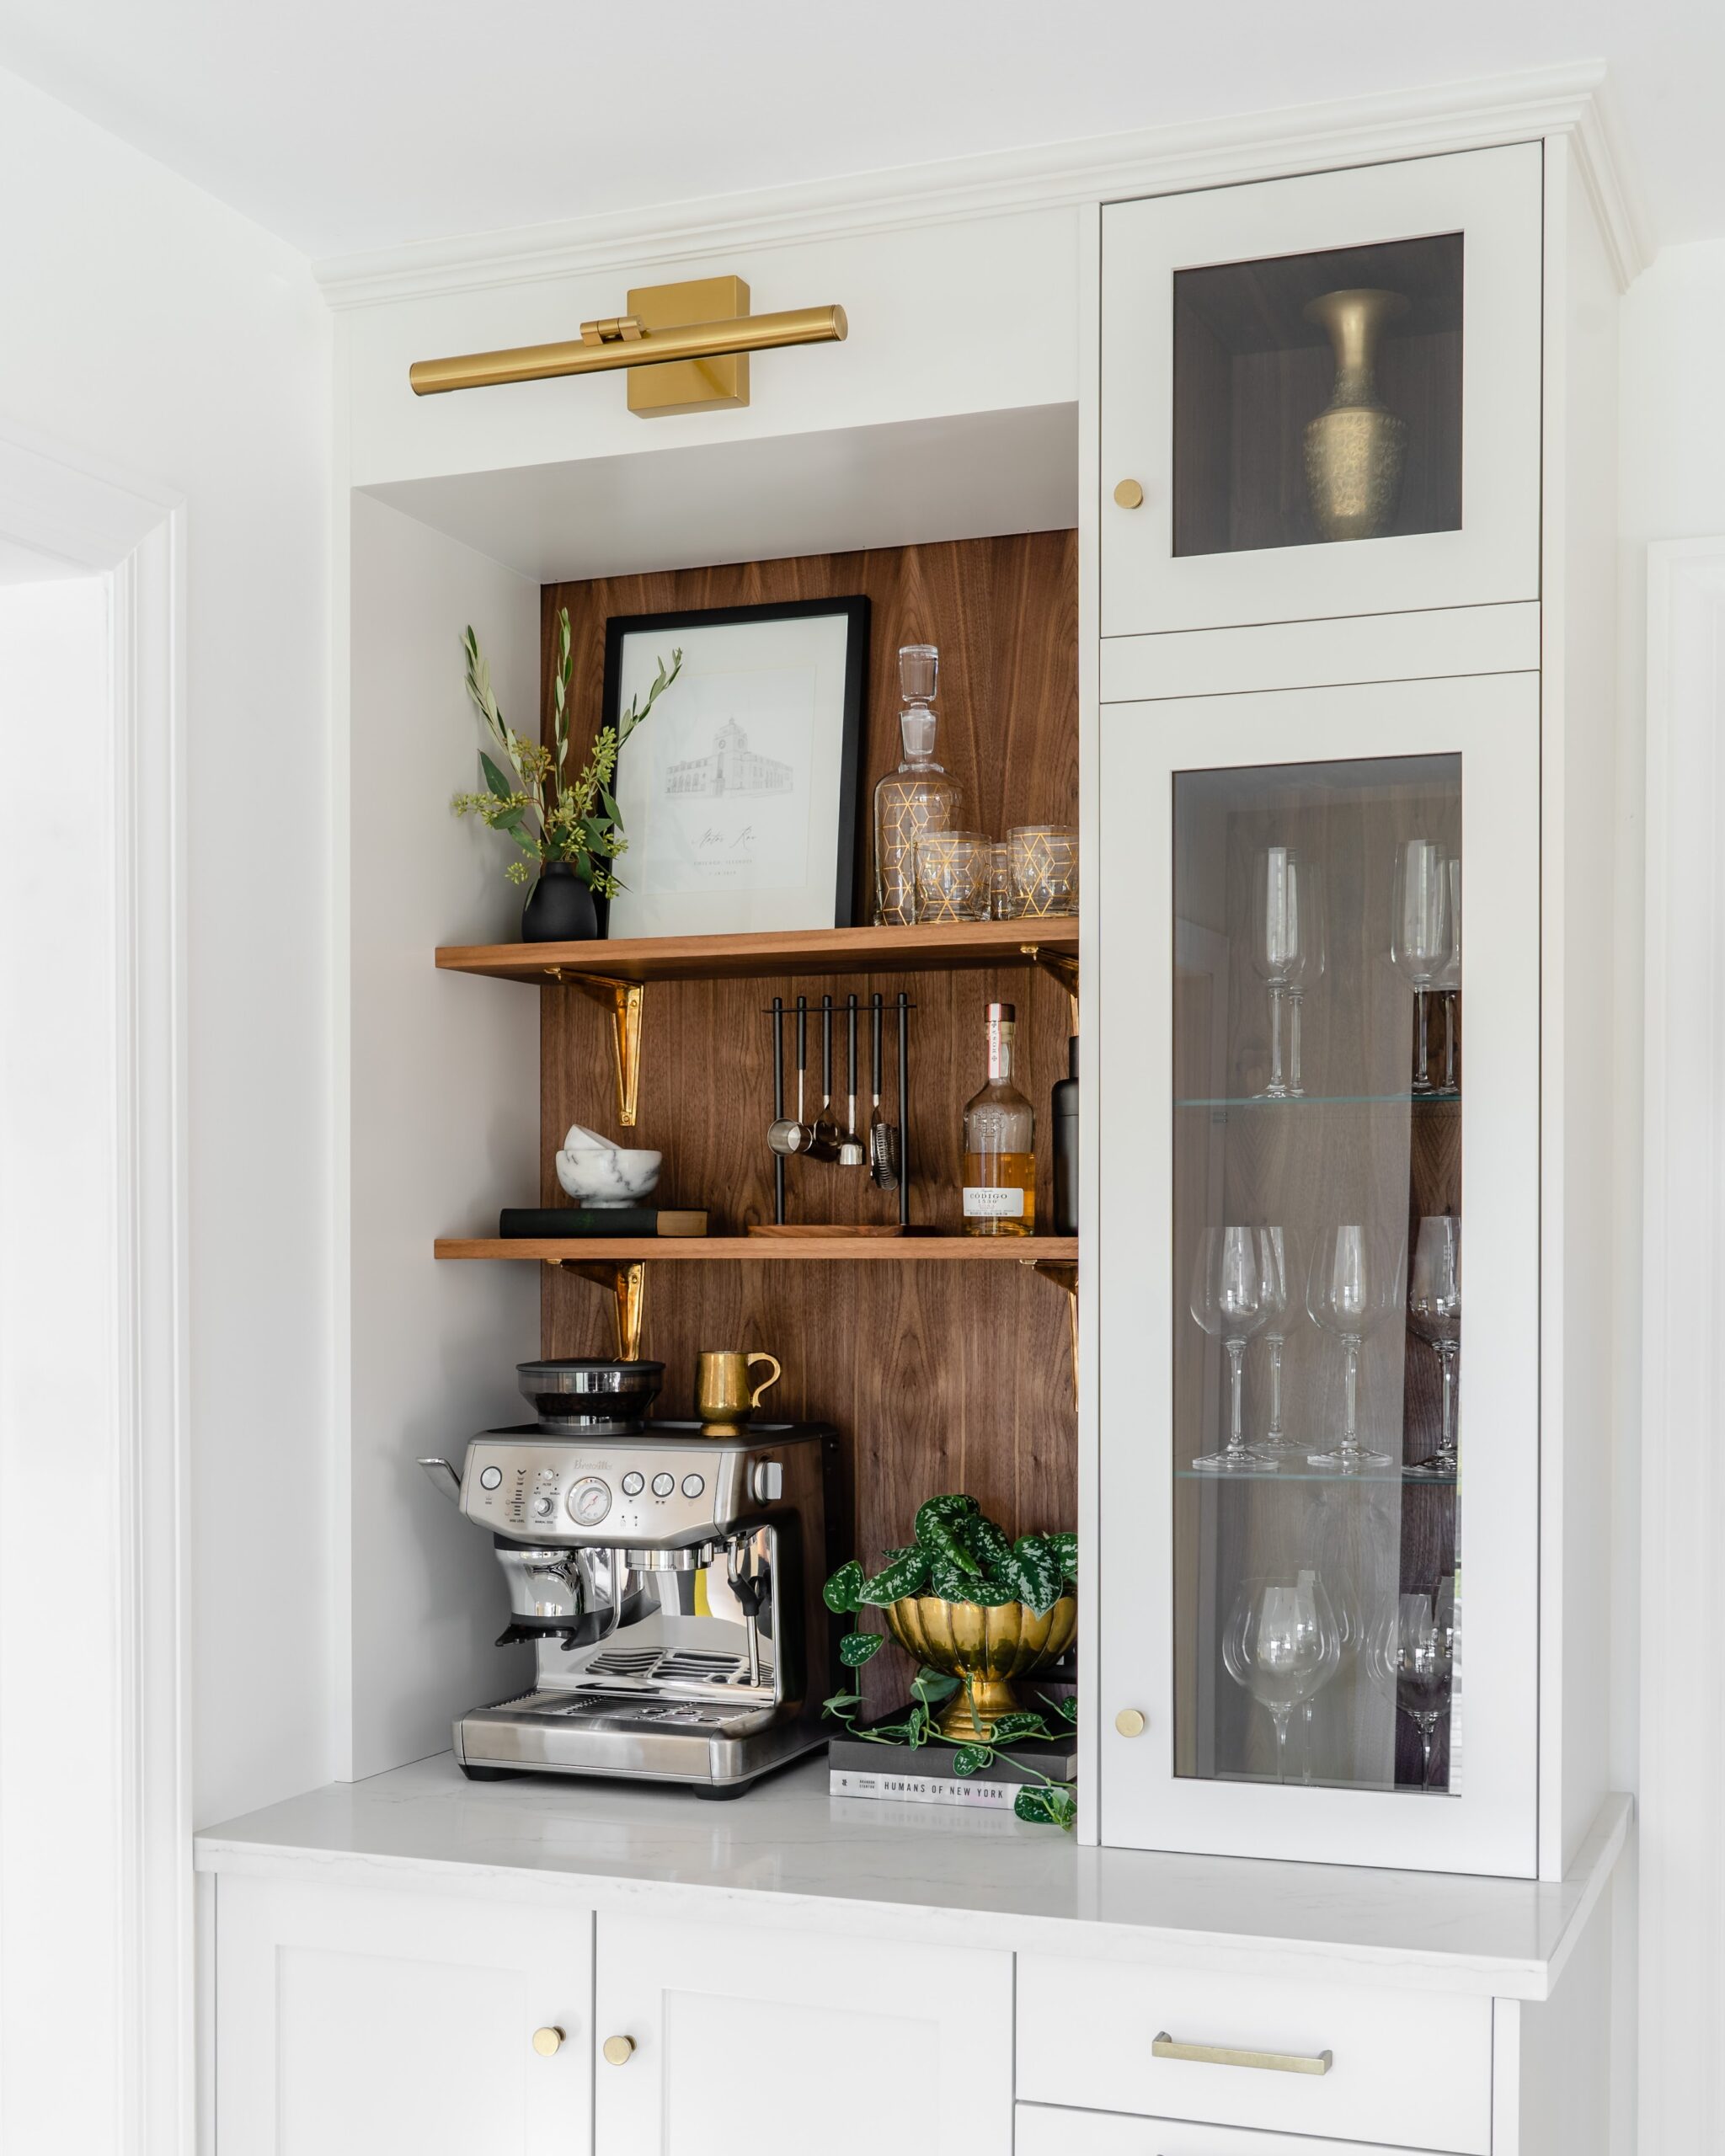
Let’s build our DIY english custom inspired kitchen island. It will include 4′ of IKEA SEKTION base cabinets and a 4′ island extension. We’re strategically doing projects in our kitchen so that we can keep it a usable kitchen for as long as possible, so before we finish demoing out the final cabinets at the sink and stove walls we are going to be building our DIY custom kitchen island. In our existing kitchen we had a small 4′ long island, which we are removing and starting from scratch. We will also be expanding upon the size of the island so it is more visually substantial and functional for us to use in the future.

If you’re interested in seeing the step by step process on how we built our custom kitchen island, we have a full YouTube vlog on the process! This covers the build process and in our next video and blog post we’ll cover painting the island.

If you’re interested in our exact plan and sizing for our custom kitchen island, we’ve got downloadable PDF plans below:

Kitchen-Island-Drawings-REVDownload

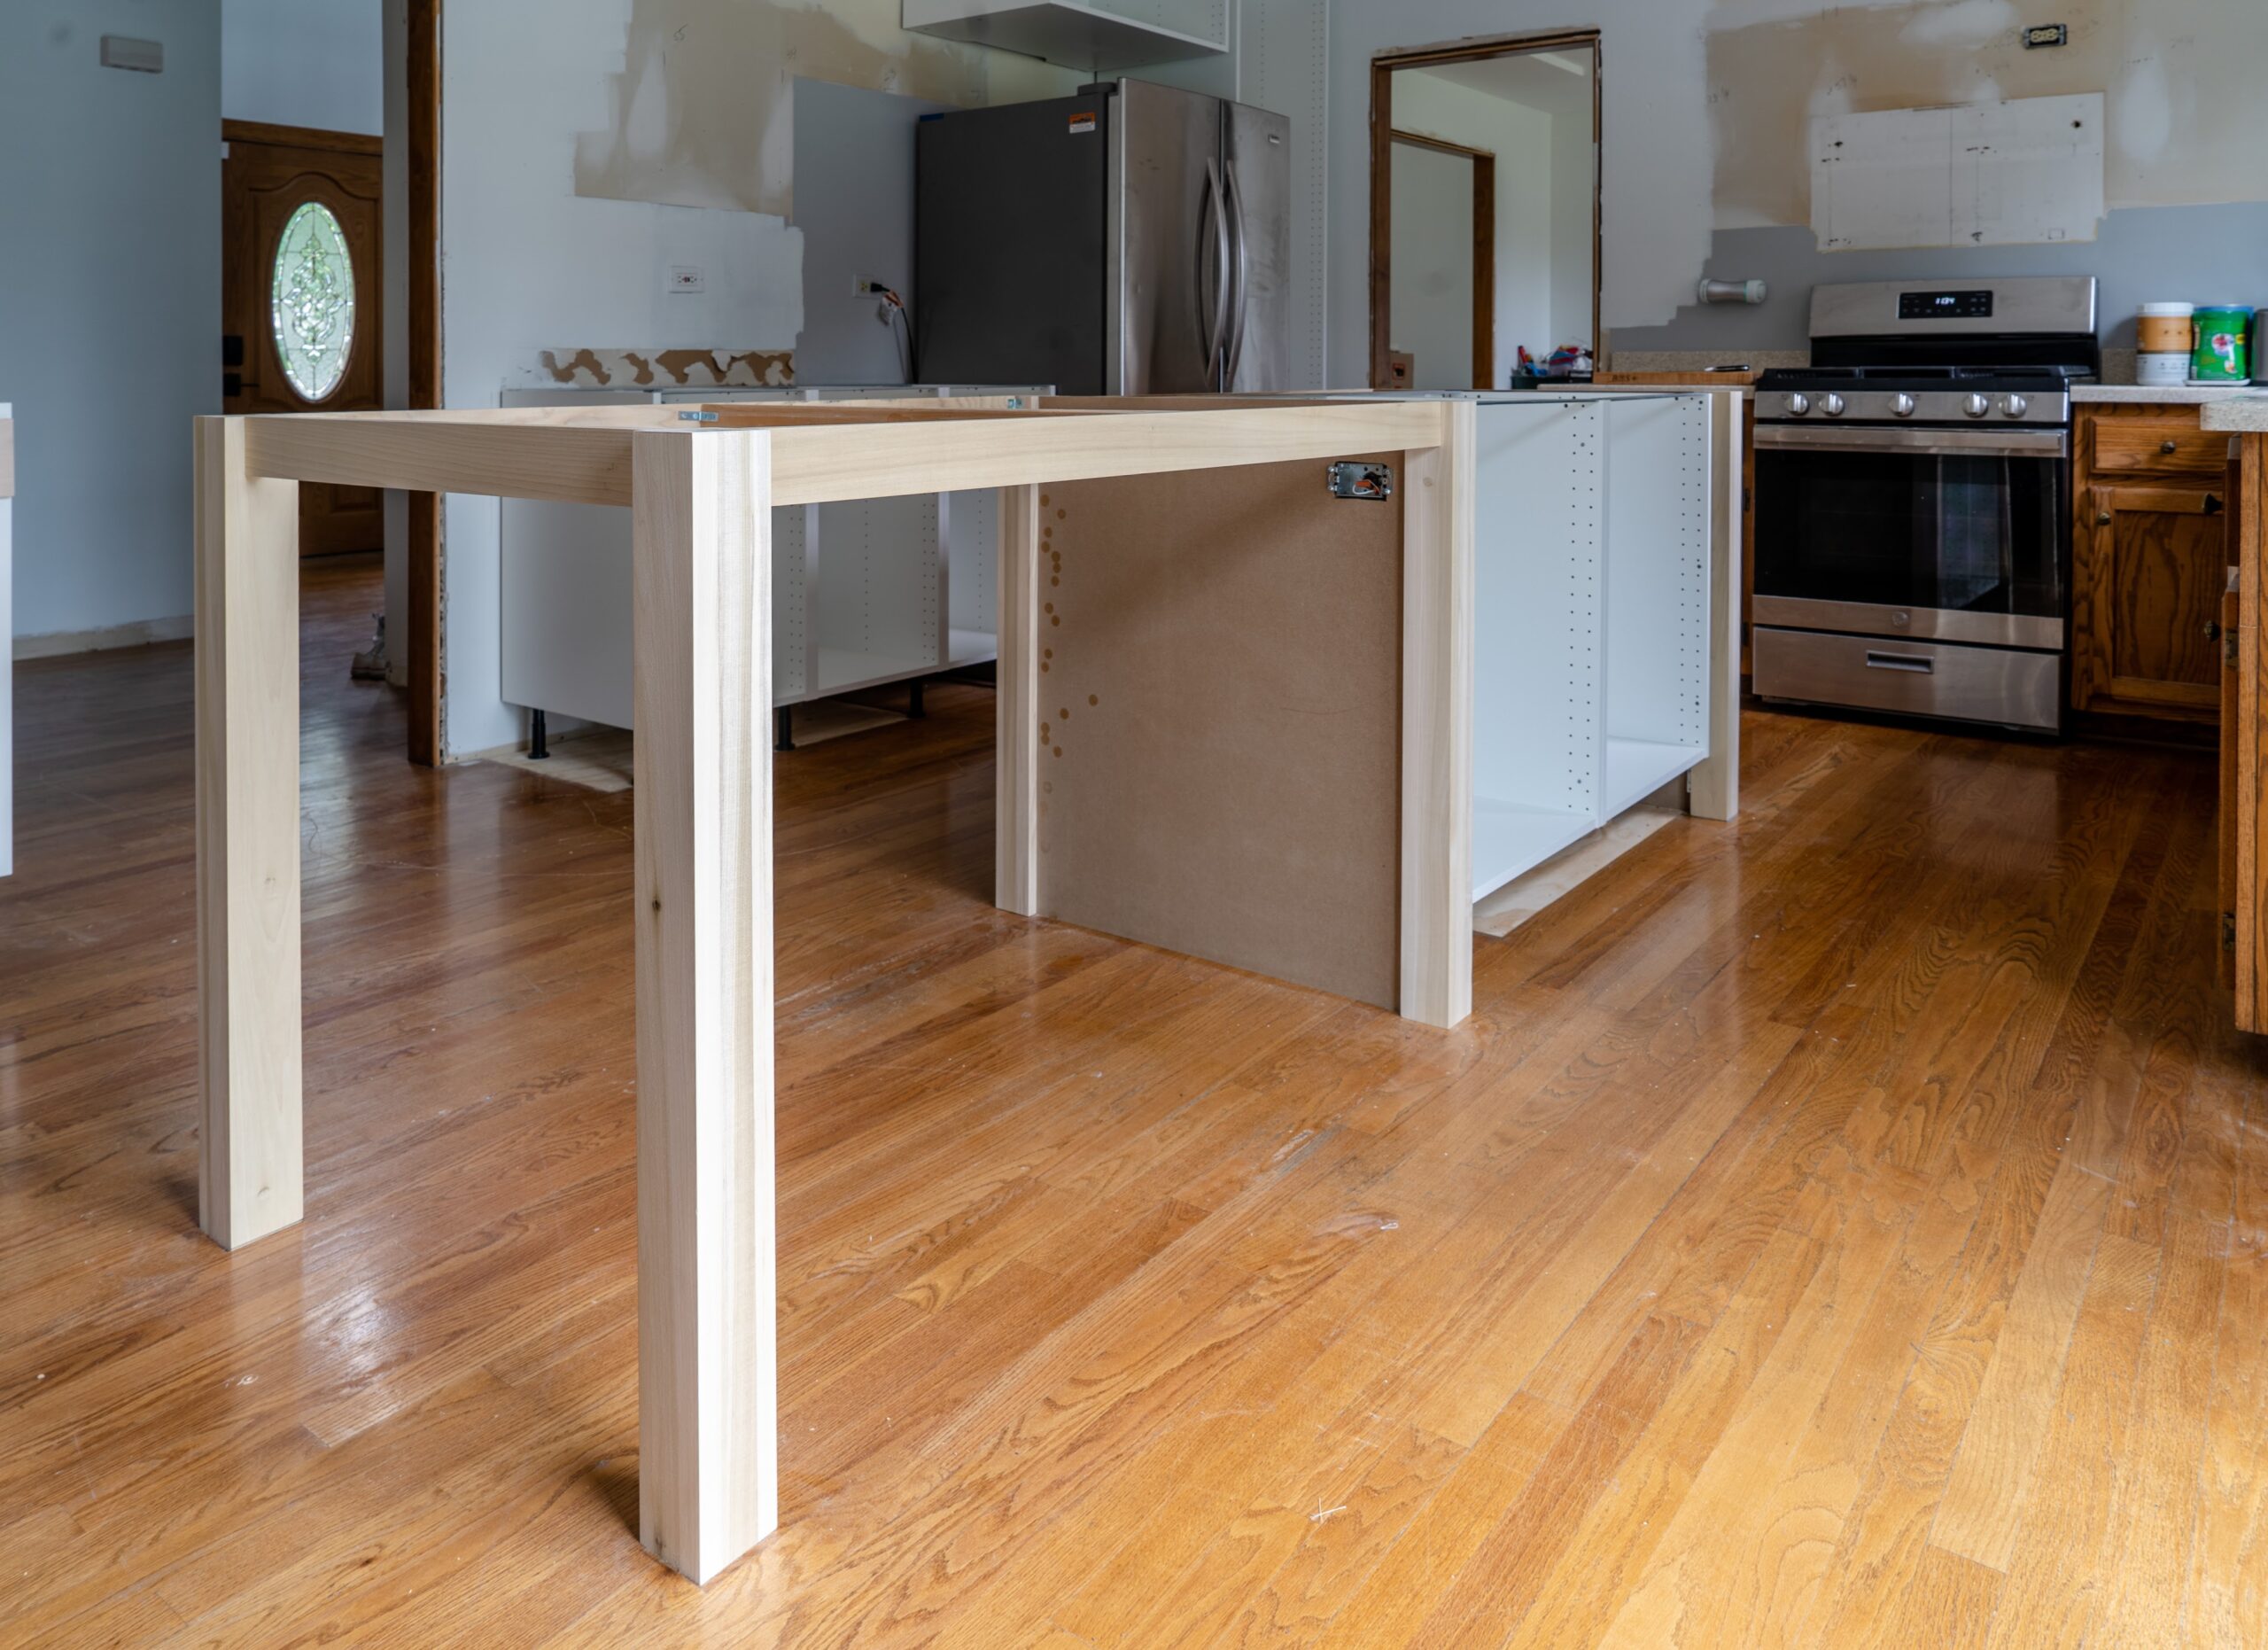
For our kitchen island, we’re going to be using a combination of IKEA SEKTION 24″ base cabinets, solid wood 3″ square column legs in poplar, 3/4″ MDF for our shelving area and side panels, 1×3 poplar to trim out the countertop extension, and metal corner brackets to attach the 1×3 poplar.

KITCHEN ISLAND MOCKUP
ISLAND SHELVING MOCKUP

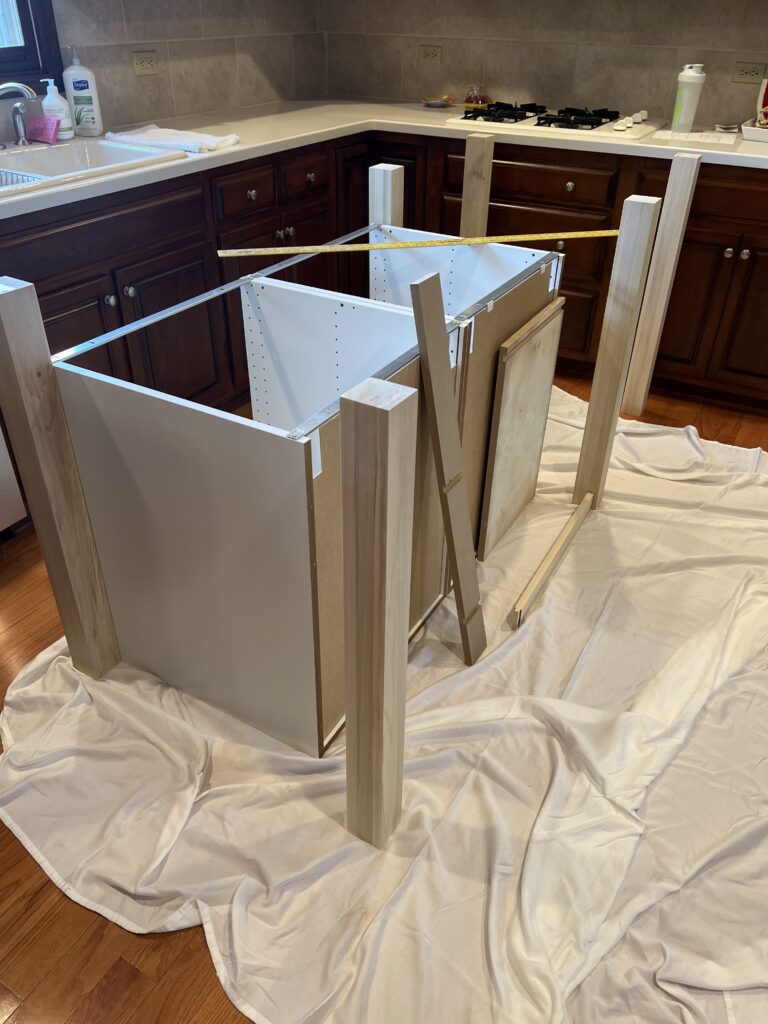
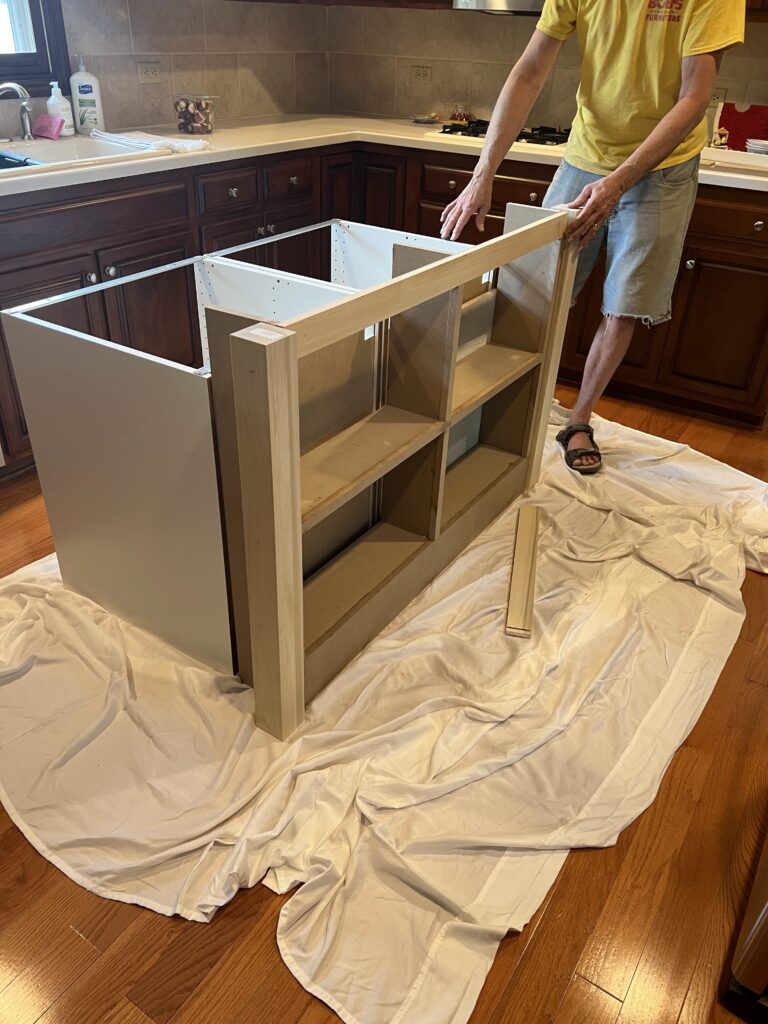
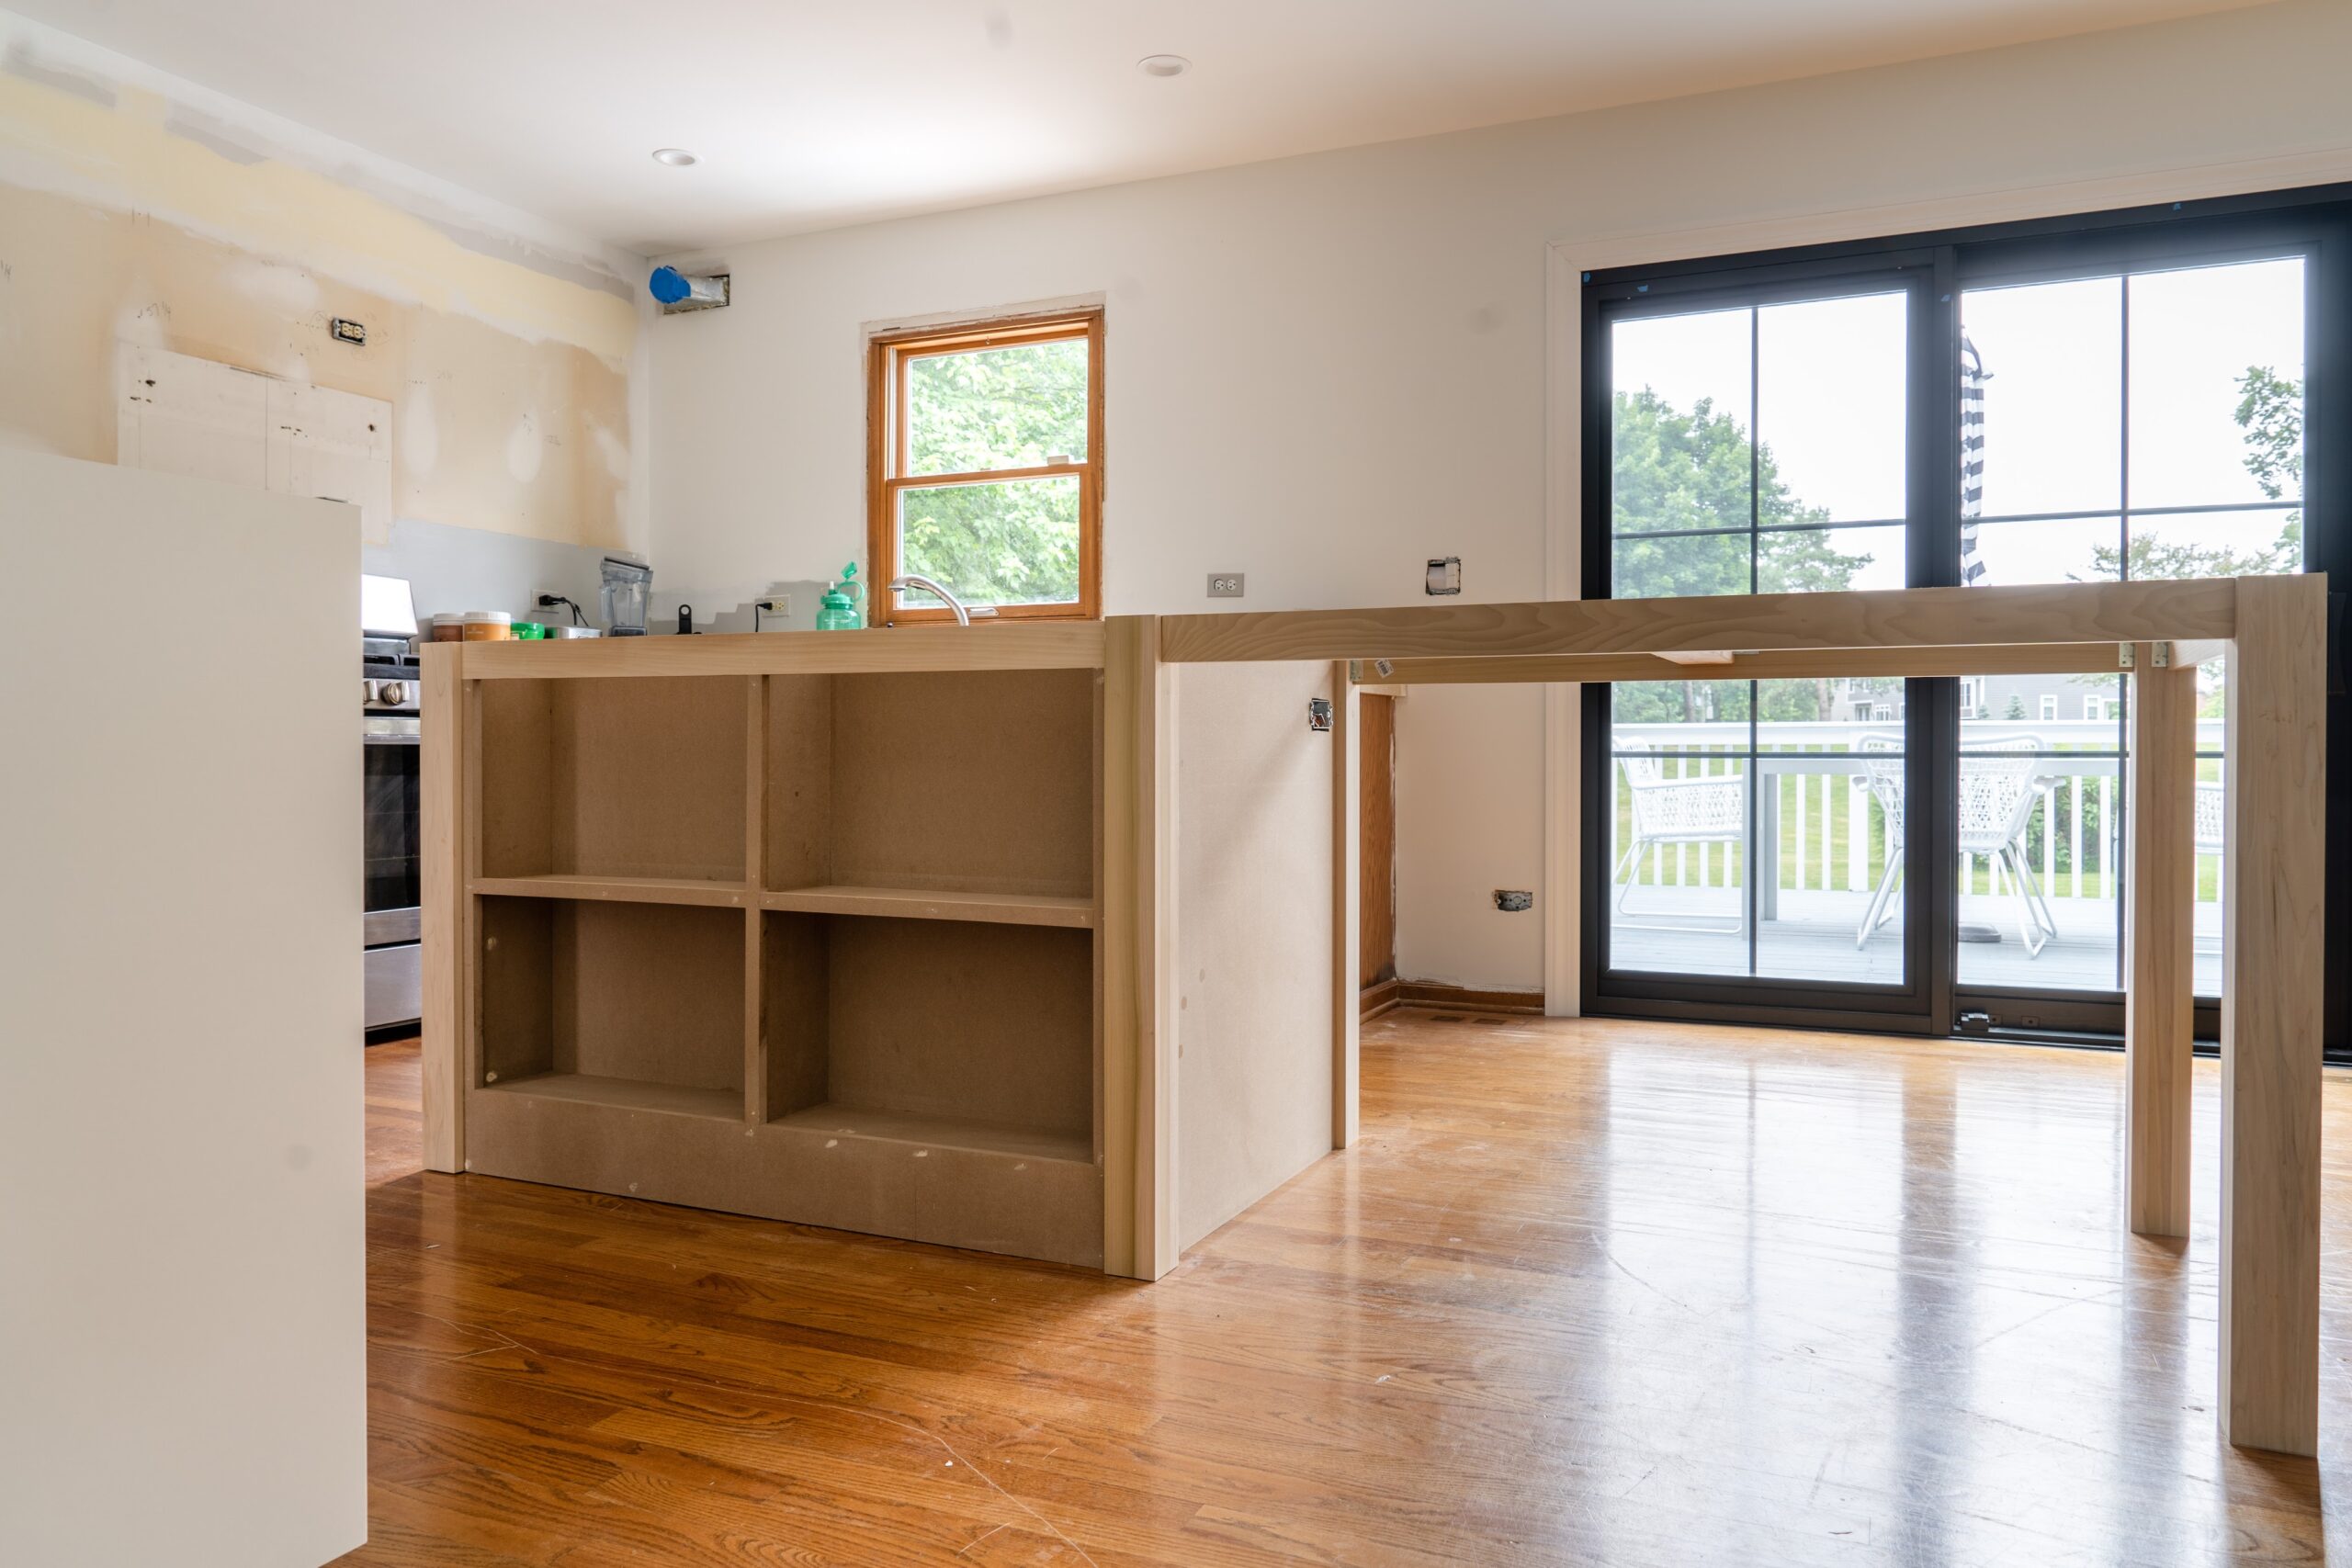
Our first step was to build the IKEA kitchen cabinets so we could begin mocking up the island. In the first picture you’ll see we started placing the base cabinets and the legs so we could understand the sizing of the shelf. Our shelf is only 8″ deep because that is the island footprint and depth that worked best in our kitchen. In the second photo you’ll see we’ve built our shelving unit using 3/4″ MDF, each shelf is about 12″ tall. We incorporated a larger base at the shelving unit because once the unit is installed we’ll add baseboard to the whole kitchen island.

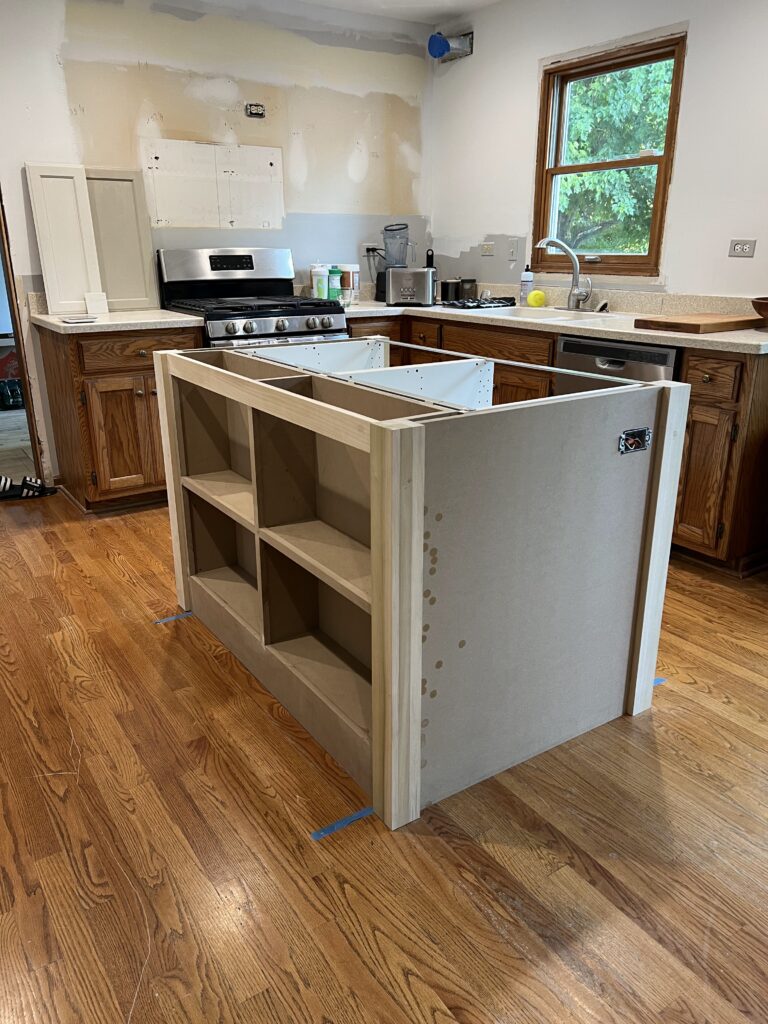
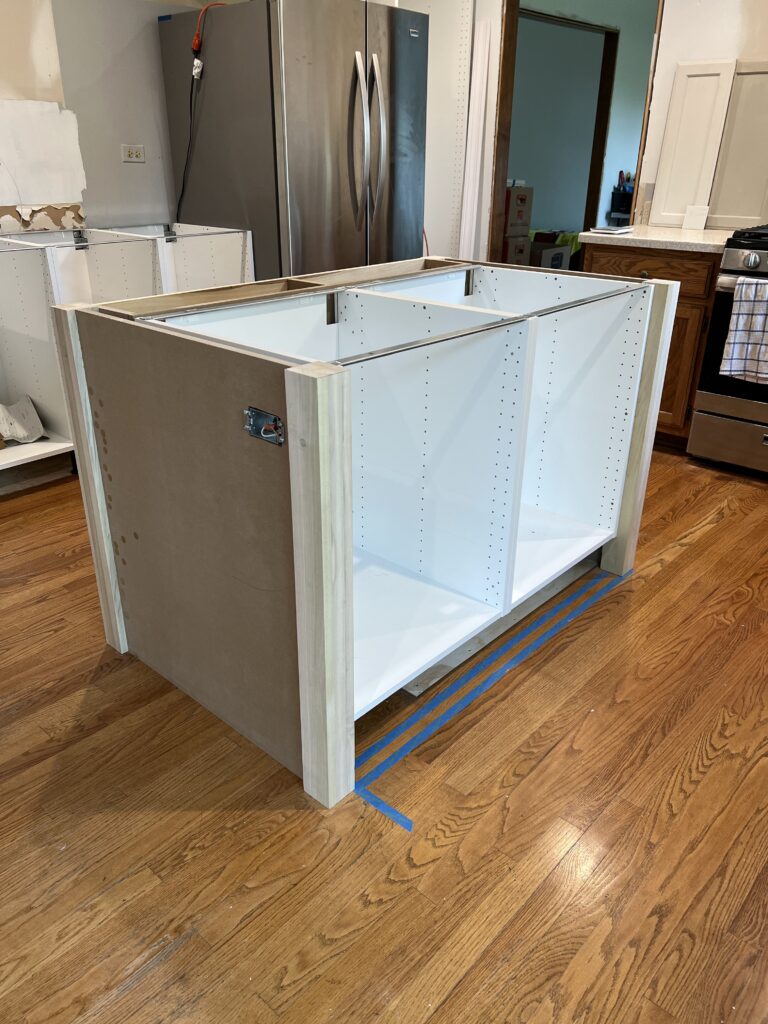
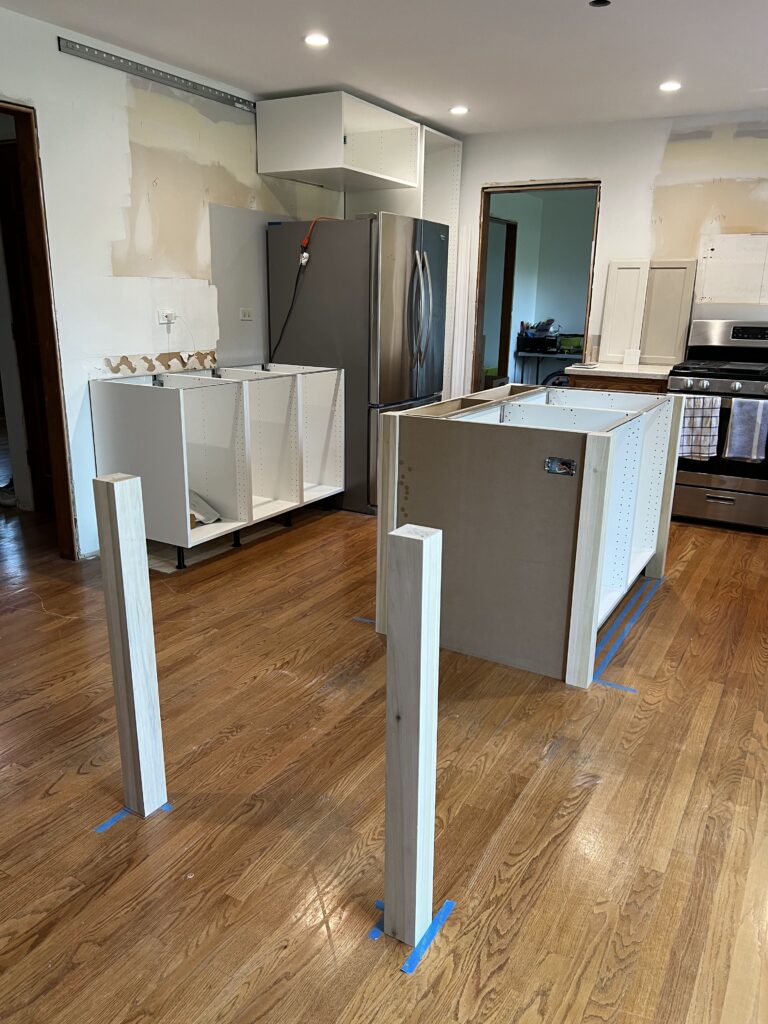
Now it was time to install! We taped out the exact location of our new island and got it roughly placed. We first installed the IKEA base cabinets and followed their instructions on installing base cabinets at an island condition, using their mounting kit. After that, we installed the side panels of the island which are simply 2 of the 3″ column legs and 3/4″ MDF attached together using metal corner brackets. BTW, we chose to offset the MDF panels 3/4″ back from the island column legs all around the island.

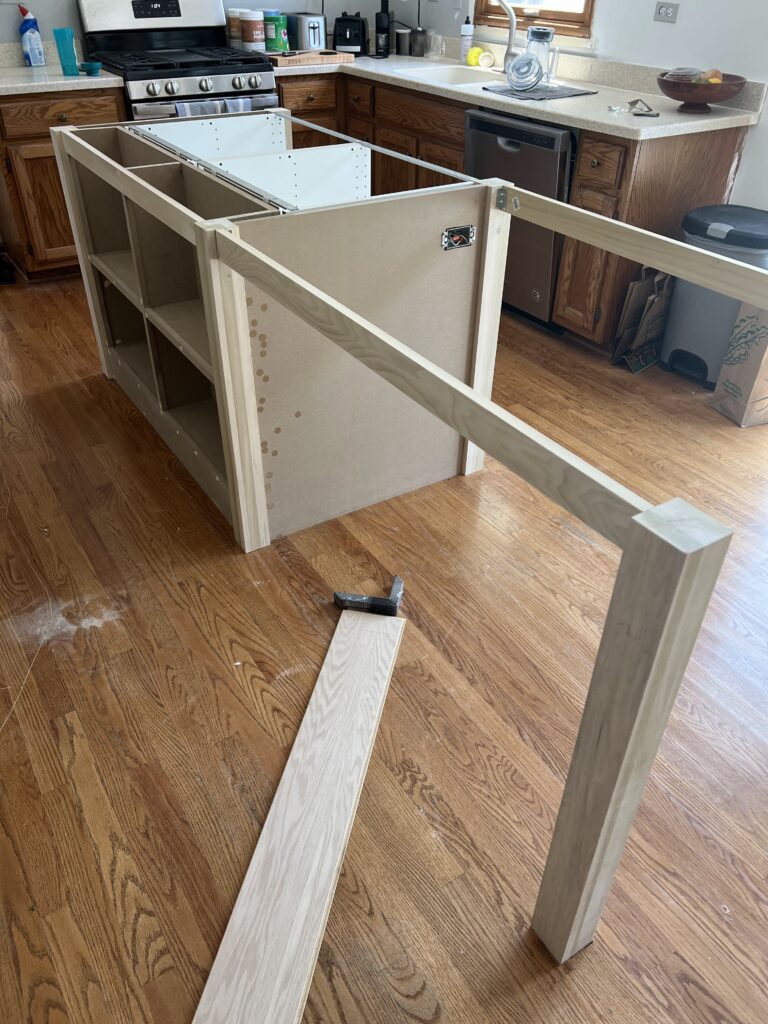
Once the majority of the island was installed, it was time to work on the countertop extension. This is a 4′ extension that will have barstools for informal seating. Because we have a basement, we used very large screws and screwed up from the basement into the two of these island column legs so that they were very sturdy. After those were in place we added the 1×3 poplar rails to connect everything and then used a 2×4 for additional support in the center of the extension.

And that’s where we’re currently at on our kitchen island. The build process is done and next steps are to paint the island, paint the cabinet doors that will go on the IKEA base cabinets, get countertops installed, and finish it off with baseboards throughout.

Posted By: thelksaddress · In: RENOVATION

PATCHING DRYWALL AT OUR KITCHEN SOFFITS
DIY INSTALL IKEA KITCHEN CABINETS

You’ll Also Love

OUR KITCHEN RENOVATION REVEAL
DIY PLASTER RANGE HOOD
CUSTOM WALNUT COFFEE BAR
About Photo
Hi! We are Lauren and Kameron, the creators behind the LKS Address. Together, we are working to pursue our passions of design, renovation, and architecture.

EXPLORE

  • BLOG
  • SHOP
  • YOUTUBE
  • ABOUT
  • CONTACT

thelksaddress

Let’s build some doors for these bookcases! It’s not a library door unless it has a brass grille, so we couldn’t forget those. We weren’t sure if we’d do doors or not and the build would have been much simpler without them. But we’re glad all of you pushed us to do the doors because we love how they turned out!
°
°
°
°
#LKSAddress #homelibrary #billybookcase #library #ikeahack #darkgreen
Elevating IKEA is one of our favorite things to do Elevating IKEA is one of our favorite things to do and we’re so excited about finishing up the library bookcases! We’ve made it through assembling the Billy bookshelves, rough framing, building our face frame, painting, adding inset detail trim, and installing our picture lights. We’ve only got a few things left to complete, and up next are our semi-custom brass grille doors!
°
°
°
°
#LKSAddress #homelibrary #billybookcase #library #ikeahack #darkgreen
Kam and I have been talking about going to Paris f Kam and I have been talking about going to Paris for years, we finally made it a priority and went to Paris for a week in October! We immediately fell in love with the city and it’s probably my favorite city I have ever visited. We left feeling so inspired. I cannot wait to go back and learn more about Parisian culture. If you’ve been to Paris, tell us your favorite part. If you haven’t been, we’d love to hear one reason you can’t wait to visit!

Paris Highlights:
@jacquemartandre - beautiful house museum
@copains.paris - gluten-free bakery
@veuveclicquot - touring their champagne house
@jentemple - special thanks to Jen for helping start our research with a bunch of personal recommendations!
°
°
°
°
#LKSAddress #Paris #France
Our backyard has undergone quite the transformatio Our backyard has undergone quite the transformation over the past year! From removing our existing deck, pouring a new concrete patio, overhauling the landscaping, installing raised garden beds, and adding finishing touches like our centerpiece urn and outdoor furniture; we wouldn’t have it any other way! It’s truly feels like an extension of our home now. It’s so nice that now when we look outside it just feels like us. What is your favorite part of our backyard project?
°
°
°
°
#LKSAddress #outdoorfurniture #backyardmakeover #outdoorrenovation
Our backyard project is now complete thanks to the Our backyard project is now complete thanks to the finishing touch, our new outdoor furniture. This outdoor furniture from @liveouter is beautiful yet functional and helps to create an extension of our home outdoors. #sponsored

We went with the Charcoal Aluminum Sofa with Armless Chairs 5-seat set and paired that with the new centerpiece of our patio, the OuterStone fire pit. Our favorite part about the seating set is the integral covers, the OuterShell, that will protect our cushions for seasons to come. It makes covering and protecting our new furniture easy and convenient! Have you ever seen anything else like it?
°
°
°
°
#LKSAddress #outdoorfurniture #outdoorliving
Before and after at our front door and covered ent Before and after at our front door and covered entry! This used to be the most disliked part of our exterior. We wanted to lean into traditional elements here to coordinate with our colonial style exterior as we gave it an updated look. Now it feels cohesive with the exterior and our personal style. Special thanks to our partners on this project, @pookylightsus, @peasedoors, and @levelhome. 
°
°
°
°
#LKSAddress #frontdoor #coveredentry #doorhardware
Follow on Instagram

Copyright © 2025 The LKS Address · Theme by 17th Avenue