The LKS Address

Welcome to Our Home Address

  • BLOG
  • SHOP
  • YOUTUBE
  • ABOUT
  • CONTACT

EXPLORE

  • BLOG
  • SHOP
  • YOUTUBE
  • ABOUT
  • CONTACT

Connect

DESIGN · November 8, 2023

DIY MARBLE FIREPLACE

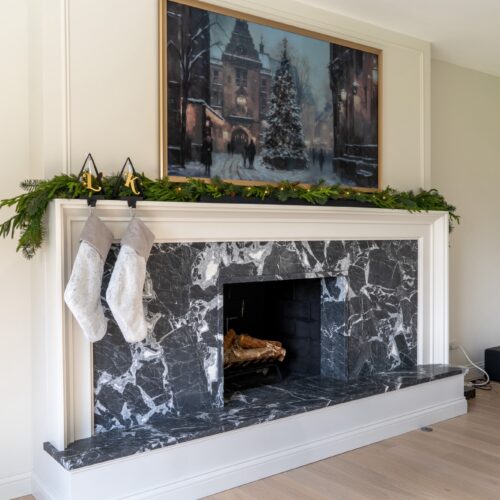
Our DIY marble fireplace is complete! We transformed our existing brick fireplace into a modern stone fireplace (without any demo!) that is unrecognizable. We finished off the fireplace with a traditional built-up wood mantel and a Frame TV.

THIS PAGE MAY CONTAIN AFFILIATE LINKS FROM WHICH I RECEIVE A SMALL COMMISSION. 


Our Fireplace Design

In case you’re new here, you can check out our full family room and fireplace design in this blog post. The plan is to build a new wall over our existing brick fireplace that we face with natural stone, add a built-up wood mantel, install box trim, and hang a frame TV.
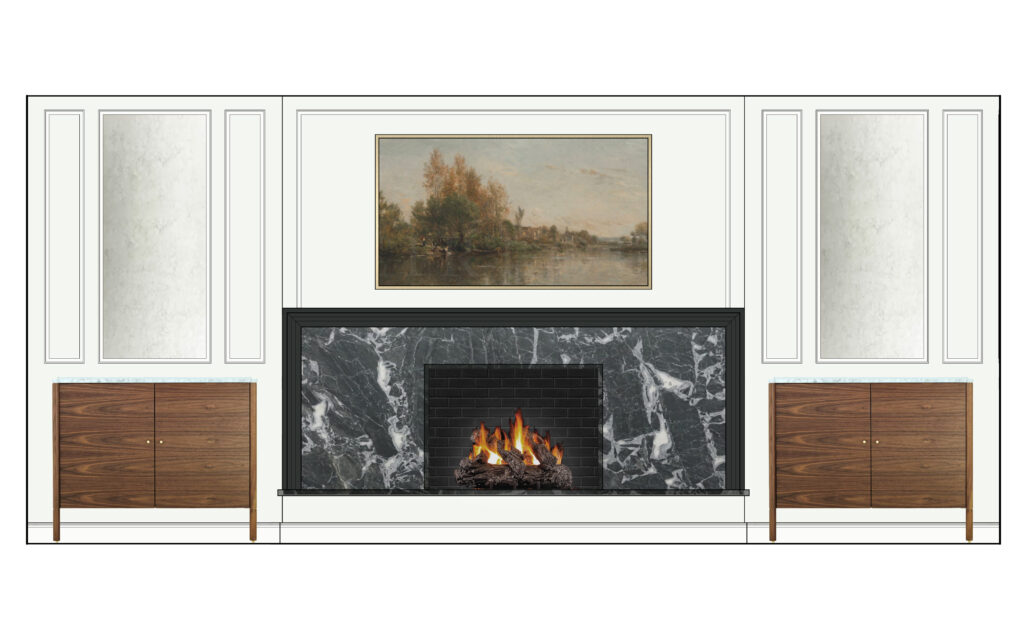
FIREPLACE WALL DESIGN RENDERING

The Before

Before we get to the reveal, let’s take a quick look again at the before! There was nothing “wrong” with this fireplace besides that it just did not match our personal style. I’ve been dreaming of this fireplace makeover since we bought the house over 2 years ago!
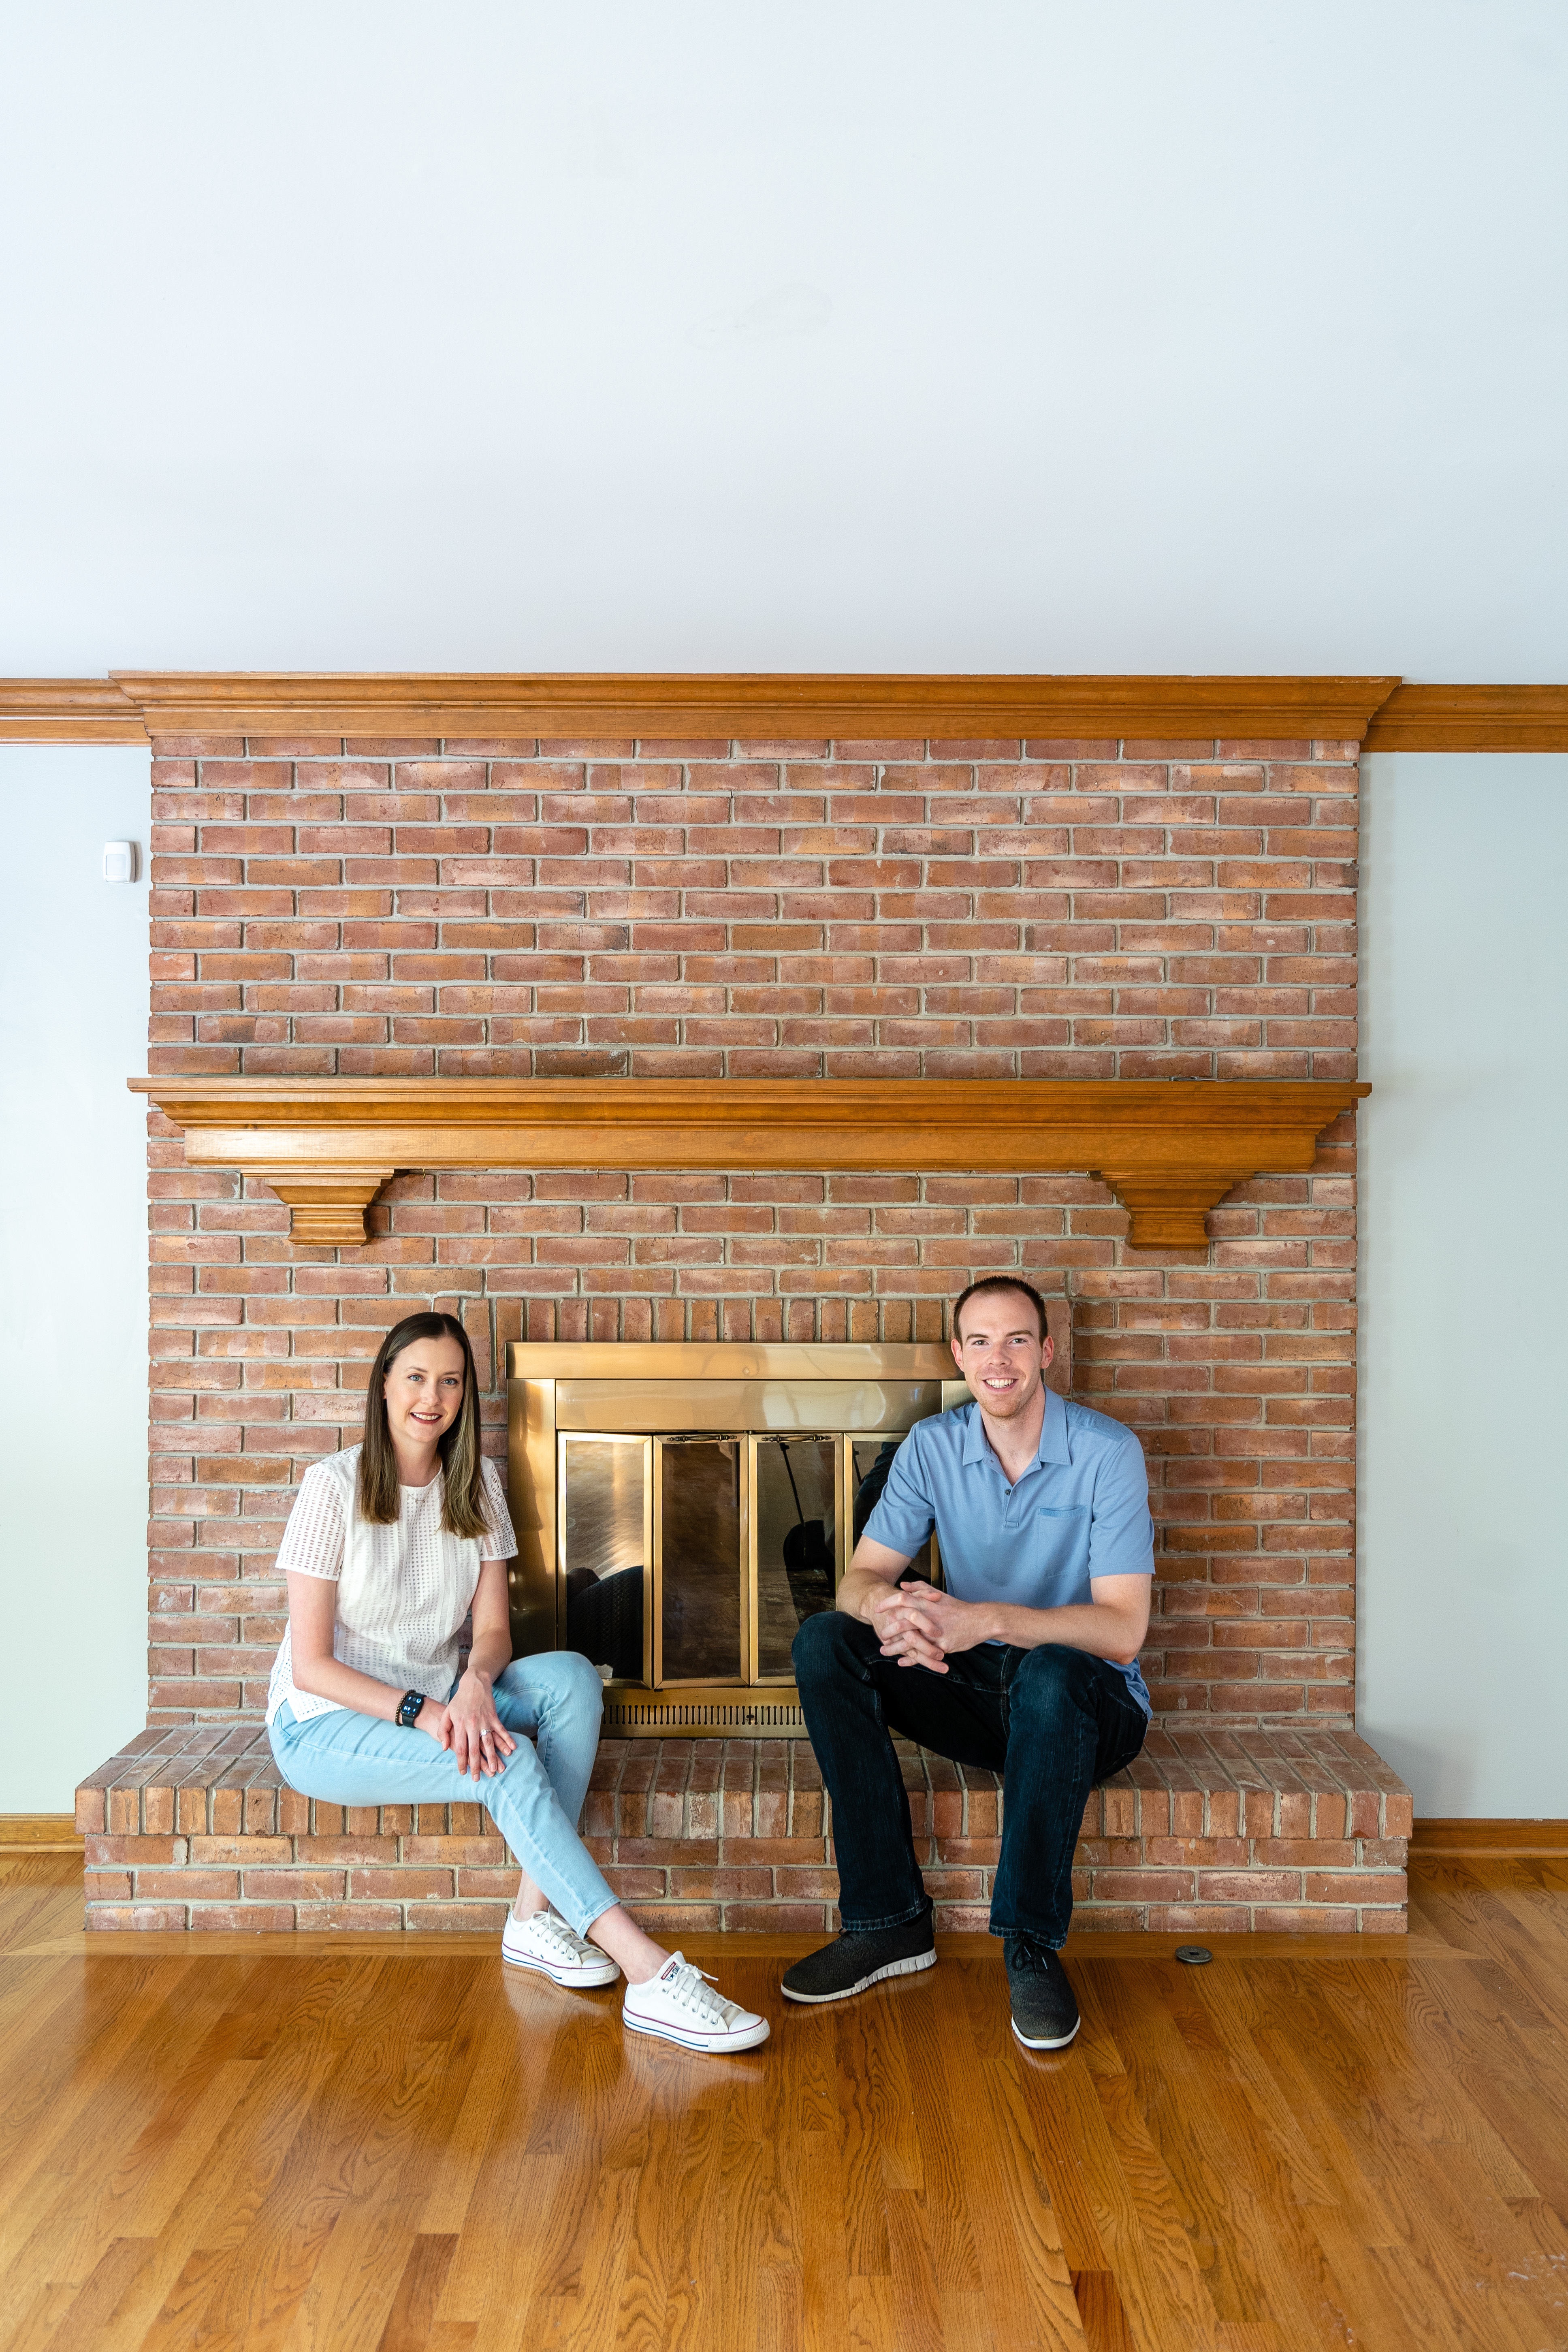
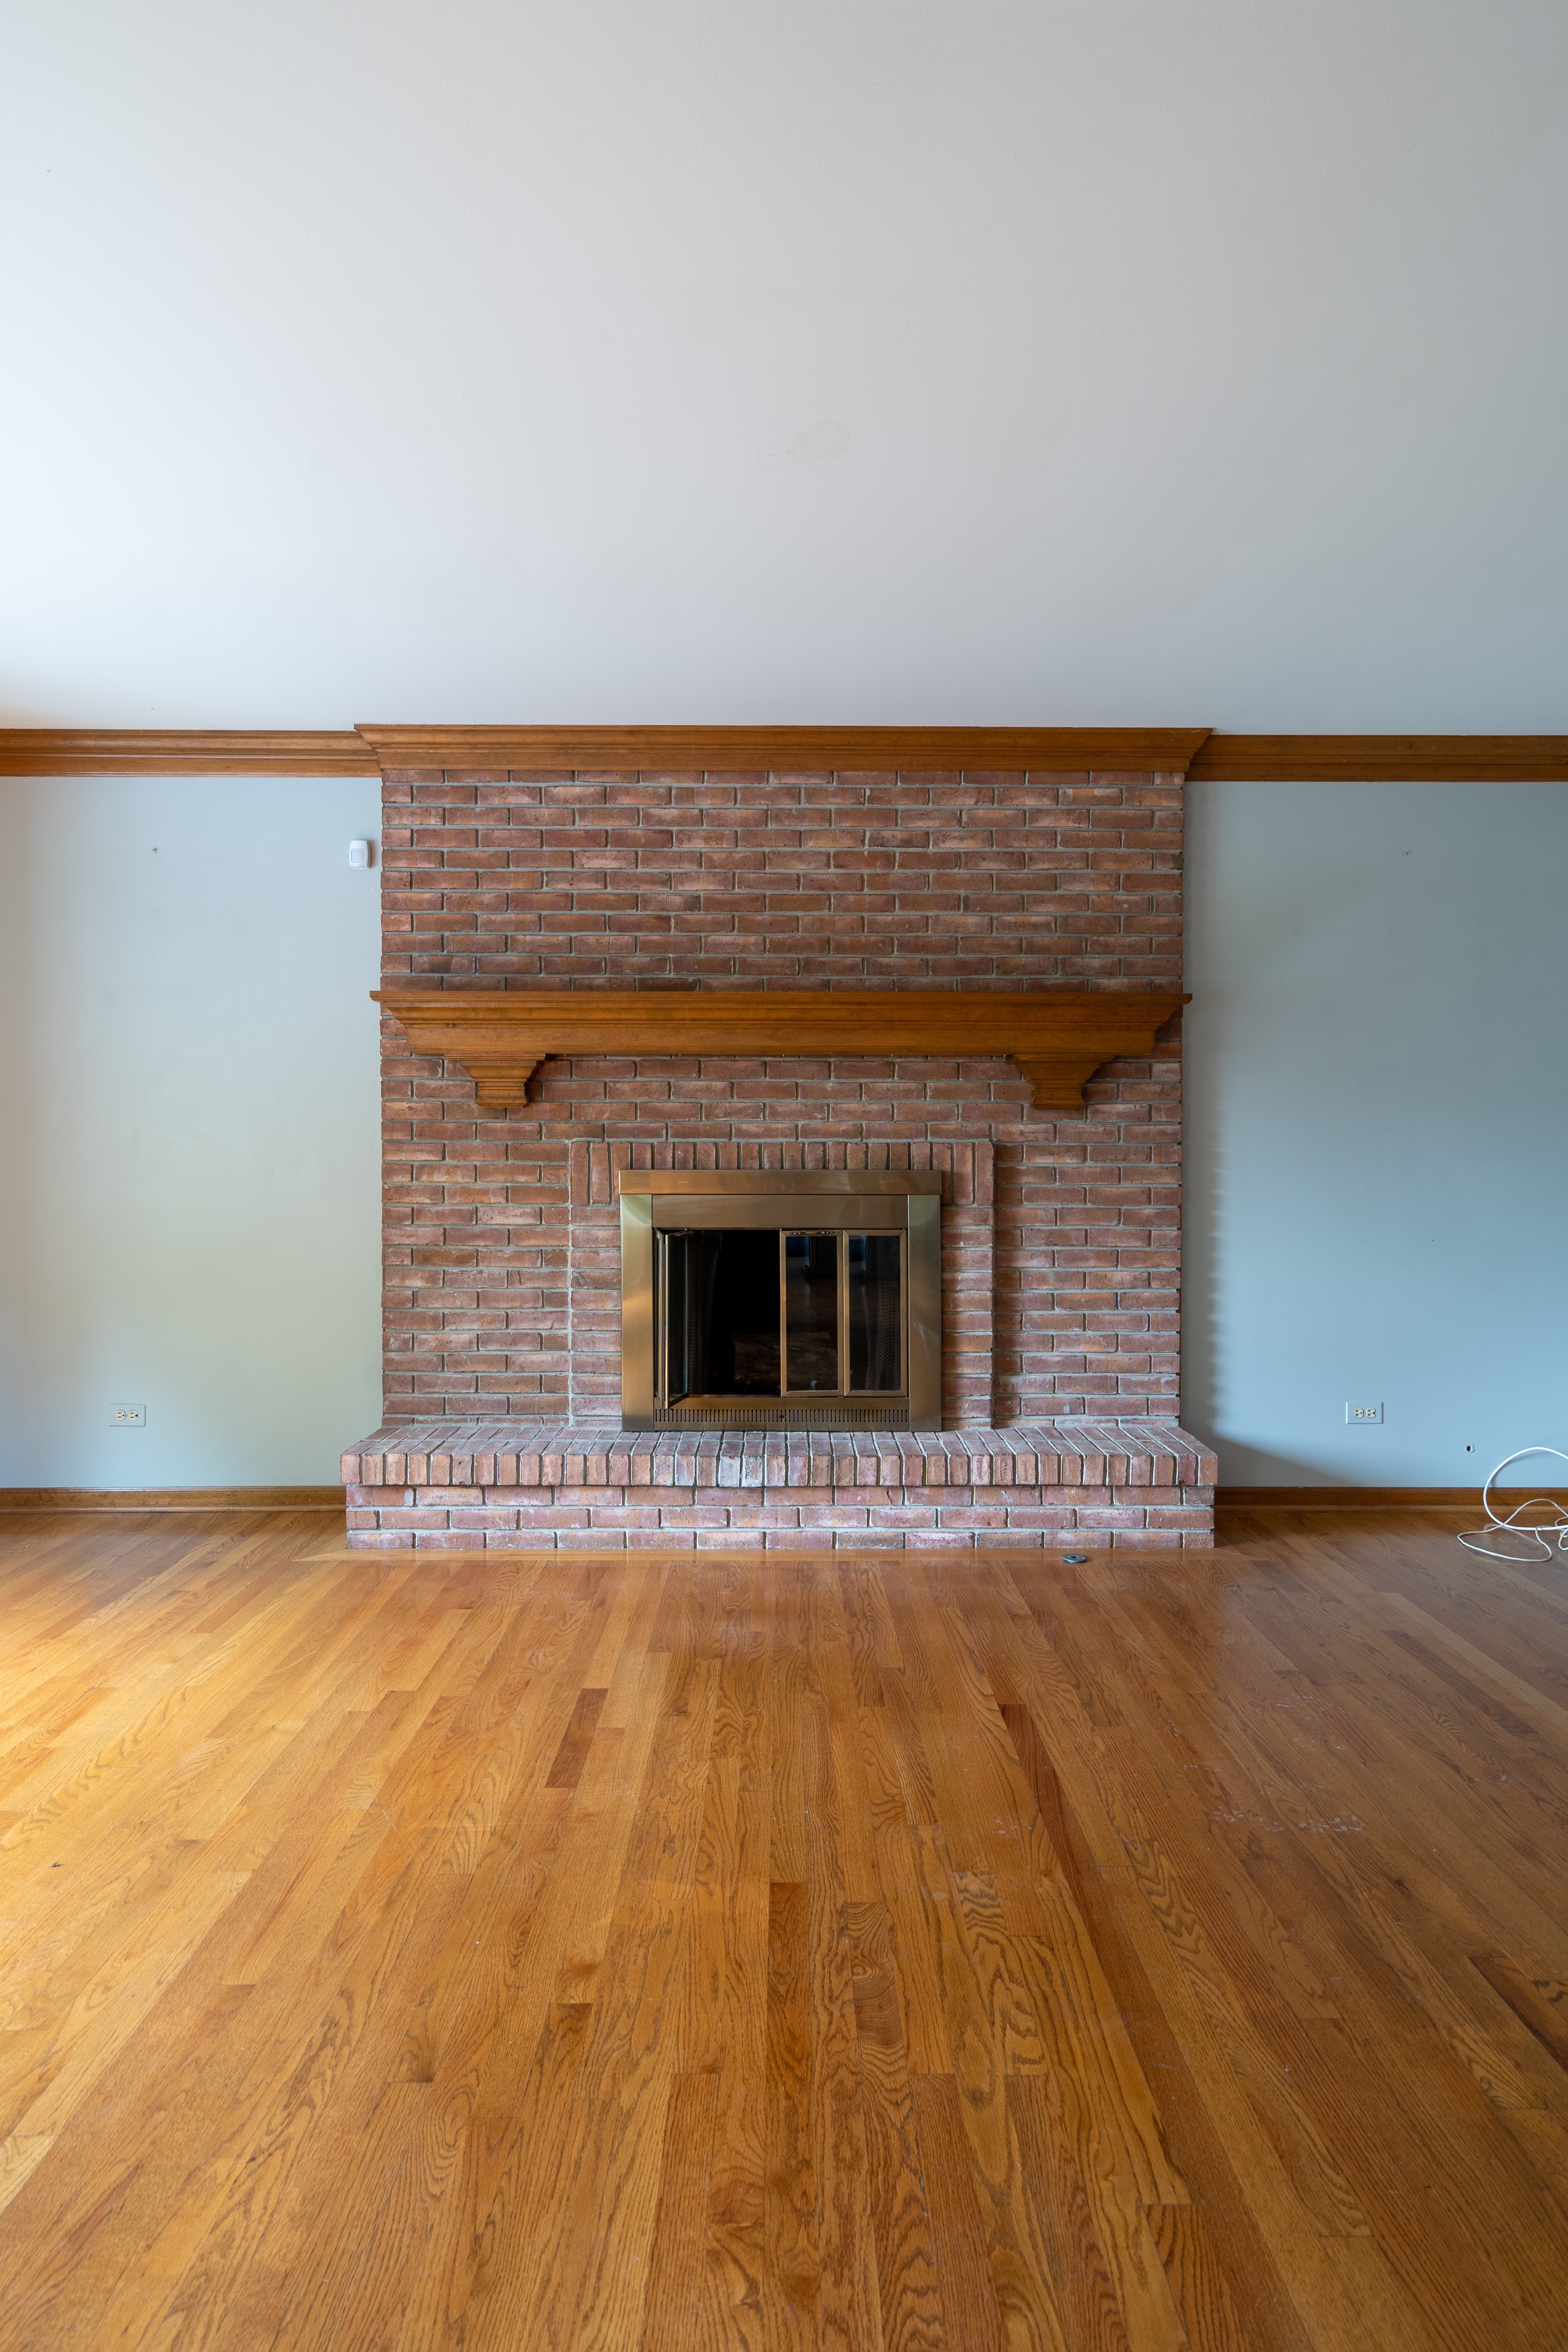
before photo fireplace

If you want to see all of the pictures when we moved into our house, you can check out this blog post.


The Fireplace Reveal

This was the most intimidating project we’ve ever taken on but we approached it like all of our other projects, in small phases. We broke it down phase by phase and before we knew it, the fireplace was done. There is no limit to what you can achieve around your house when you think of it like this!
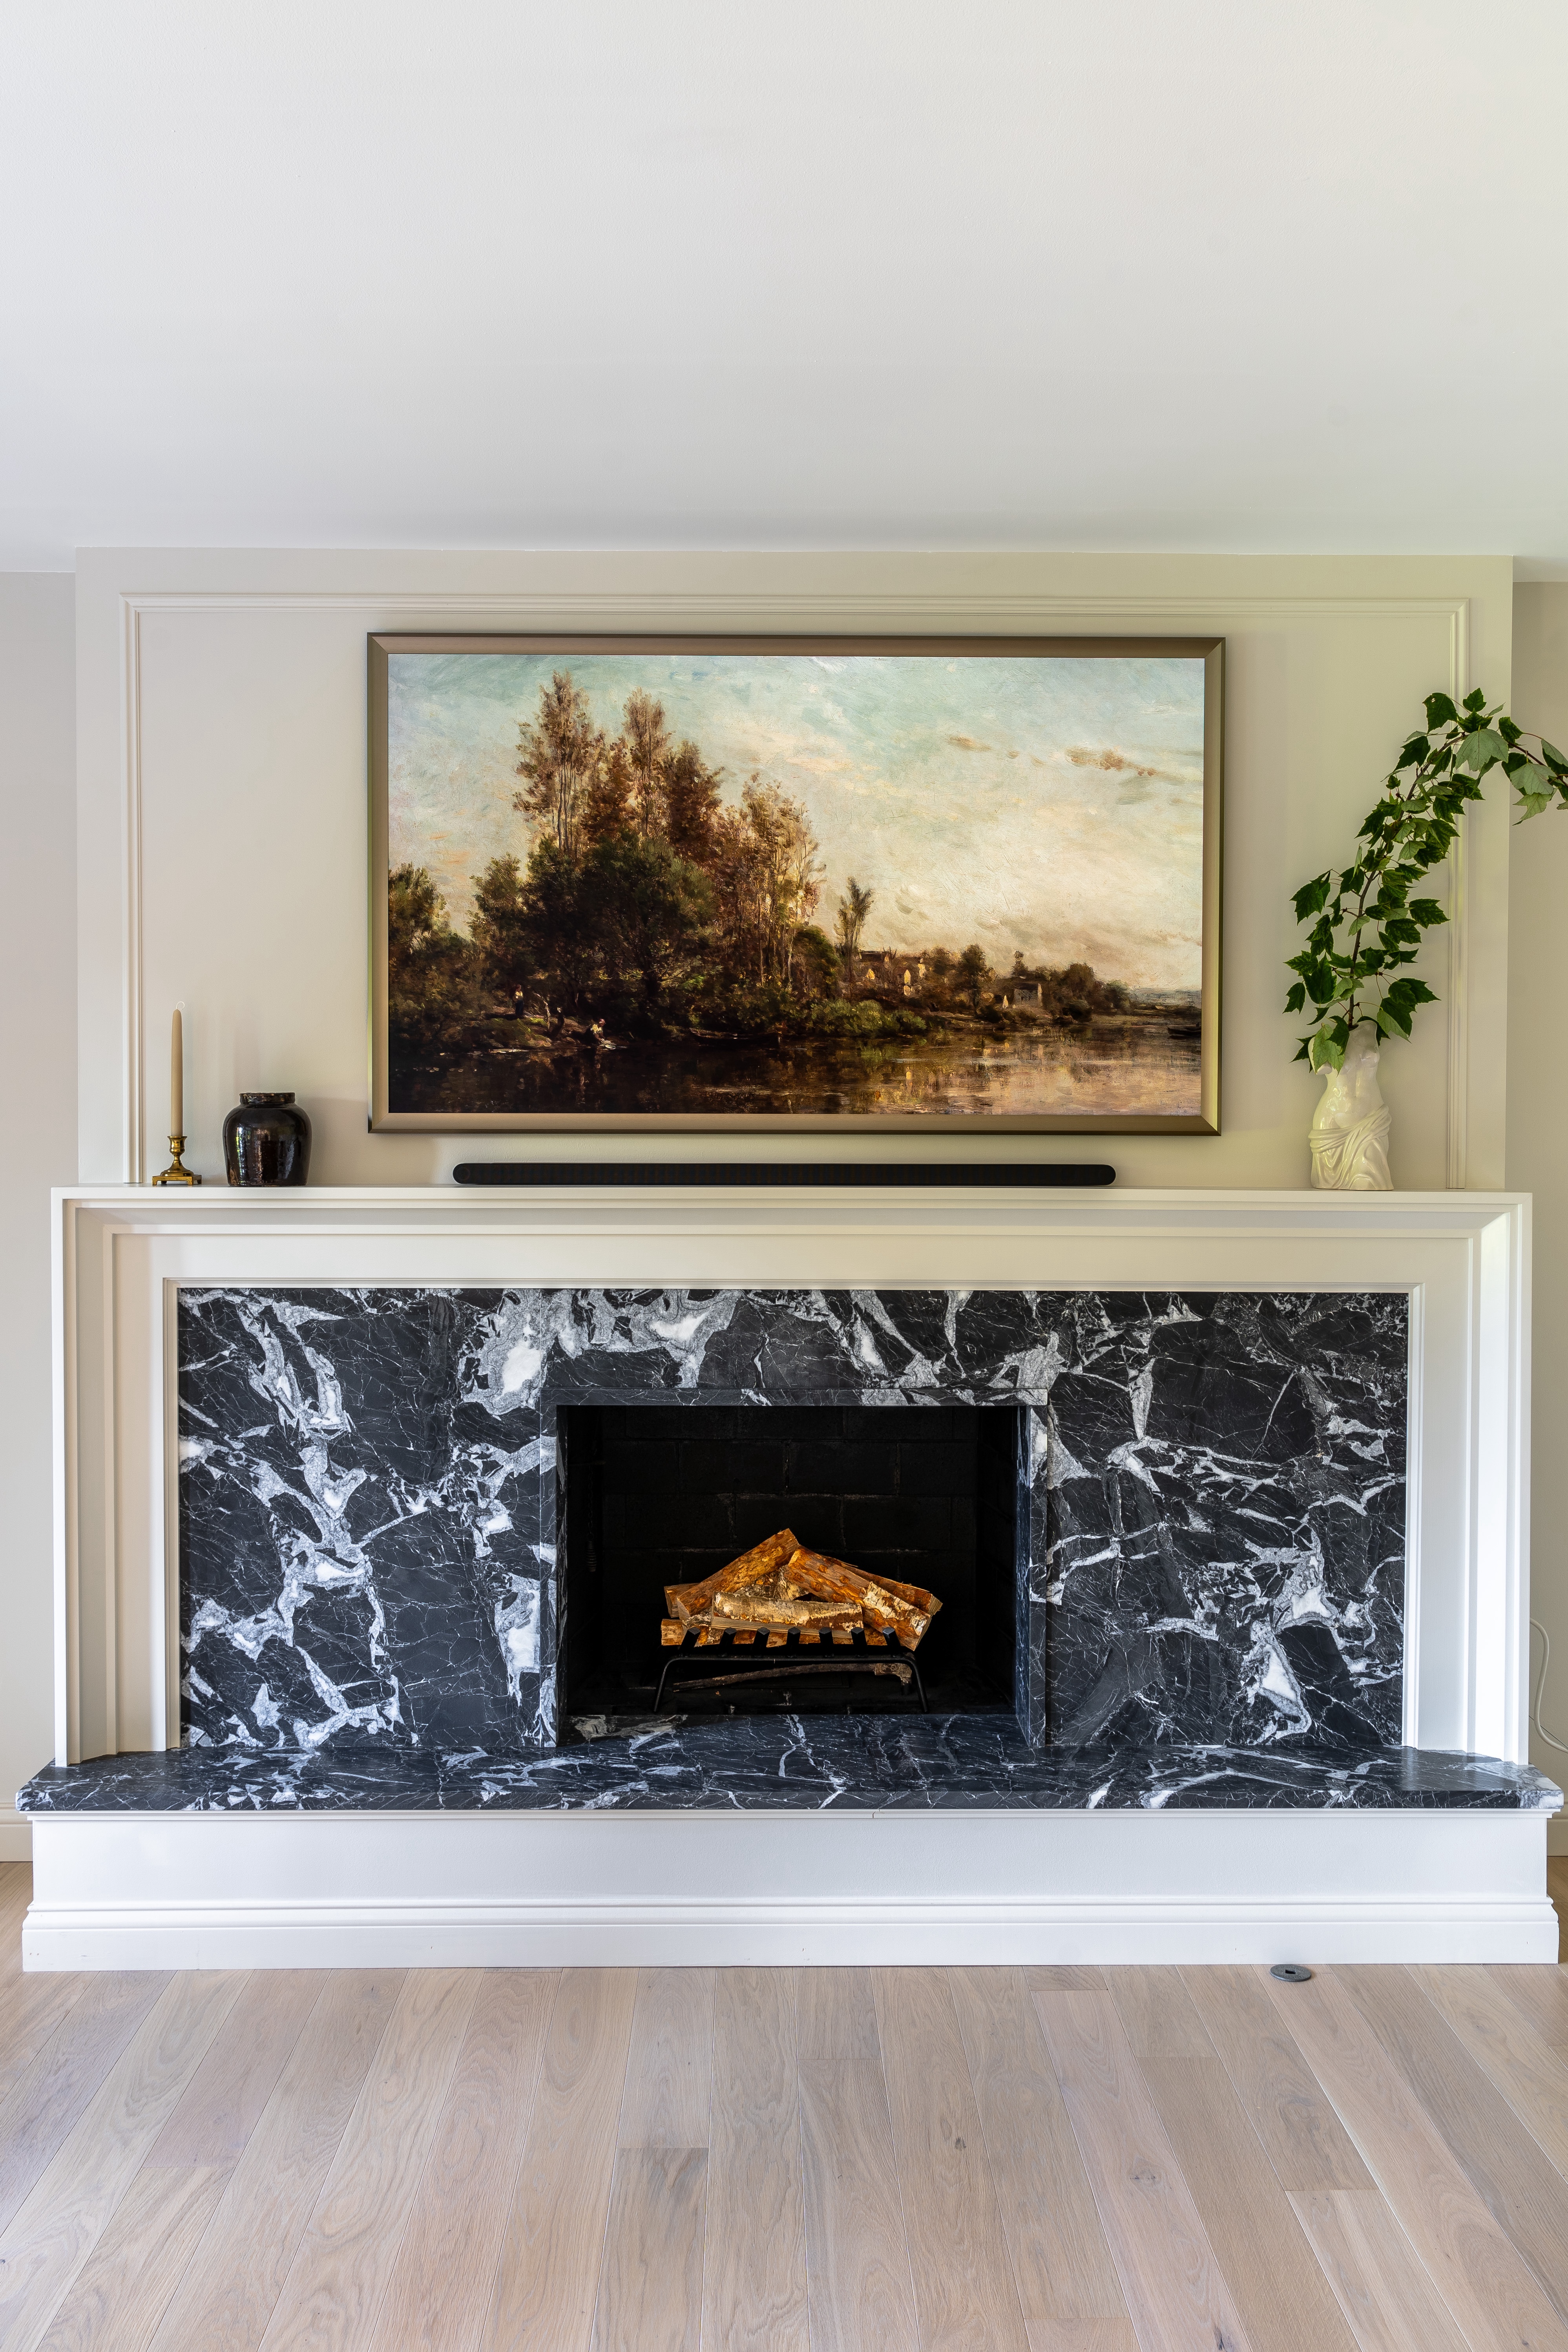
diy marble fireplace reveal

If you’re interested on how we got here, check out our post on framing over our existing fireplace, which includes all of the information on framing and drywall. Then after the stone got installed, we built our timeless wood mantel, which you can check out here.

diy marble fireplace

I’m not sure what my favorite part of the fireplace is; it is a tie between the stone and the mantel. We had our ups and downs with the stone but in the end we went with the right choice. It is just enough of a statement piece for our fireplace!

finished fireplace

For the mantel, we’re also so glad we went with the Kuiken Brothers modern craftsman mantel design. You can check out more on our mantel build here. I love that the mantel brings a traditional touch back to the fireplace.

diy marble fireplace reveal

How Much Did Our Fireplace Cost?

This is always one of our most frequently asked questions about a project, how much did it cost? This wasn’t one of our cheapest DIYs because of the cost of the stone (which we did not want to compromise on) so keep that in mind below.

  • Framing – $170
  • Media Box / Electrical – $175
  • Drywall / Cementboard – $110
  • Drywall Finishing – $550 (We hired this out)
  • Firebox Paint / Patch – $40
  • Stone – $5,600
  • Mantel – $330
  • Paint – $75

The total cost for the fireplace is $7,050. 80% of that cost was our stone! I bet you could do this project a lot cheaper if you found an in-stock stone or went with a lower cost option like a black granite. Regardless, we wouldn’t change a thing! I can’t imagine what this would have cost if we hired it out.


Up Next for our Family Room Project

We’ve still got a few more projects to finish out the family room project completely. Up next, we’re going to working on transforming our existing bay window, so stay tuned! You can check out the full list of projects we’ve planned in our family room here.
Posted By: thelksaddress · In: DESIGN

TIMELESS WOOD FIREPLACE MANTEL
ADDING CHARACTER TO OUR BAY WINDOW

You’ll Also Love

OUR PRIMARY BEDROOM DESIGN AND WHERE IT STARTED
OUR WHOLE HOUSE MOOD BOARD
A HOLIDAY HOME: Christmas Decor Ideas For Your Family Room
About Photo
Hi! We are Lauren and Kameron, the creators behind the LKS Address. Together, we are working to pursue our passions of design, renovation, and architecture.

EXPLORE

  • BLOG
  • SHOP
  • YOUTUBE
  • ABOUT
  • CONTACT
CLOFFICE MONITOR! I wanted my cloffice to function CLOFFICE MONITOR! I wanted my cloffice to function like a desk but not necessarily look like one, so one of the biggest challenges was figuring out how to make my computer monitor look more like a piece of art.

Taking inspiration from the Frame TV, I researched ways to hide the cords, mount the monitor as close to the wall as possible, and eventually add a custom frame to complete the look. 

Comment MONITOR and I’ll send you links to everything I used for this setup!
Did you know you can just… create the bar you want Did you know you can just… create the bar you want before you actually build it? #lowespartner

With a little creativity and a trip to @loweshomeimprovement, we’re shifting our mindset from we’ll do that someday to why not now?

I’ve wanted a beverage fridge for years for all my sparkling waters and mocktails. Instead of waiting for our future built-in bar, I created the feeling of one now with this KitchenAid dual zone beverage fridge! 

I personalized it with reeded glass film, a porcelain marble tile top, and a few of my favorite bar accessories to create the cutest little vignette. 

Shop this project on my Lowe’s storefront, linked in bio! #lowesproject
CLOFFICE REVEAL! #ad I still can’t believe this is CLOFFICE REVEAL! #ad I still can’t believe this is the same space. With the help of @benjaminmoore, I transformed our spare closet into a charming, creative, and functional home office.

The transformation came together around one main thing: color. I color drenched the entire space in Benjamin Moore Santorini Blue 1634 using Regal Select Interior paint. With 3,500+ colors to choose from, there’s truly a color for every mood and vibe.

Want to learn more about Benjamin Moore Regal Select and the color I used? Head to the link in my bio #benjaminmoore
CLOFFICE SHELVES & COUNTERTOP! Building the shelve CLOFFICE SHELVES & COUNTERTOP! Building the shelves and installing the countertop was way easier than I expected and using nominal lumber made this project much simpler.

Instead of working with large sheets of plywood and making tons of cuts, I used standard 1x12s for the shelves and 1x2s for the supports. Fewer cuts = less work!

MATERIALS:
• 8”x8” wood brackets / corbels
• 1x2 poplar, countertop + shelf supports
• 1x12 poplar, shelves
• #10 3” screws, wood brackets
• #9 2-1/2” screws, 1x2 supports
• 1/2” L brackets, for securing countertop
• Laminate countertop, reinforced with 3/4” plywood
I was so excited to use @benjaminmoore Regal Selec I was so excited to use @benjaminmoore Regal Select Interior for my office makeover since it has always been our go-to paint! I chose the color Santorini Blue 1634 in an eggshell finish and I already love how my cloffice is coming to life #ad

Regal Select Interior paint gives that smooth, beautiful finish we love, with the durability and long-lasting results we expect from Benjamin Moore. Head to your local Ace Hardware or Benjamin Moore retailer to talk to an expert and shop paints and stains #benjaminmoore
CLOFFICE (CLOSET + OFFICE) DESIGN! I’m turning the CLOFFICE (CLOSET + OFFICE) DESIGN! I’m turning the third closet in our primary bedroom into my new office, and I’m so excited to give this little space some personality! I’m creating a fun, bold, dedicated workspace that can be completely tucked away when I’m done for the day. Follow along for the full transformation
Follow on Instagram

Copyright © 2026 The LKS Address · Theme by 17th Avenue