Installing framing over our existing brick fireplace is the first step in our fireplace renovation project! We’ll be leaving the brick and simply adding a new framed wall in-front of the existing, drywalling, and finishing the fireplace from there.
THIS PAGE MAY CONTAIN AFFILIATE LINKS FROM WHICH I RECEIVE A SMALL COMMISSION.
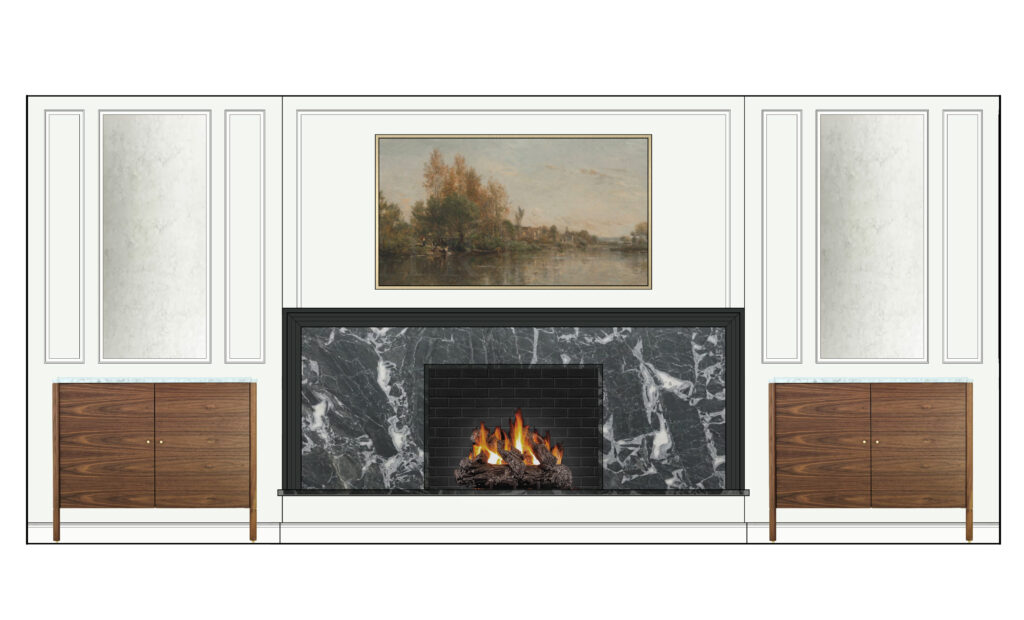
Our Fireplace Design
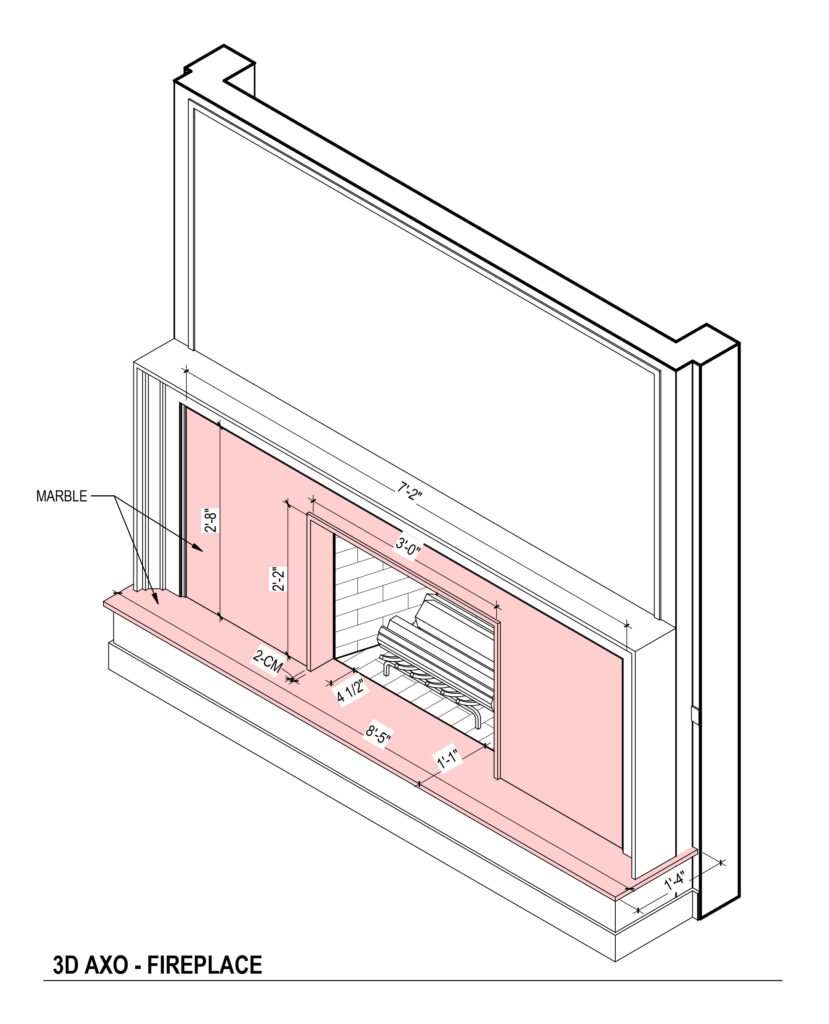
We previously went over all our whole design for the family room, you can check that out in this blog post. Now, let’s talk the fireplace more specifically. Below is a rendering of the fireplace design, we’re going to frame out a new wall in front of the existing fireplace so that we can cover it in drywall. After we get drywall, we’ll be installing a marble or stone slab around the firebox and at the raised hearth. Our plan is to finish the fireplace off with a built-up wood mantle.
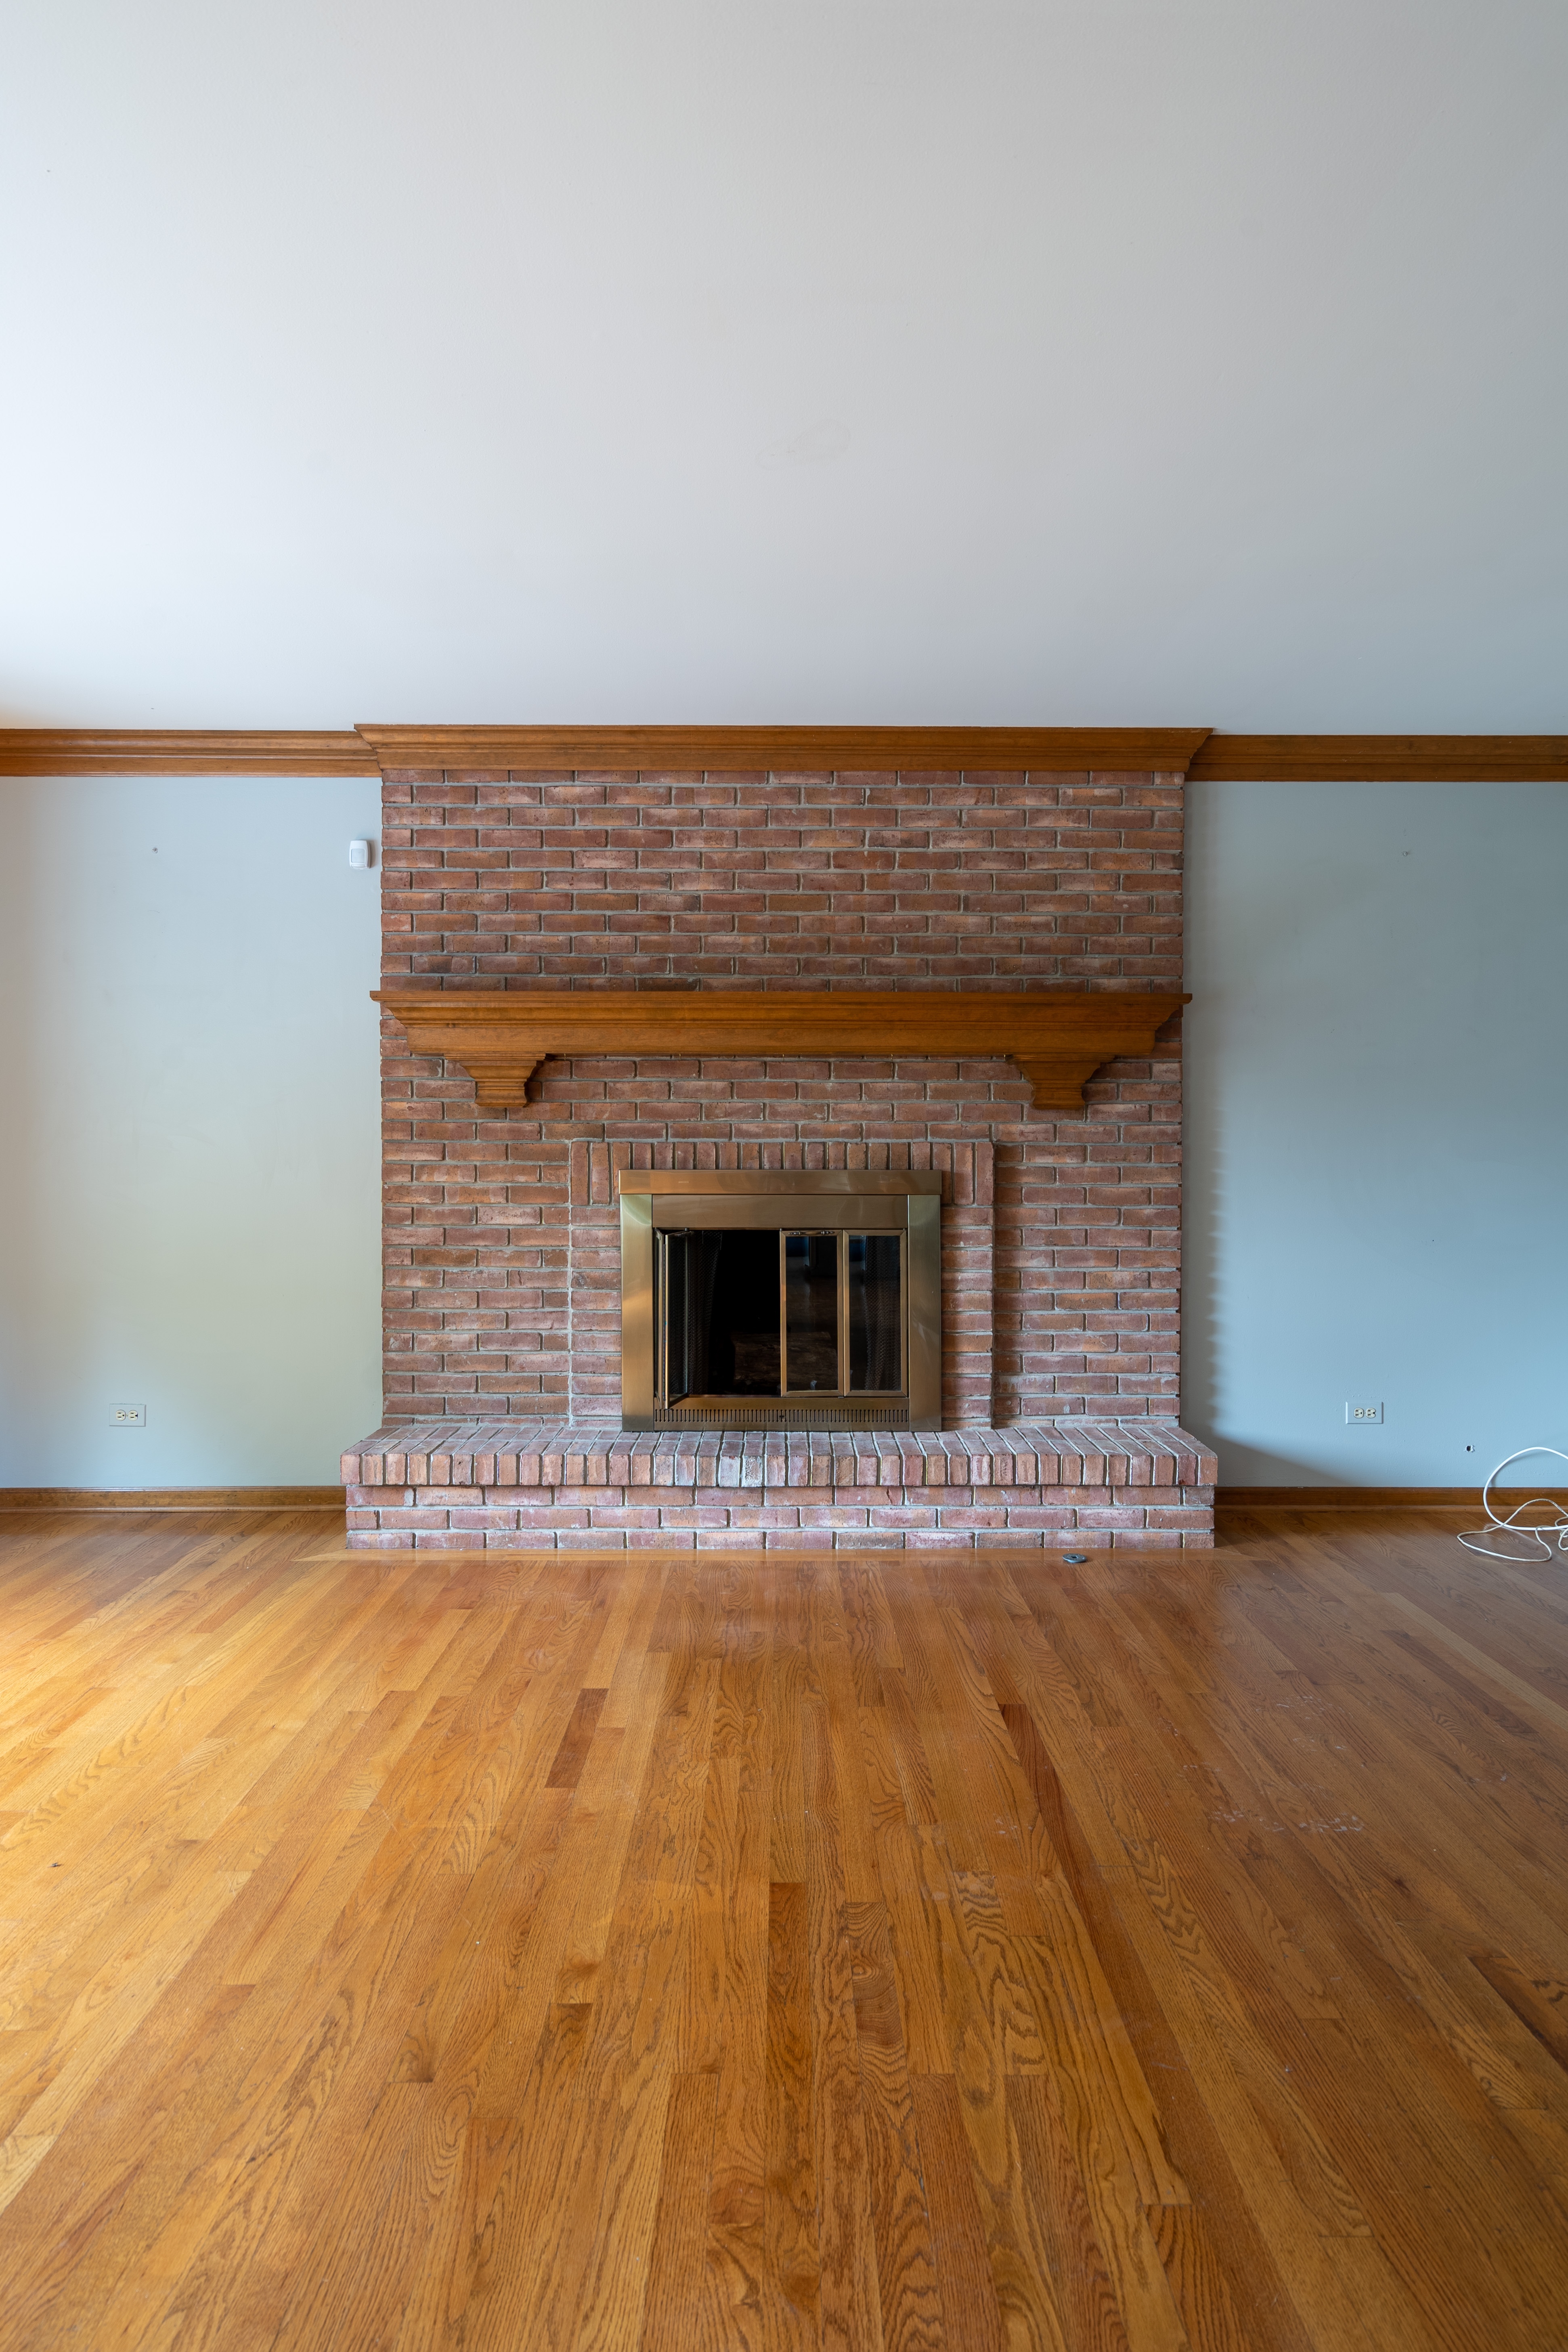
The Before
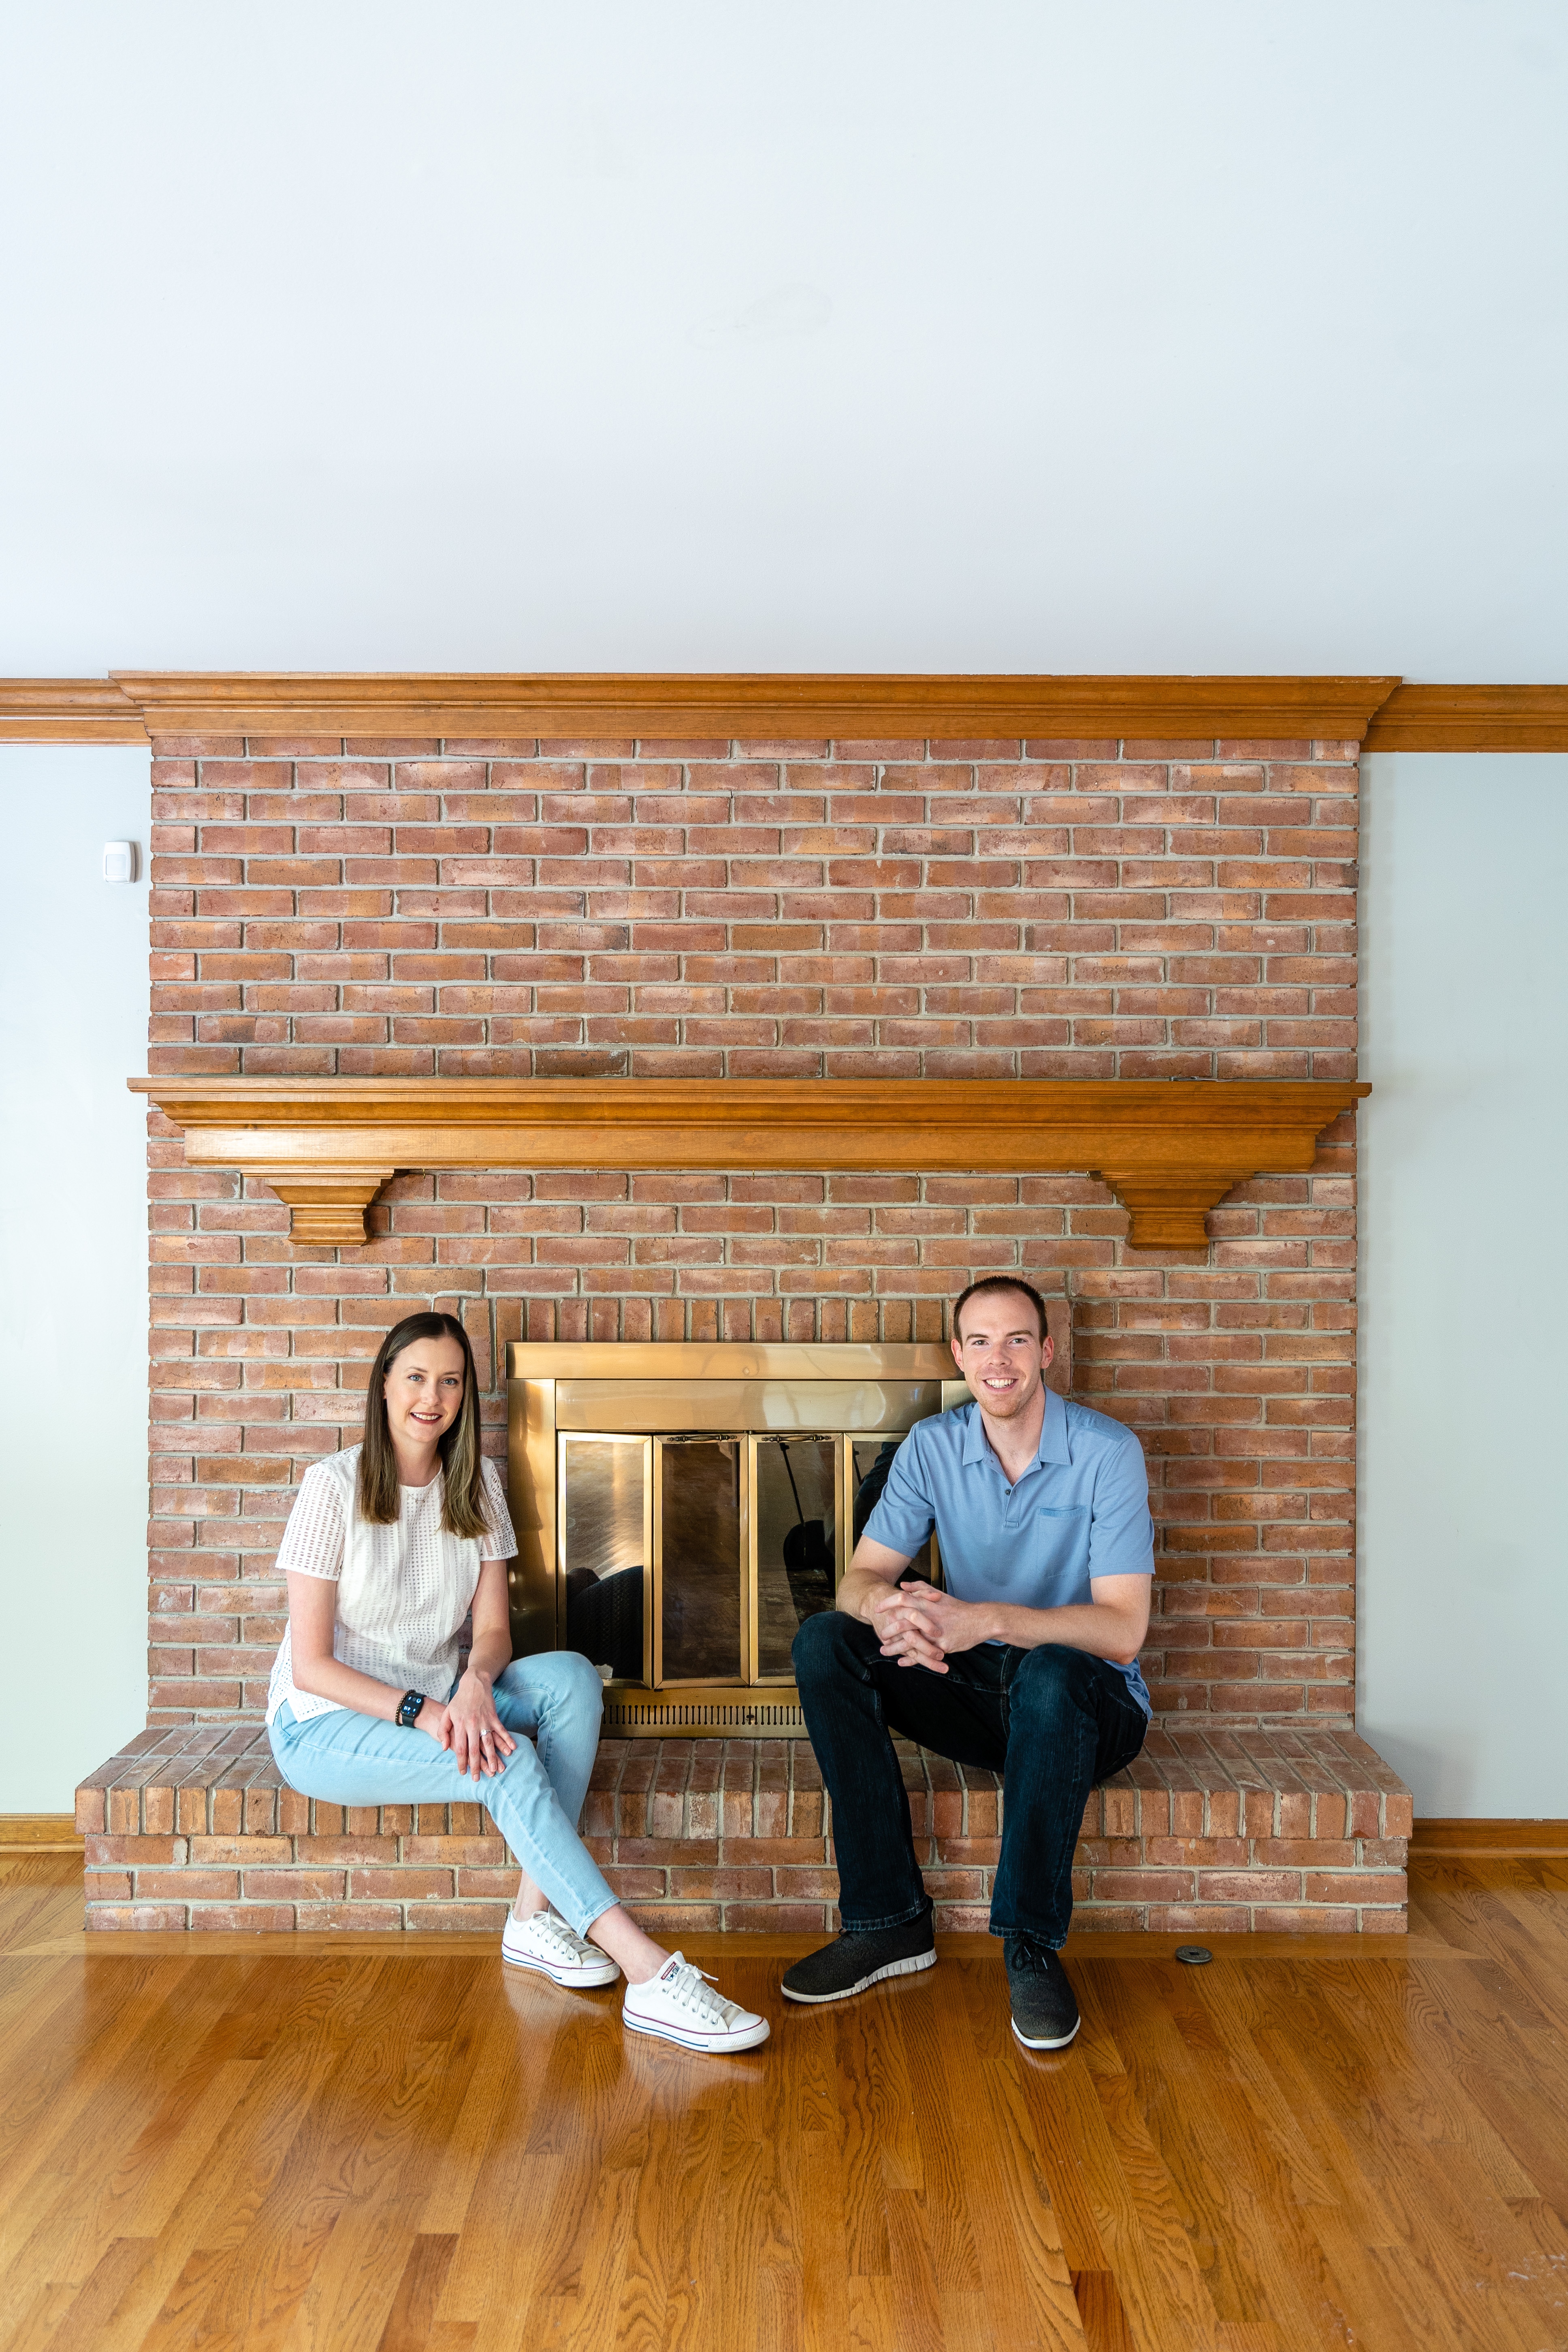
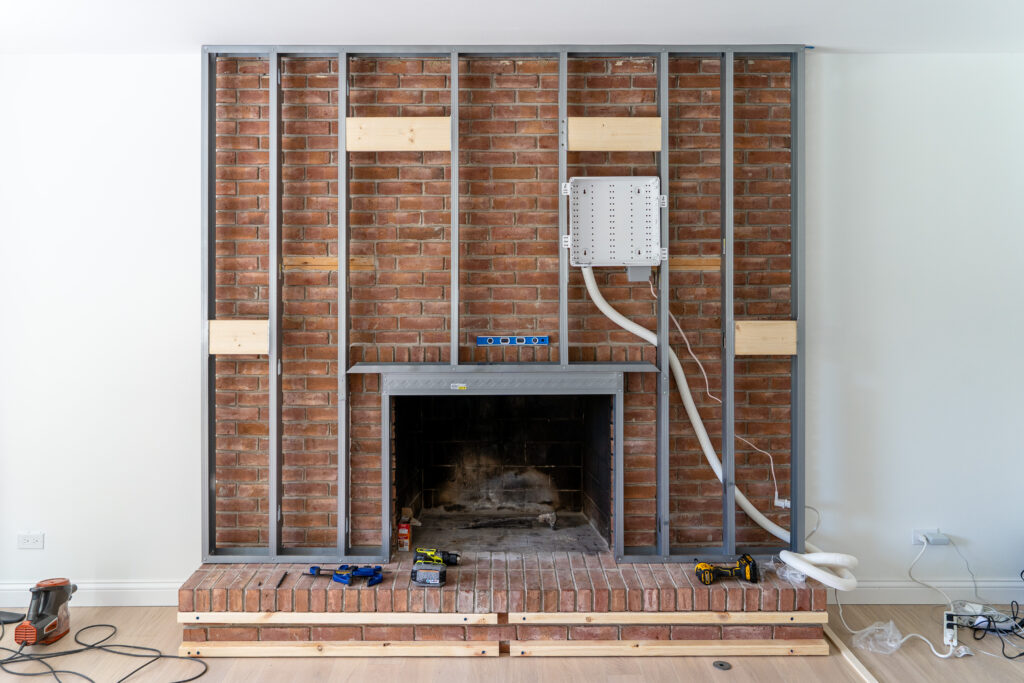
This is the existing brick fireplace we are working with! You might not be able to tell but this is a very wide fireplace at 8′-2″ wide! We’ve spent months trying to figure out how to make it more proportionate and instead of fighting the width, we’ve decided to embrace it in our new design.
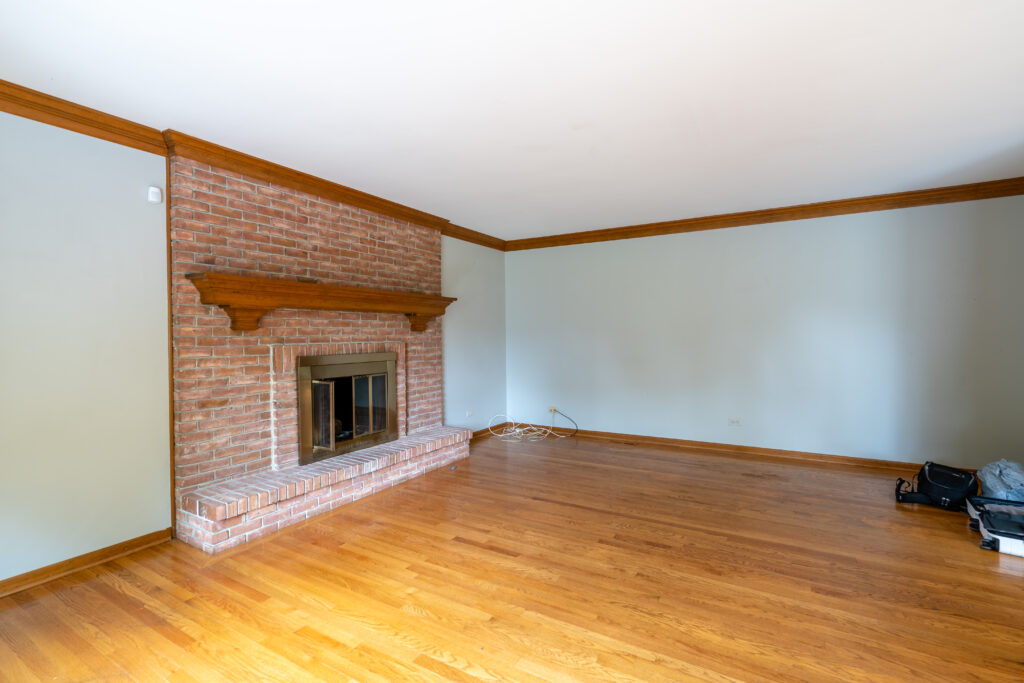
We’ve also have a raised brick hearth. Having one wouldn’t be our first choice, however, we are going to keep it and work with what we’ve got. We’ll also be covering this in drywall and adding stone on the top.
If you’re interested in seeing all the before pictures of our house, you can check them out at this blog post.
Planning the Framing & Researching Code
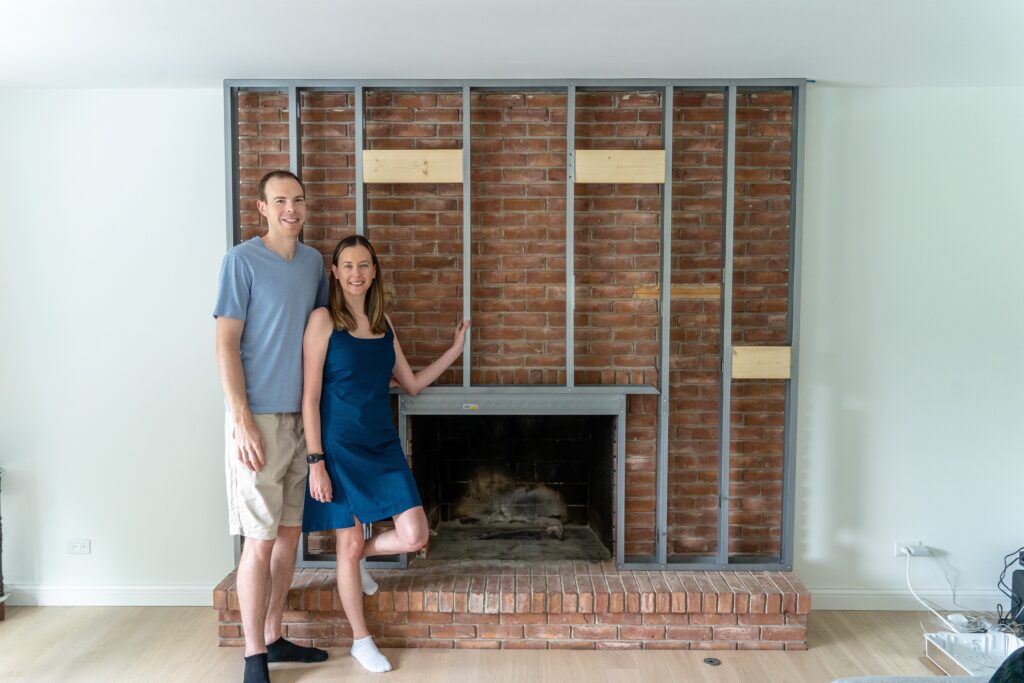
This is a wood burning fireplace and if you are planning a similar project, please make sure you research your local building codes. I spent months researching our local building codes and the appropriate way to frame over our existing fireplace. Due to code requirements, we will be using metal studs to frame out our fireplace wall. Where allowed, we will add wood blocking for the tv and mantle.
Kam and I have never framed a wall before or worked with metal studs, so I over-planned for this project. Prior to purchasing any materials, we did a lot of research on working with metal studs. This how-to post on metal studs was really helpful for us in the planning stages. I also planned out the framing layout before we got started so less was left up to question.

In our framing diagram above, the solid red lines represent the metal studs. The blue lines represent the wood studs we used as blocking for the tv mount and mantle.
Materials & Tools Needed for Framing
Now that we’ve planned out the framing for the fireplace we can pick up all of the materials and tools we will need for the install!
- 3-5/8″ Metal Studs
- 3-5/8″ Metal Tracks
- Tin Snips
- C-Clamp
- Hammer Drill
- Tapcon Drill Bit
- Masonry Tapcon Screws (at the brick)
- Pan Head Screws (at the metal studs)
- GRK Multi-purpose Screws (at the wood joists)
- I-Beam Level
- Speed Square
- Laser Level
- Media Box
- In-Wall Outlet
- Smurf Tube
Installing the Framing
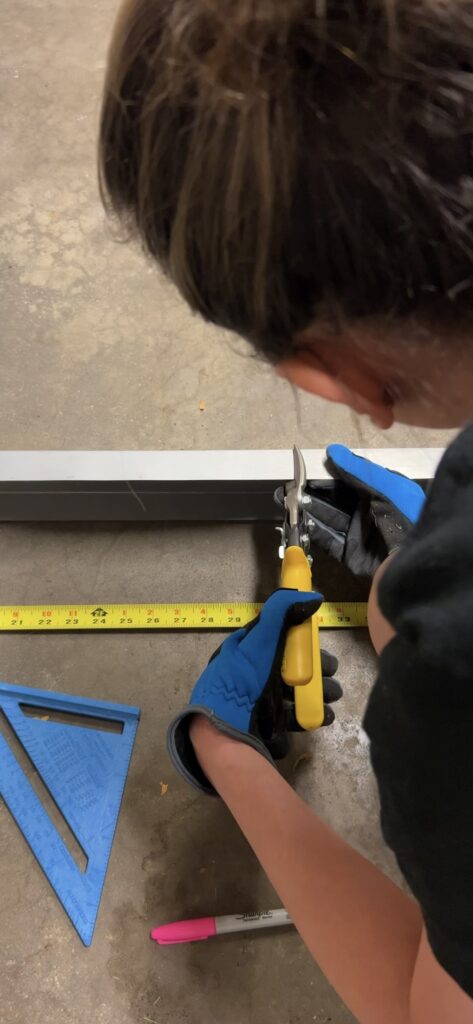
It’s time to start installing the metal framing. We started by installing metal tracks at the bottom and top of the new wall. To cut the metal tracks and studs, we used a speed square to mark the cut line, scored the line with a utility knife, and then cut the flanges using tin snips.
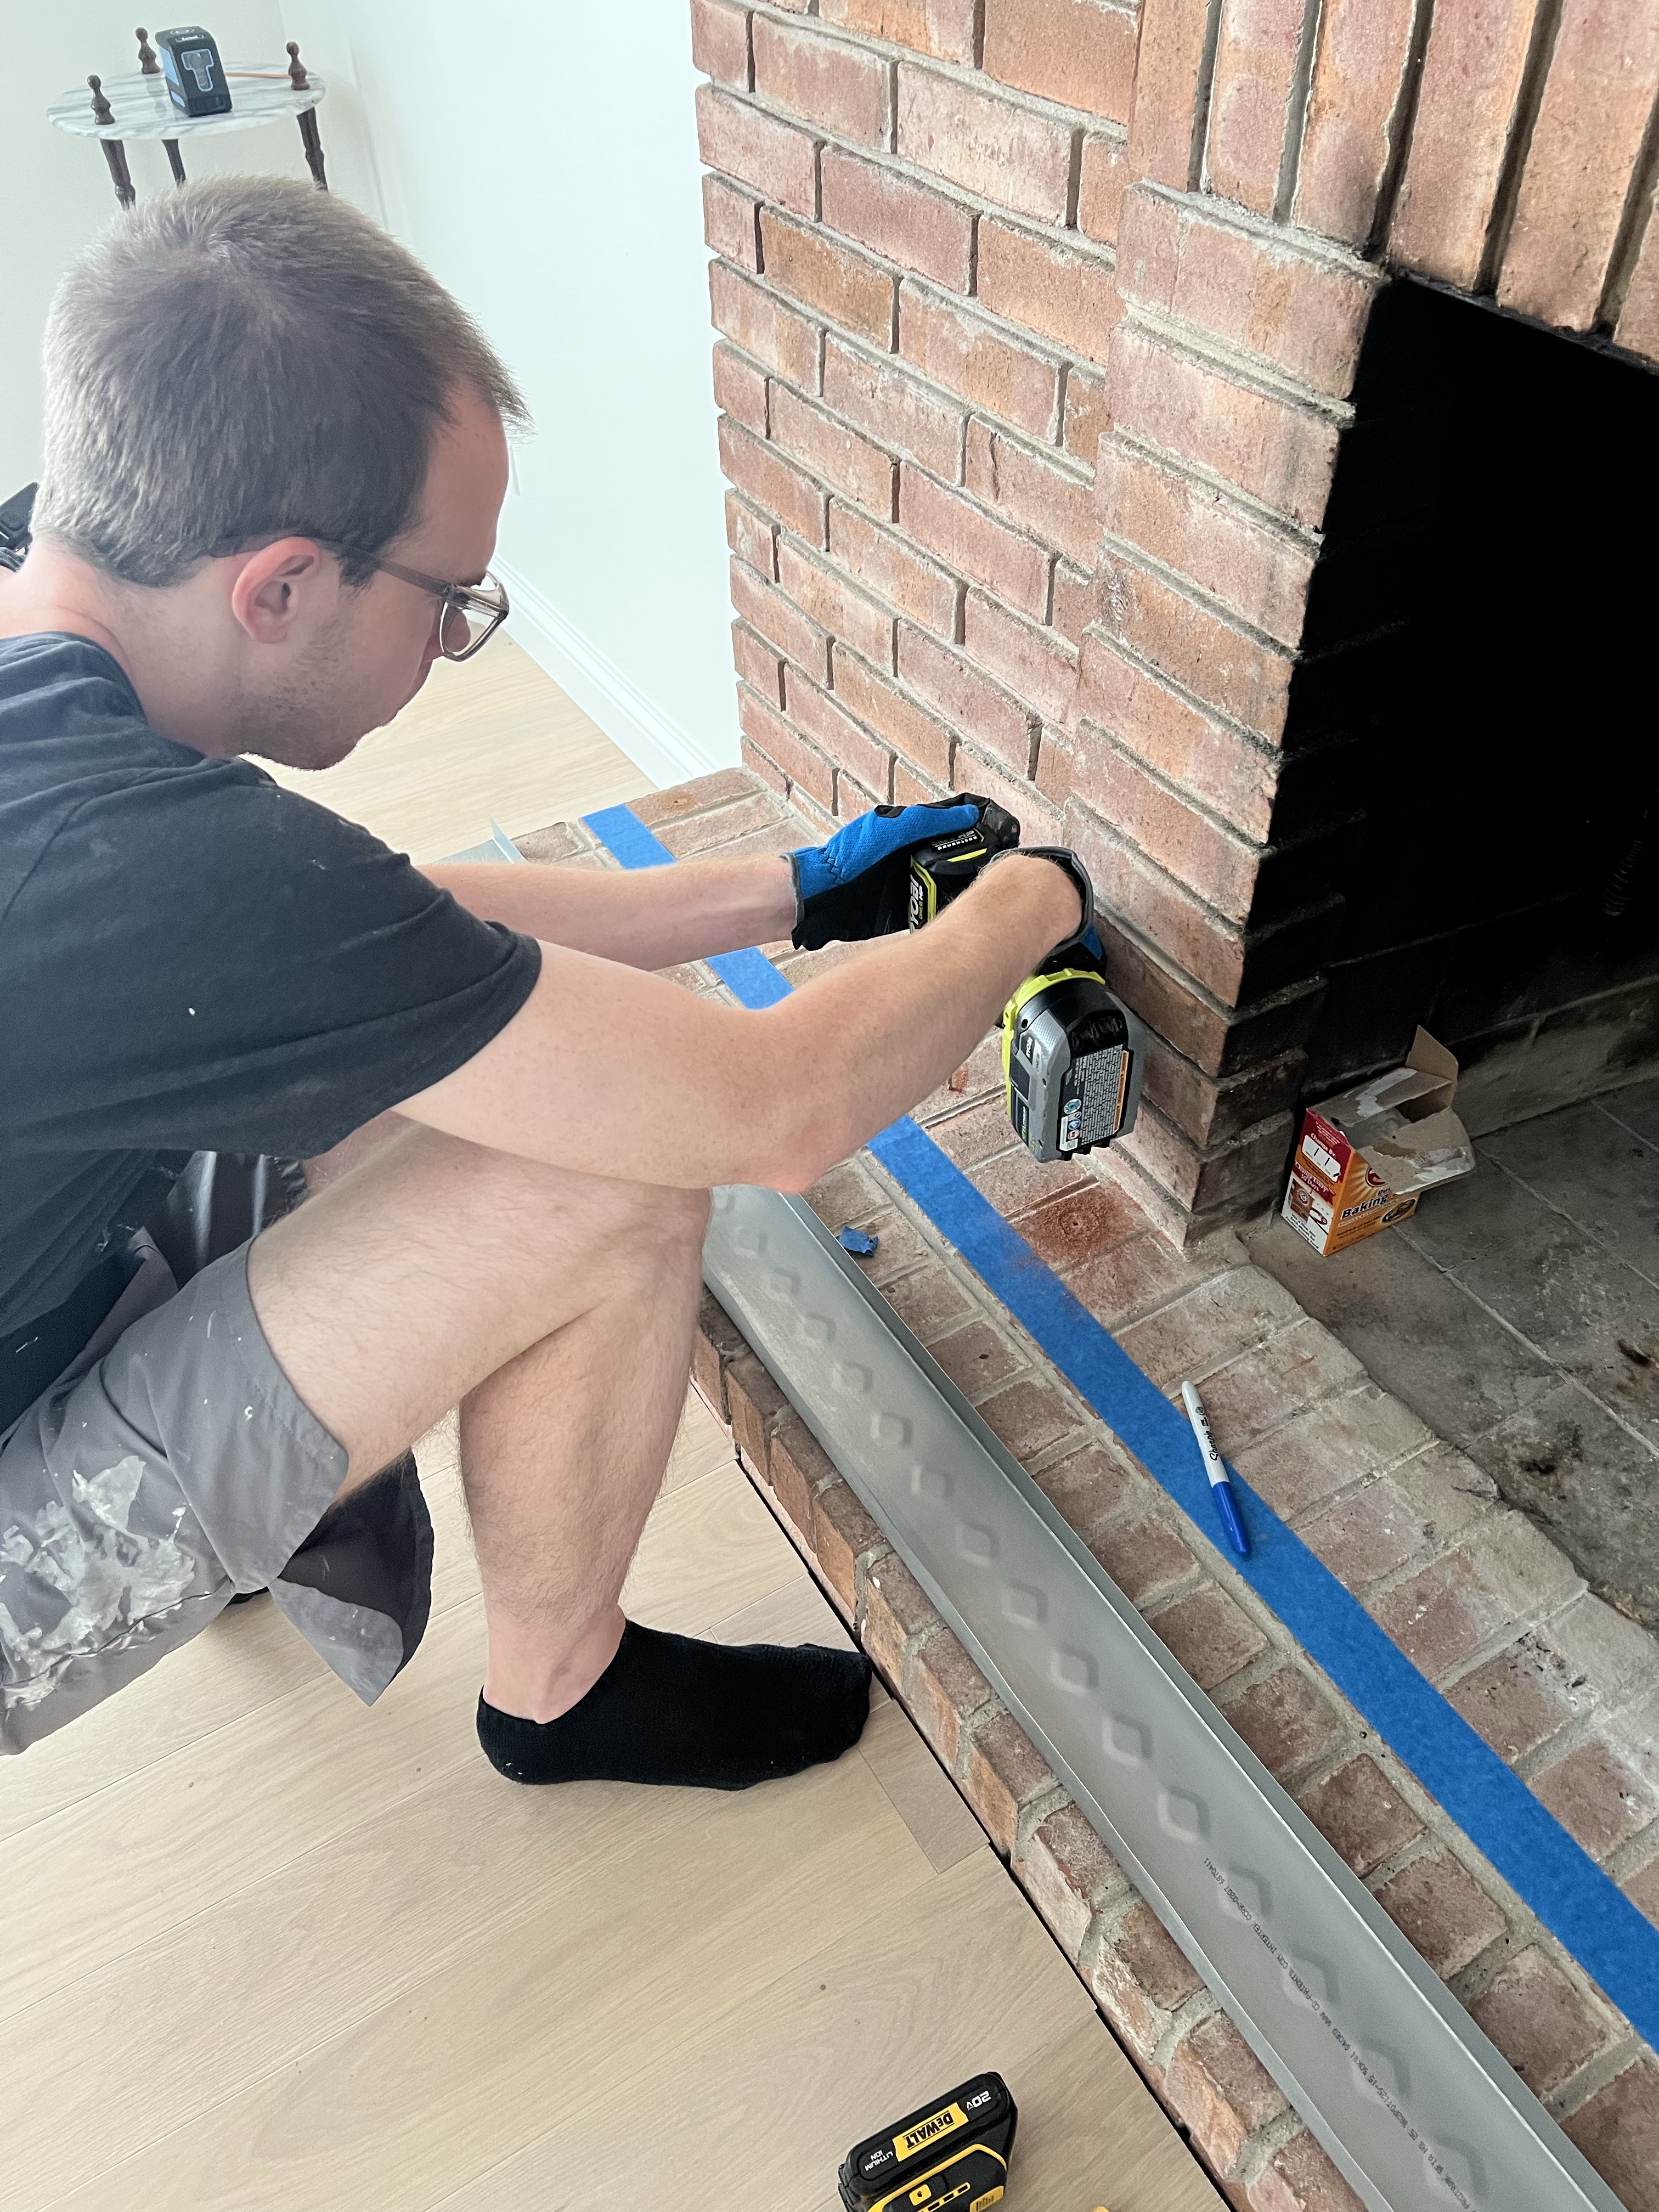
We used a laser-level as a guide and triple-measured the location of our bottom and top tracks. Once we had the location nailed down, we attached the bottom track with masonry tapcon screws (using a hammer drill and tapcon drill bit) to the existing raised brick hearth. We attached the top track with grk multi-purpose screws into the wood ceiling joist.
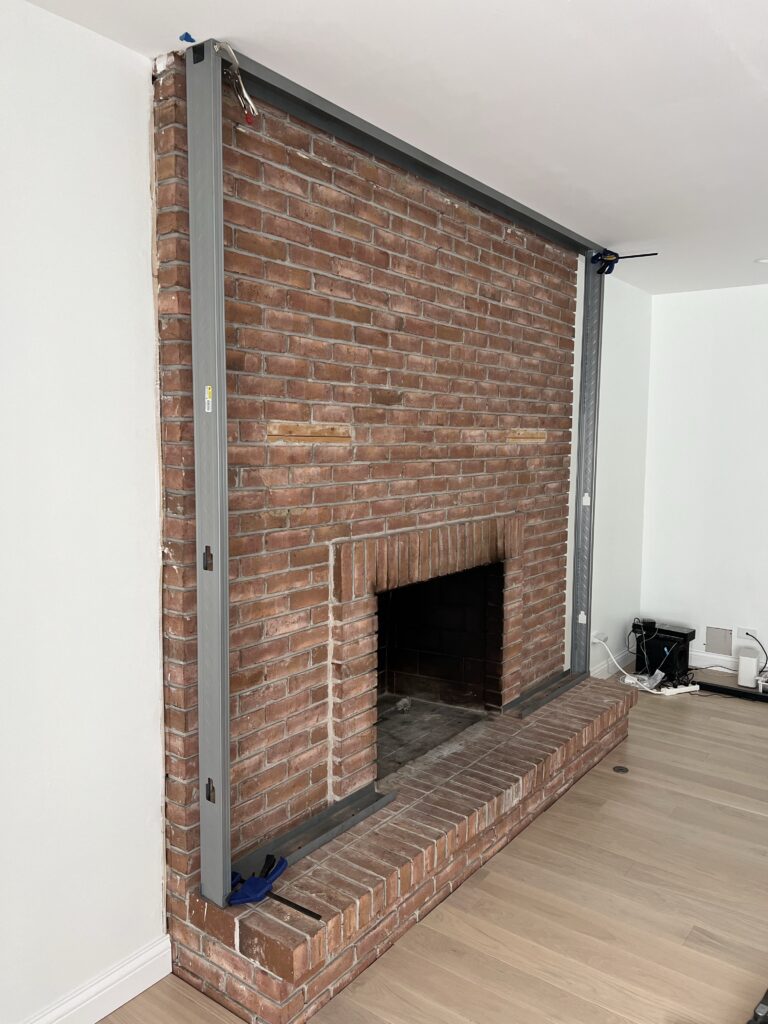
After the tracks were installed, we worked from the inside out. We created the framing around the firebox opening using the 3-5/8″ metal studs, which we pre-assembled before install so we were able to screw in (using pan head screws) from the back (where it butts up to the existing brick wall). Before screwing, we used the c-clamp to hold the metal stud tightly in place.
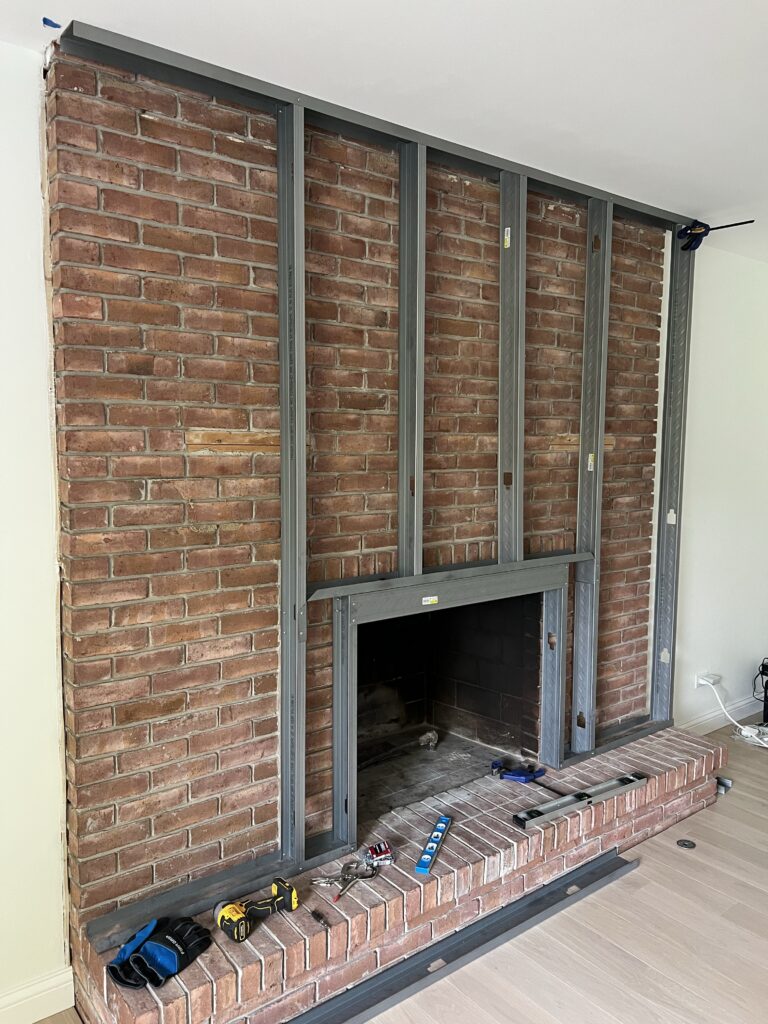
After the firebox opening was framed, we added the remaining vertical metal studs (maximum of 16″ on-center). We placed them using the laser level as a guide and double-checked our work using an i-beam level.
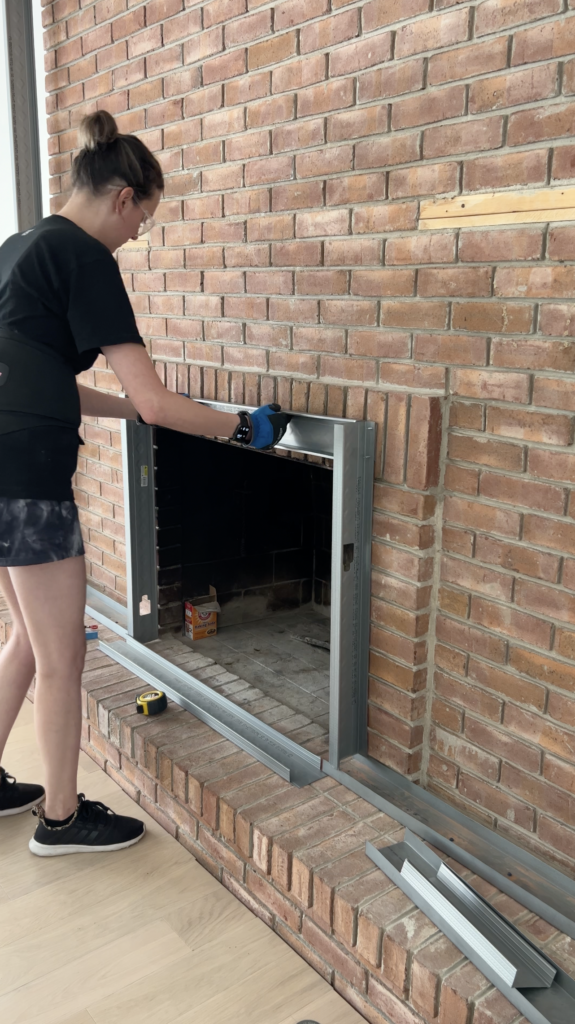
Finishing off with Wood Blocking & Furring Strips
Now that we’ve got metal framing completed we need to finish with our wood blocking. It is a good idea to add wood blocking at areas you need additional support. We will be adding 1×6 wood studs at the TV mount and where we will need to attached the top of the future mantle. In hindsight, I wish that we also added blocking at the bottom of each side of the mantle too. We’re using kerf joints to attach the wood block, which we learned from this how-to post on metal studs.
We’re also adding wood furring strips at the front of the raised hearth. We picked up wood 2x4s and cut them to size so they were flush with the existing overhang of the brick. We attached these with masonry tapcon screws (using a hammer drill and tapcon drill bit) to the existing raised brick hearth.
Adding the Media Box & Smurf Tube
Once the framing and blocking were complete, the last step before drywall was to install a media box and smurf tube. We are planning to hang our Samsung Frame TV above the fireplace so we needed to make sure we were able to accommodate the one connect box and any additional cables. We’re adding the smurf tube so we have conduit in the wall if any new cords or technology need to be run in the future.
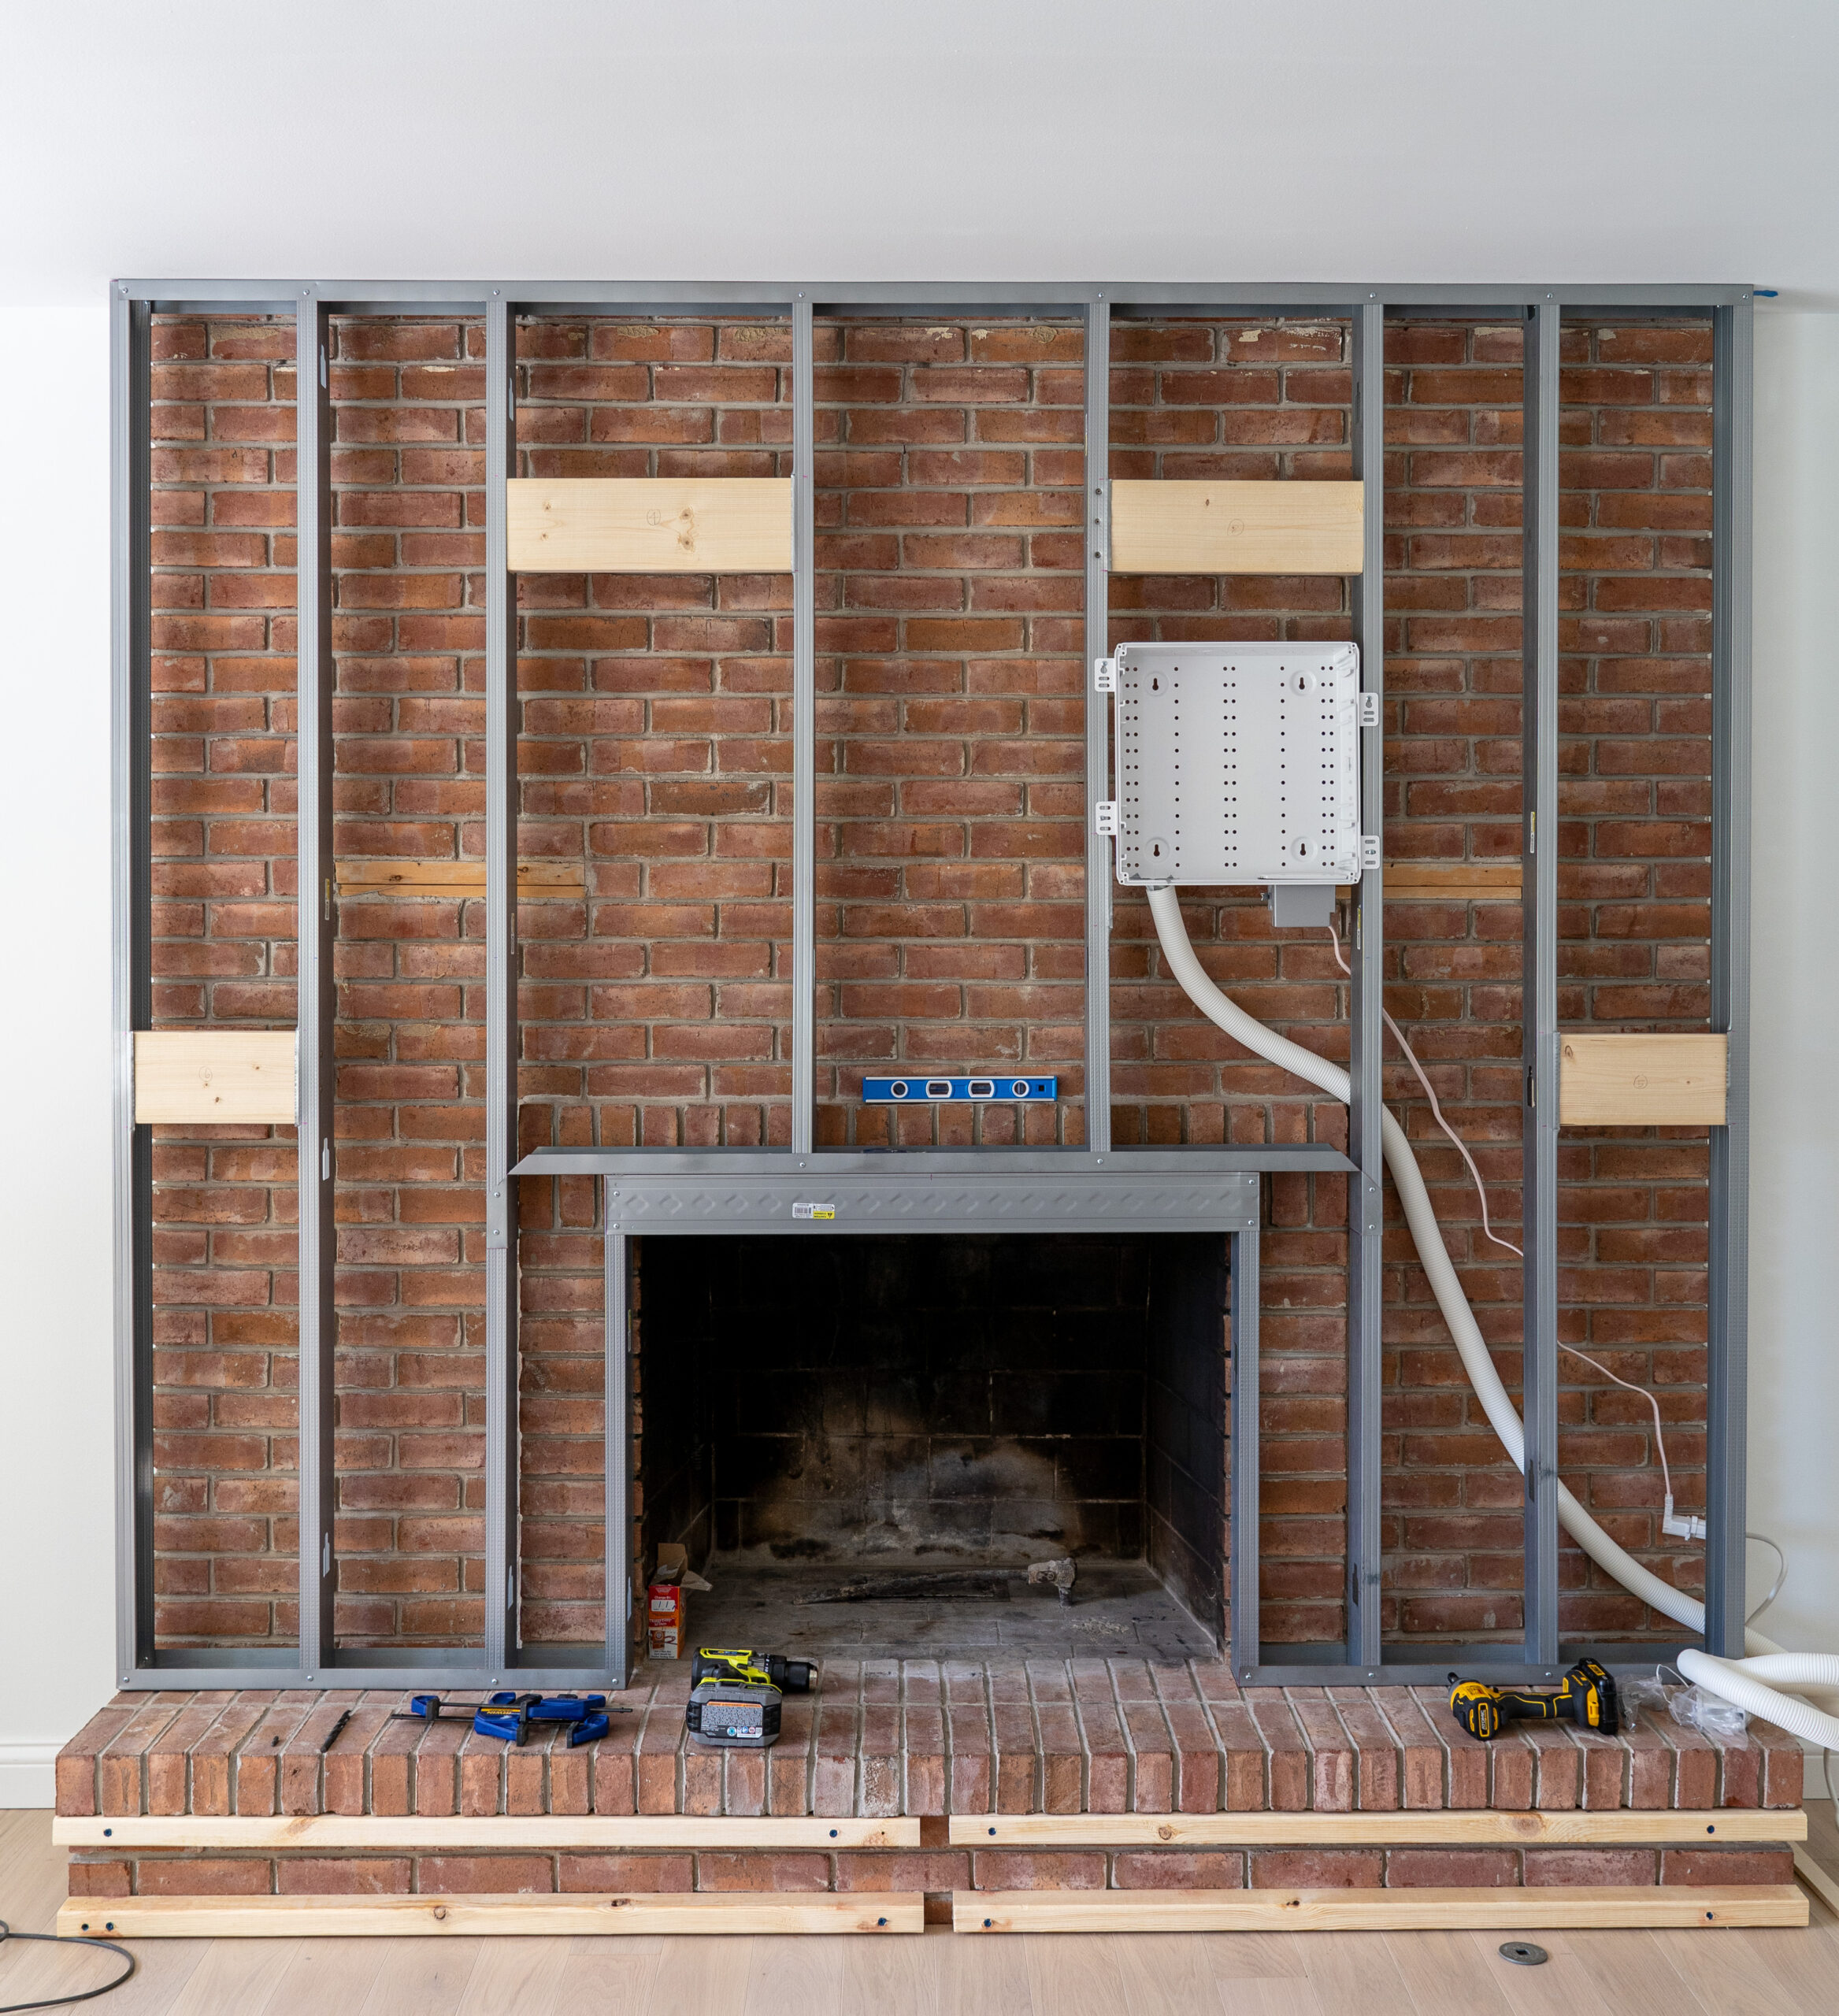
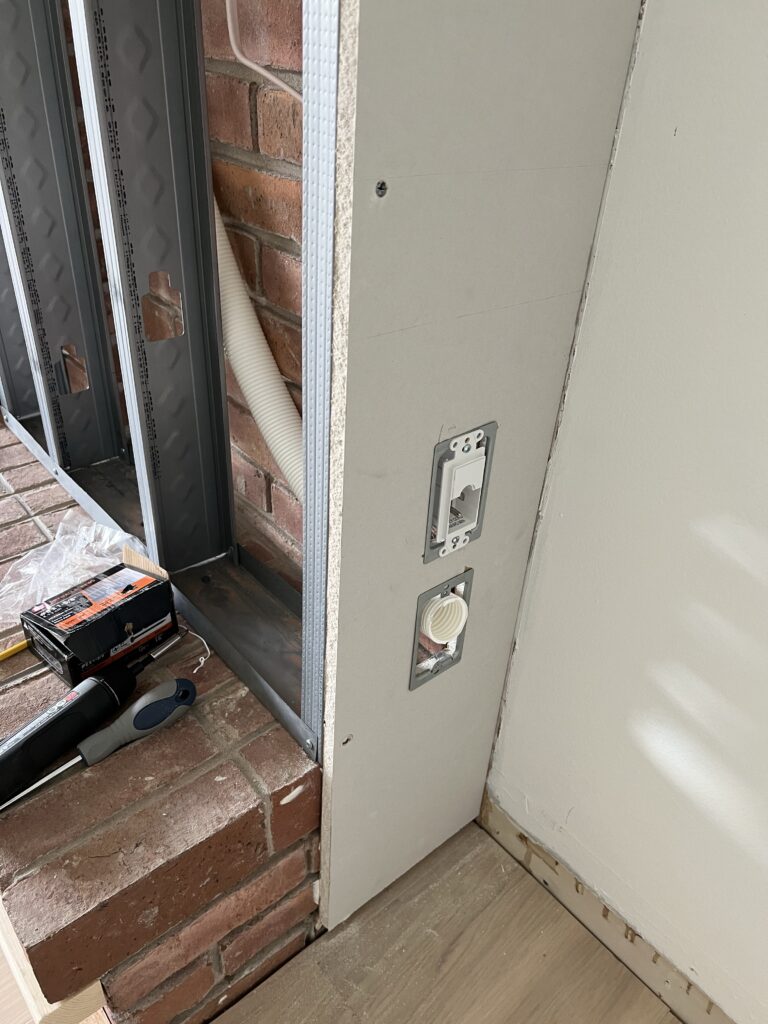
It is important to plan the mounting height of your TV so that you can also plan where to mount the media box. Once we got the media box mounted, we ran an outlet and the smurf tube from the bottom of the media box to the right side wall of the fireplace. All the cords will come out there and be able to run to an outlet if needed or straight into our future storage cabinet.
Framed Fireplace Ready for Drywall!
Now that the metal framing, wood blocking, media box and smurf tube are installed, we are ready for drywall! Here is a look at the finished framed wall.
We will be hanging the drywall and cement board ourselves, so stay tuned!