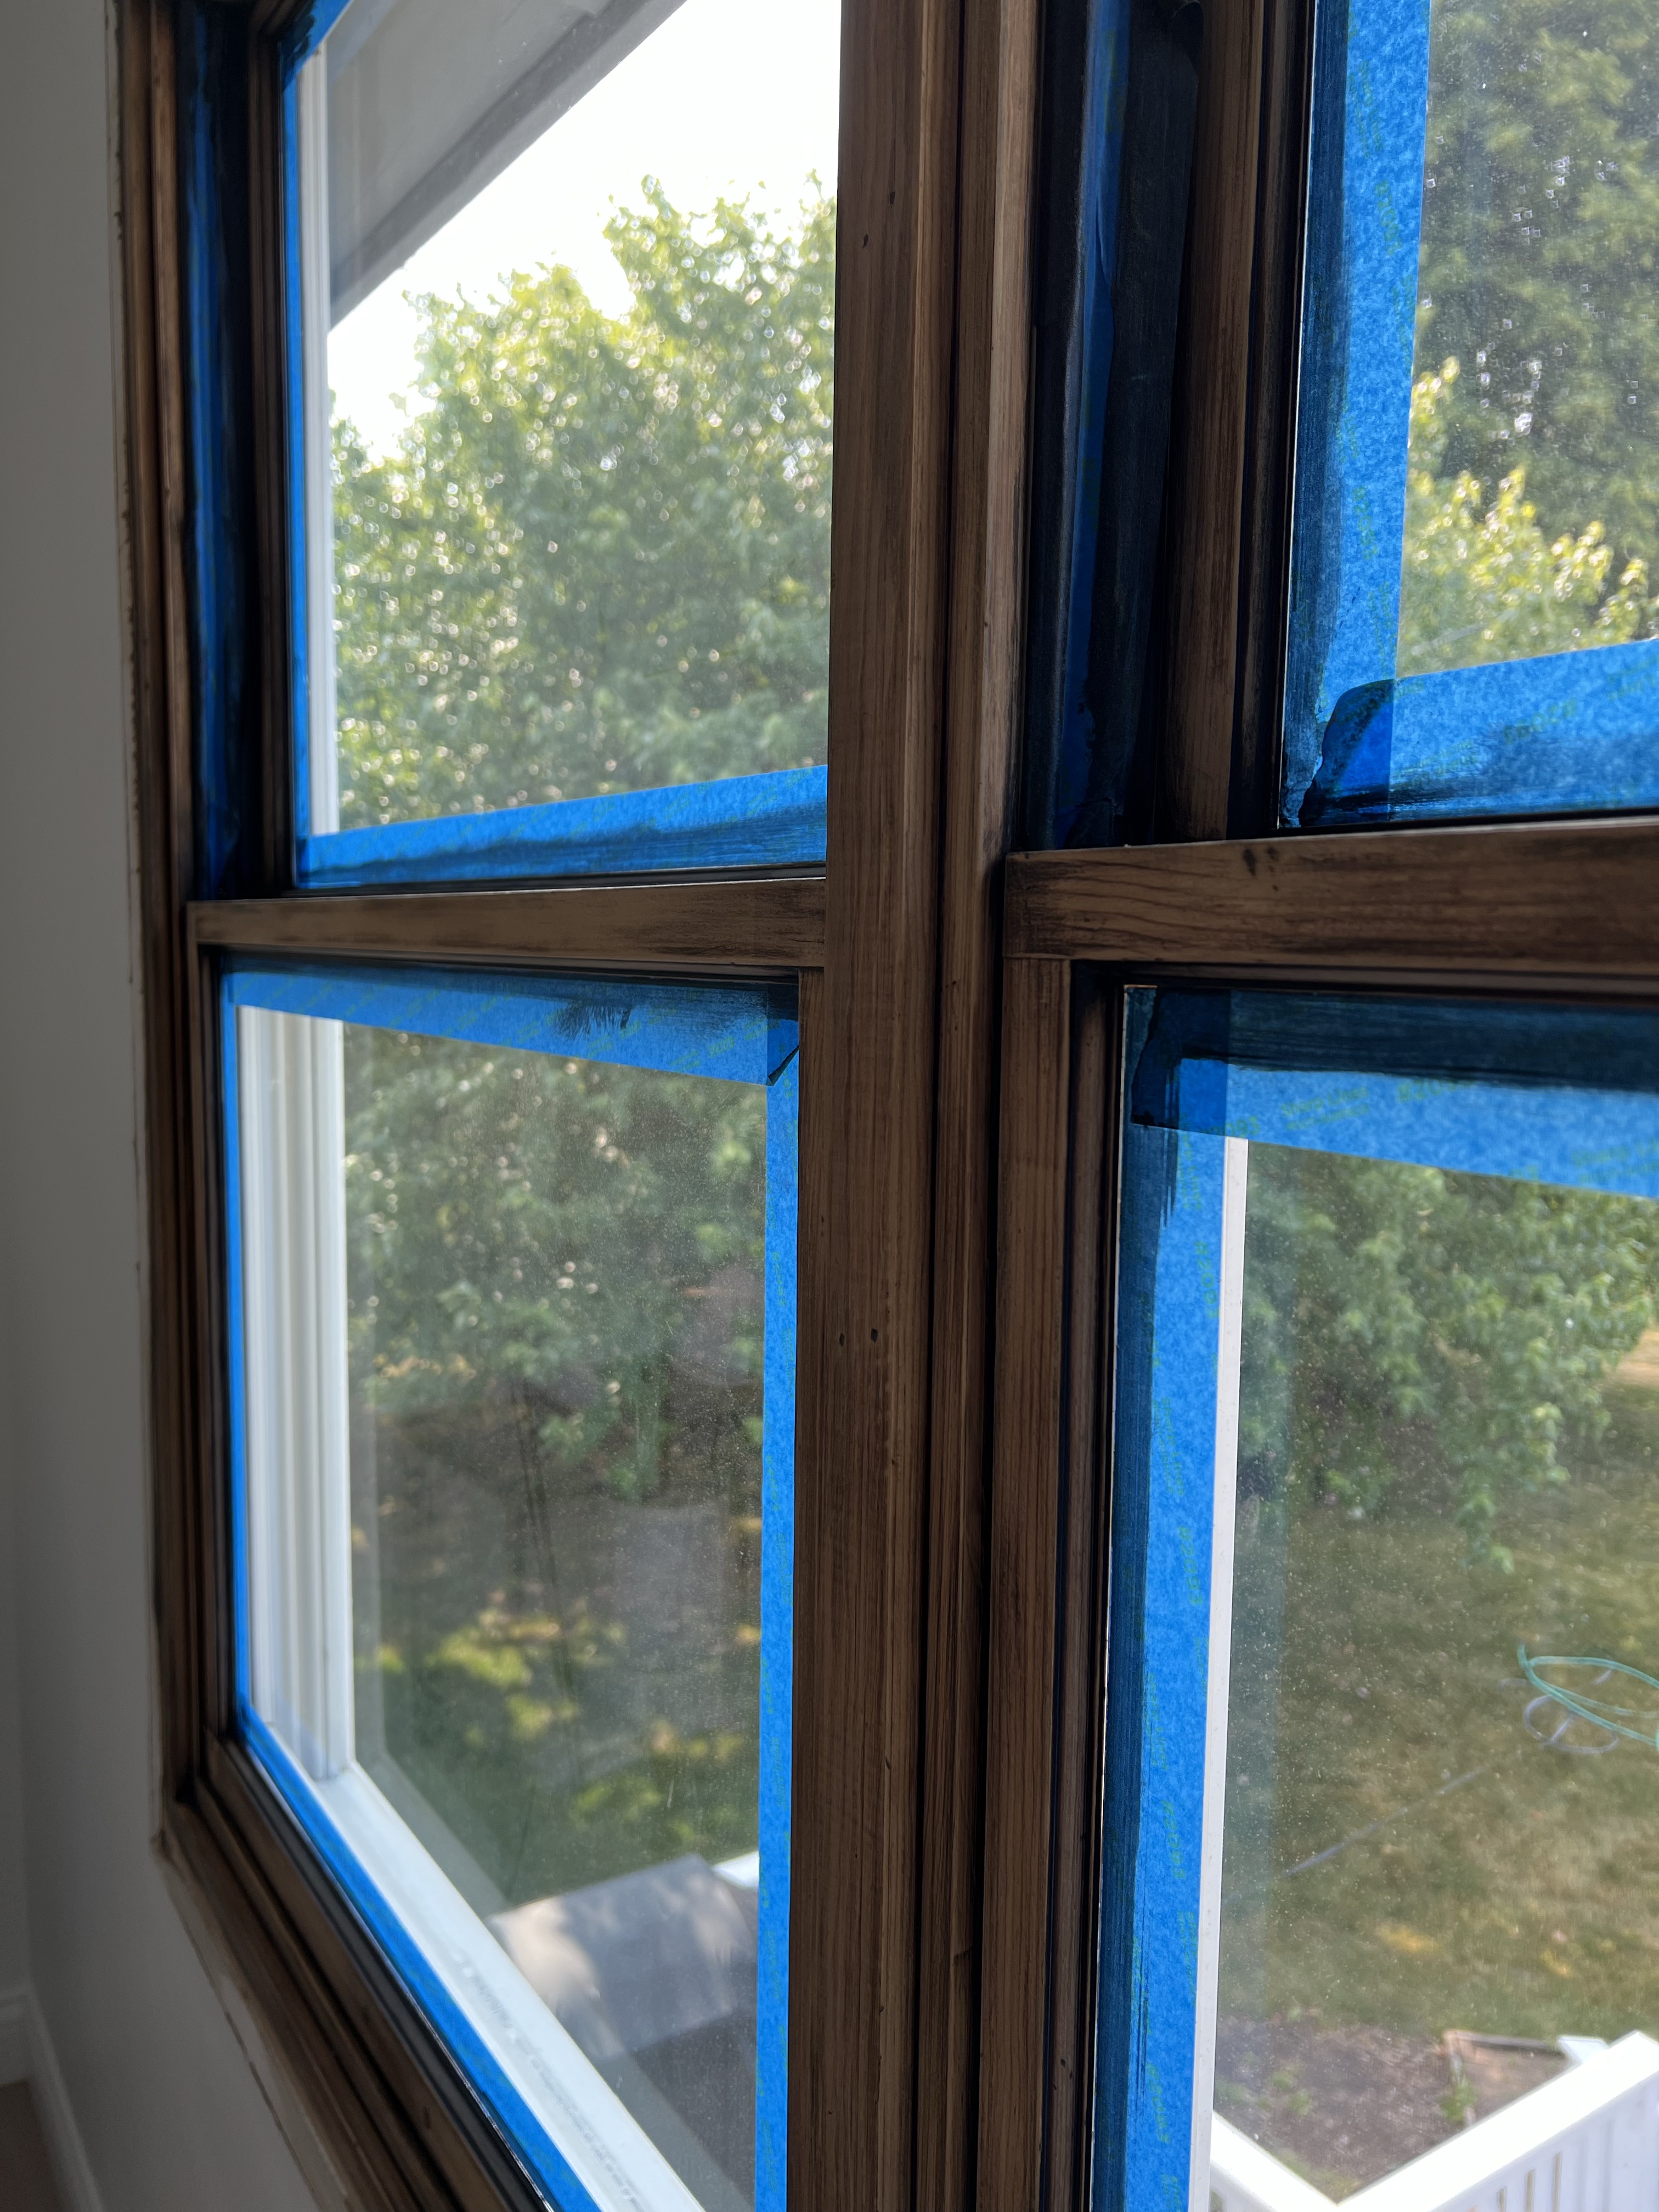
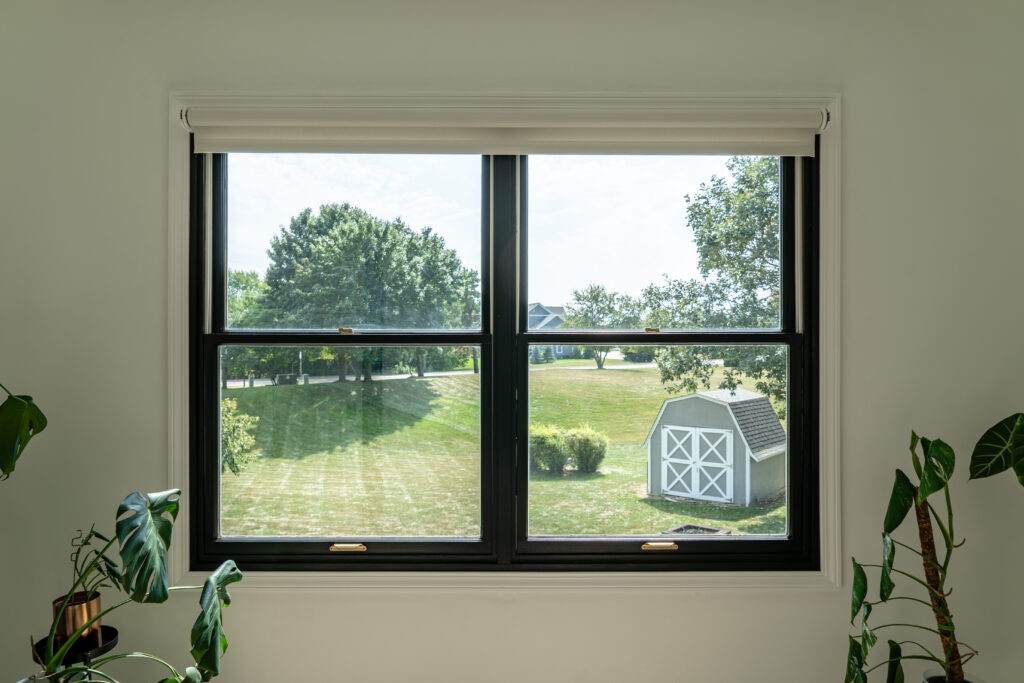
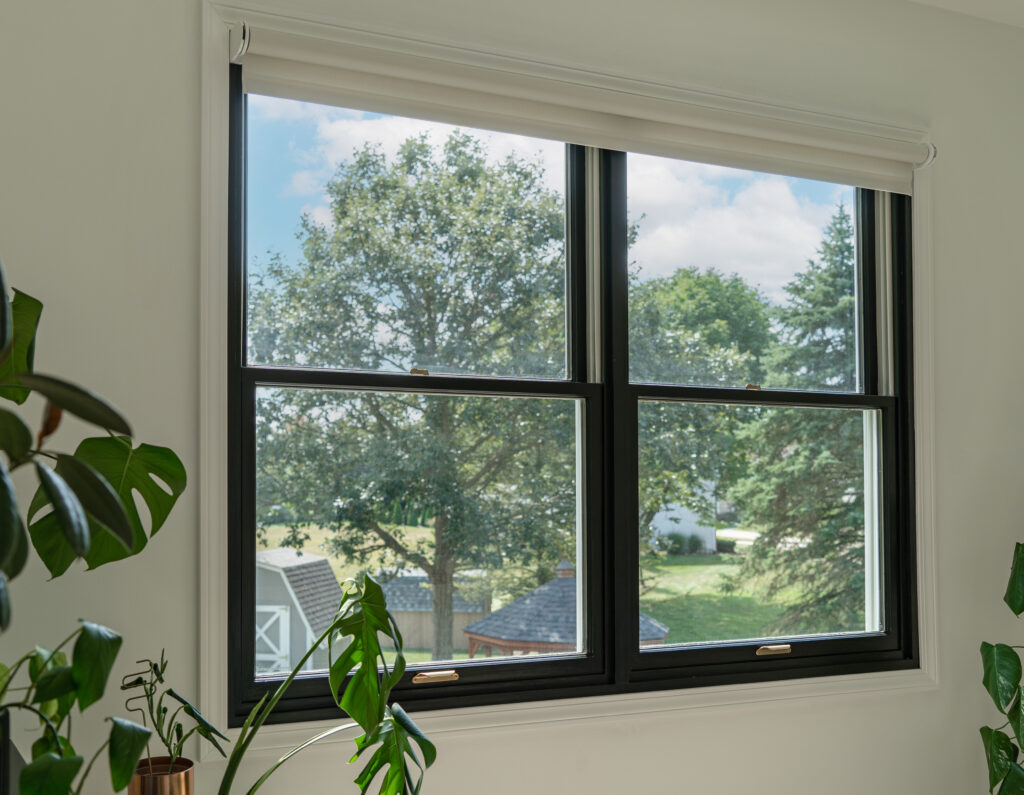
We’re onto our last project of our upstairs and we will be staining our existing wood windows black! We previously did this to our kitchen window and it turned out great, so we’re looking forward to repeating the same process on our windows upstairs.
THIS PAGE MAY CONTAIN AFFILIATE LINKS FROM WHICH I RECEIVE A SMALL COMMISSION.
Prepping the Windows
Before we’re ready to stain, we need to prep the windows. We will remove the existing blinds, existing trim, and existing hardware. We’re going to be replacing the window trim and adding new blinds. We’re also going to be spray painting the existing window hardware because our windows are old so it is difficult to find replacements.

Once we’ve removed all of that, we need to sand the windows to remove any existing finish. If you follow us on Instagram, you’ll already know that this is an extremely important step. Spoiler alert, we did not sand off enough of the existing finish the first time around and after the first coat of stain we were left with ‘tacky stain’ that would not penetrate or dry. You can learn more about our ‘tacky stain’ dilemma here.
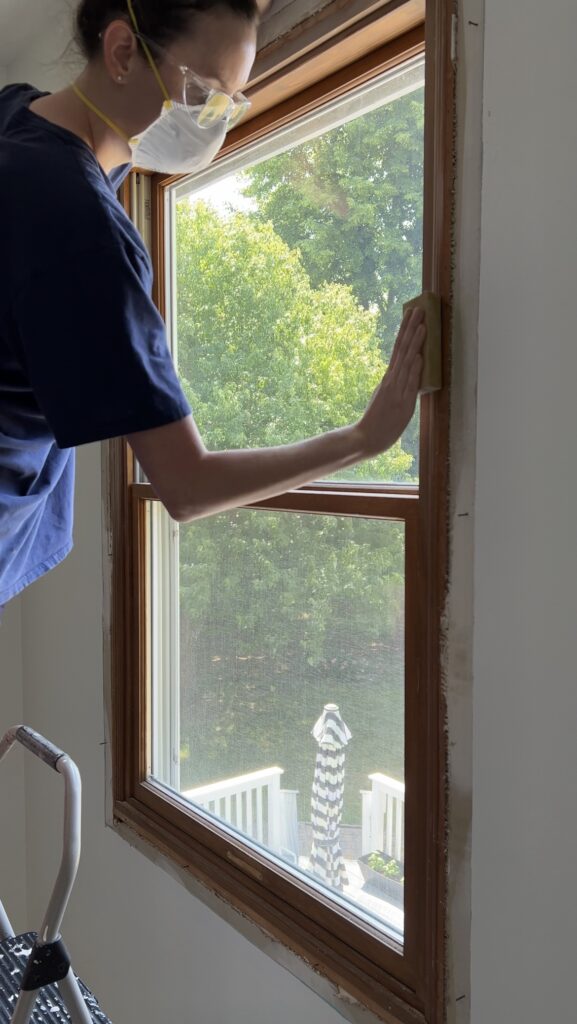
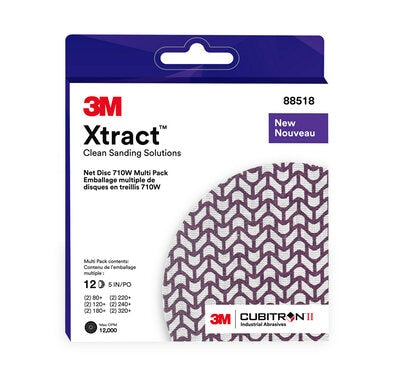
To sand, we’re using our favorite 3M extract sanding discs in 180 grit and sanding by hand because of the detailed areas of the windows. Again, it is important to make sure you’ve sanded off the existing finish down to the bare wood (don’t make the same mistakes as us!).
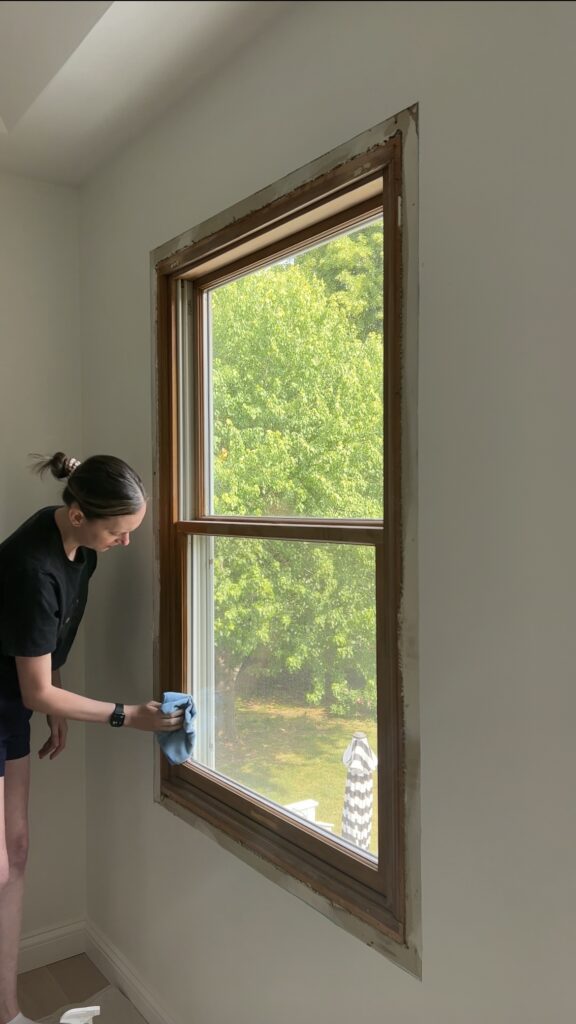
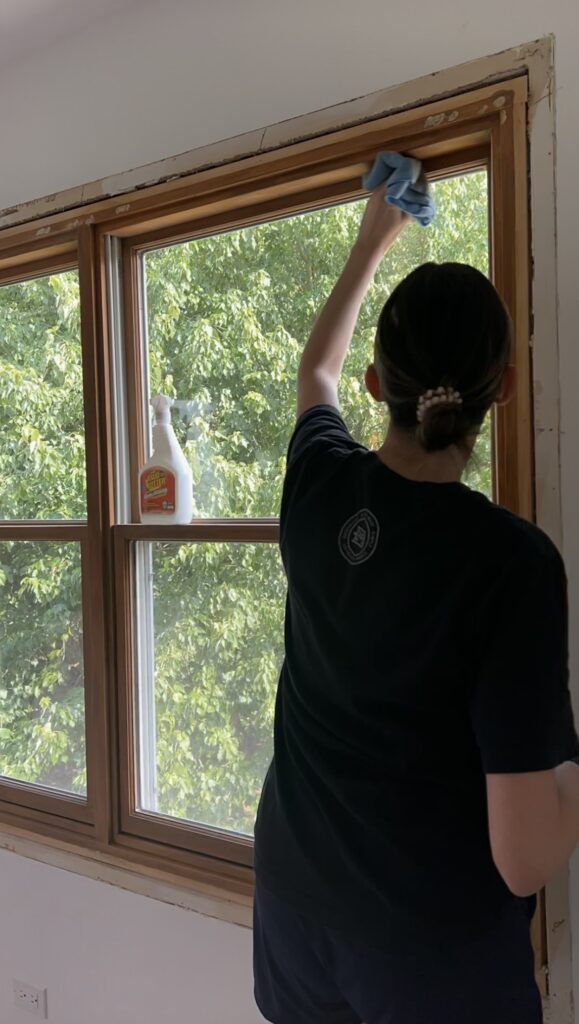
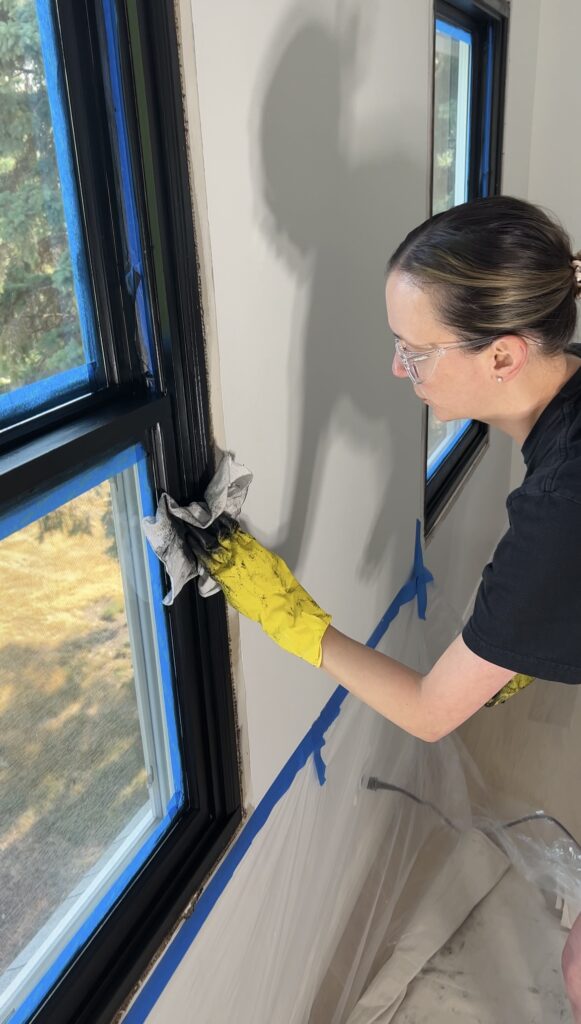
After we sanded, we thoroughly vacuumed all dust and then cleaned the windows with our go-to krud kutter. We always finish off the prep process by wiping the windows with a tack cloth to ensure we have a very clean surface.
Staining the Windows Black
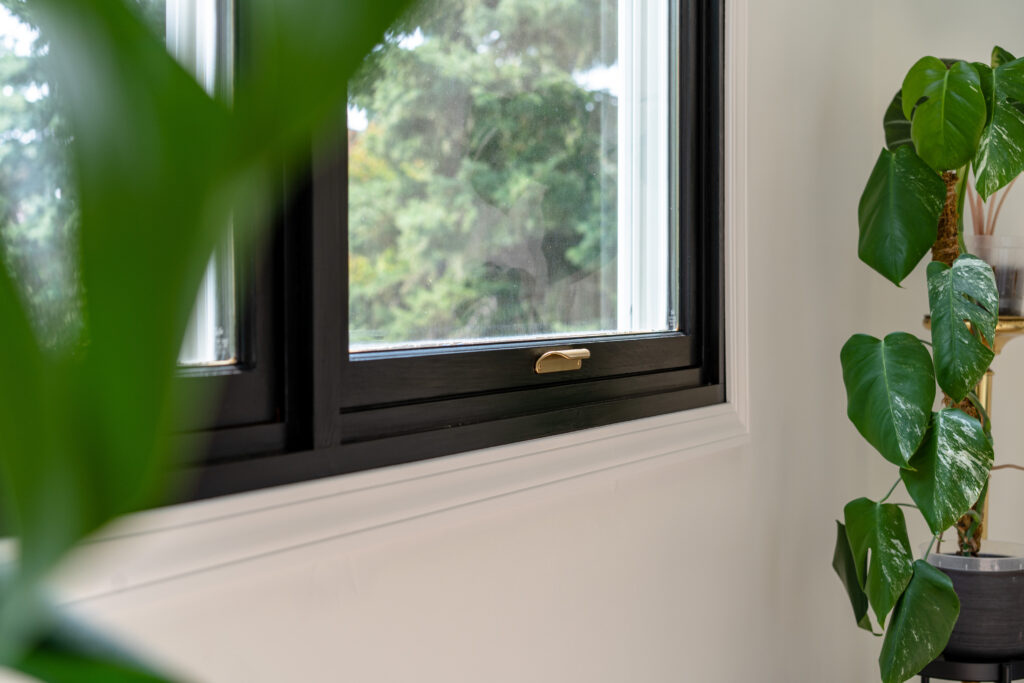
As we mentioned, we’re going to be staining the wood windows black. We are using Varathane’s fast-dry interior oil-based stain in the color ebony. I typically prefer to use water-based products but with black to achieve a deep pure-black color you need to use an oil-based stain.
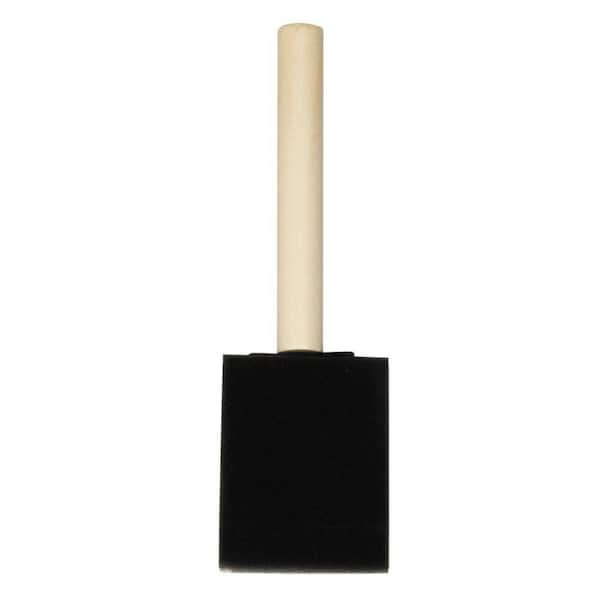
We are applying the stain using a lint-free staining cloth in addition to a foam brush. I like to use the cloth at most areas and supplement with the foam brush to get into any hard to reach spots like corners. It is important to read the specific directions of the exact stain you are using for your windows. Our stain called for wiping the stain on and within 3 minutes to wipe off any access. This helps to ensure you won’t over-apply and have the issue of ‘tacky stain’ that wont dry or cure properly.

I found that I needed to apply 3 coats of stain to ensure I did not miss any spots. Because we’re using Varathane’s fast-dry stain, we were able to re-coat within 4 hours. This made finishing 3 coats much easier. After the 3 coats of stain, I waited 24 hours before proceeding with applying the polyurethane top coat.
Applying a Polyurethane Topcoat
After patiently waiting 24 hours to ensure the stain was fully dry, before applying the poly topcoat, I very lightly hand sanded the stained windows with a 320 grit sandpaper. This will smooth out any areas and help the poly topcoat adhere properly. After that, I again vacuumed any dust and swiped the windows with a tack cloth.
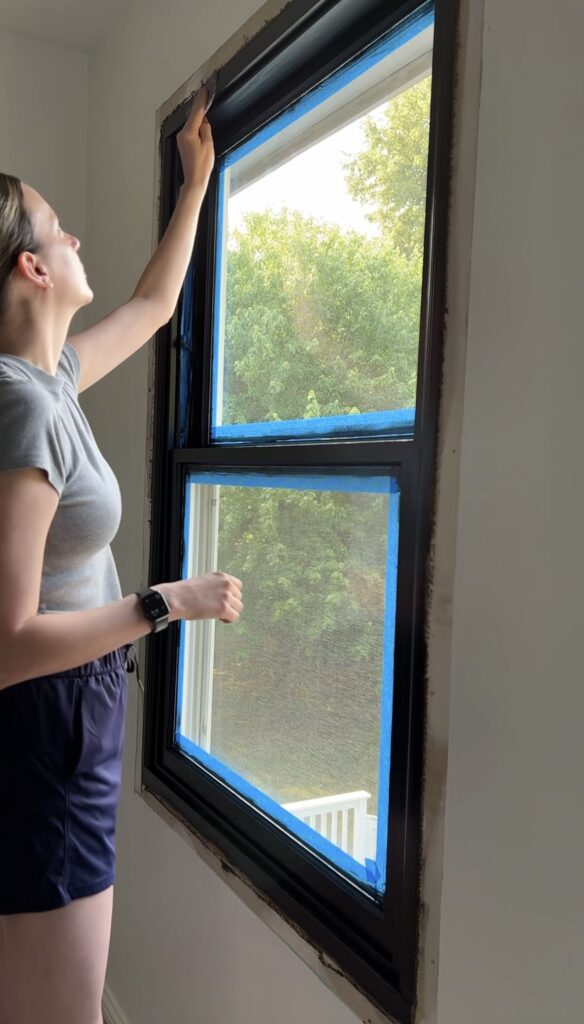

For the polyurethane topcoat, I am using Minwax Polycrylic in clear satin, a water-based polyurethane. The directions on the polycrylic recommend applying it with a synthetic bristle brush. We used the 1-1/2” silver-tip Wooster brush. If you haven’t used poly before, it is really important to stir it thoroughly. Make sure you stir it with a stir stick, rather than shaking the can.


We are applying 2 coats of the polycrylic. Minwax recommends 2-3 coats depending on how high-traffic of any area it is. We felt that 2 coats was sufficient for our windows.
Spray Painting the Existing Window Hardware
As we mentioned earlier, we’re going to be spray painting the existing window hardware rather than replacing. I typically like to replace with new whenever possible but because our windows are pretty old I could not find any exact replacements in a nice finish.
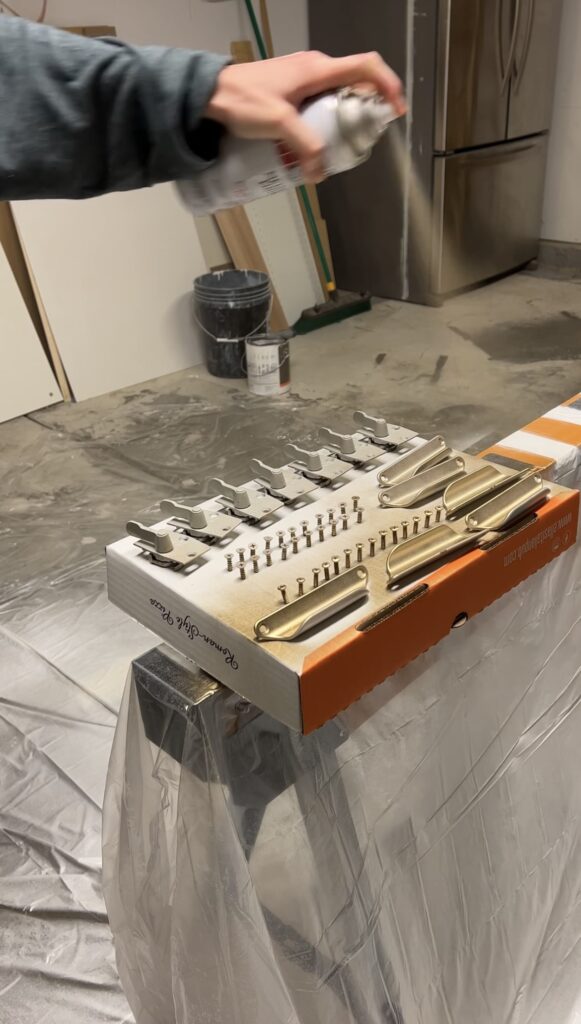
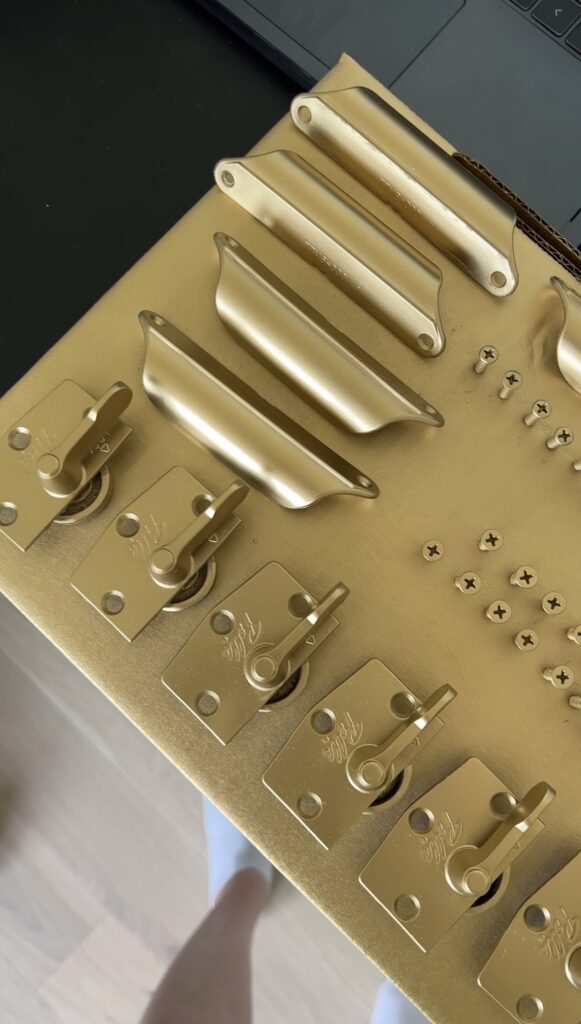
We’ve tried multiple brass colored spray paints and have finally found one we are really happy with! We’ll be using Rustoleum Metallic Finish gold spray paint. First, we cleaned all of the existing hardware (including the screws) with krud kutter and let it fully dry.

Next, we applied multiple light coats of the spray paint, making sure to spray from different directions. Once we felt like the hardware was thoroughly coated, we let it dry, and then re-installed it onto the windows.
A lot of our followers on instagram thought we got new window hardware! It’s because this spray paint offers a very convincing nice brass finish and it can easily help to update existing windows.
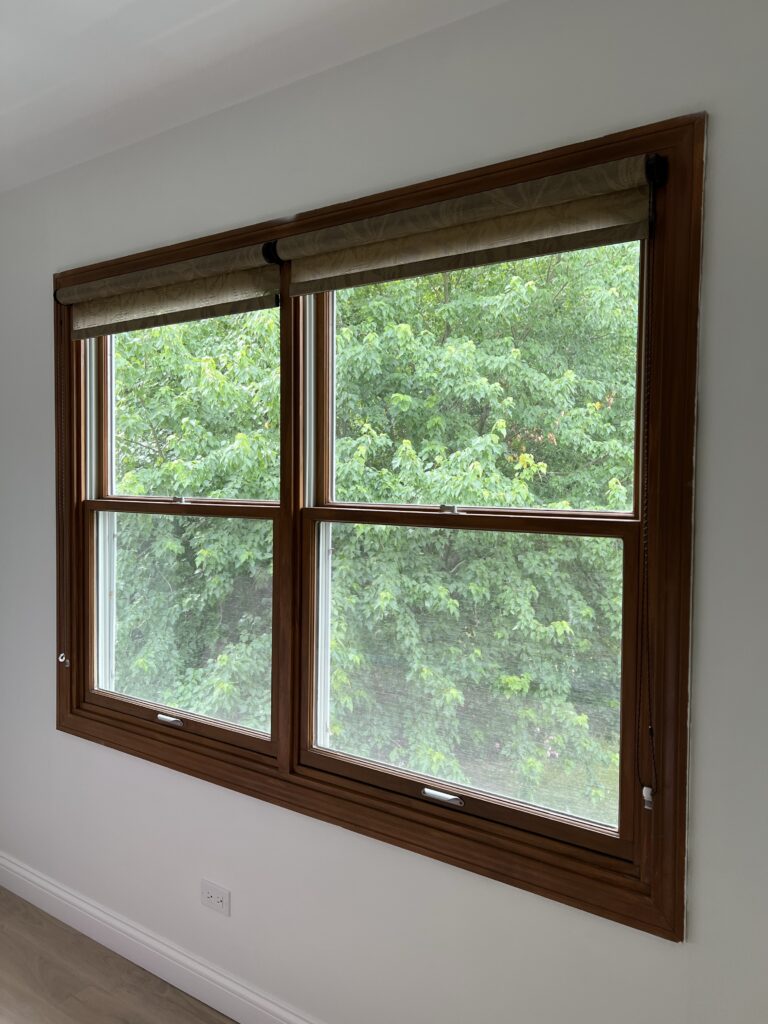
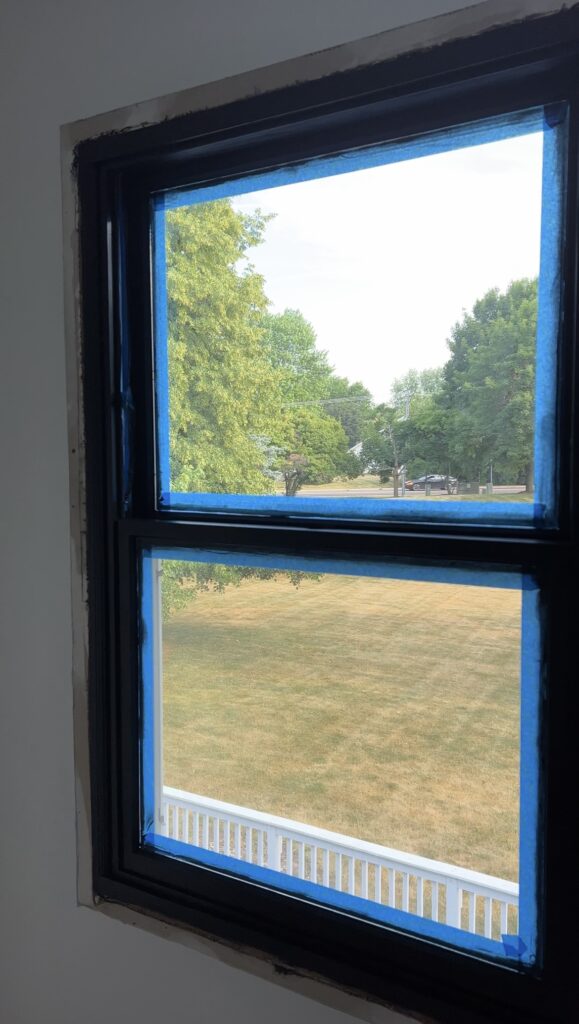
Our Completed Windows Stained Black
Summary of our Step-by-step Process
If you prefer a list, here’s a step by step of our window staining process:
- Remove any existing blinds, trim, and hardware
- Sand off existing finish, with 180 grit sandpaper
- Vacuum any remaining dust
- Clean the entire surface with krud kutter
- Wipe the entire surface with tack cloth
- Apply minimum two coats of oil-based stain, wipe on with lint-free cloth, use foam brush on any hard to reach areas or corners
- Lightly sand the stained window, with 220 grit sandpaper
- Vacuum any remaining dust
- Wipe the entire surface with tack cloth
- Apply minimum two coats of Minwax Polycrylic, brushed on with 1-1/2” silver-tip Wooster brush.
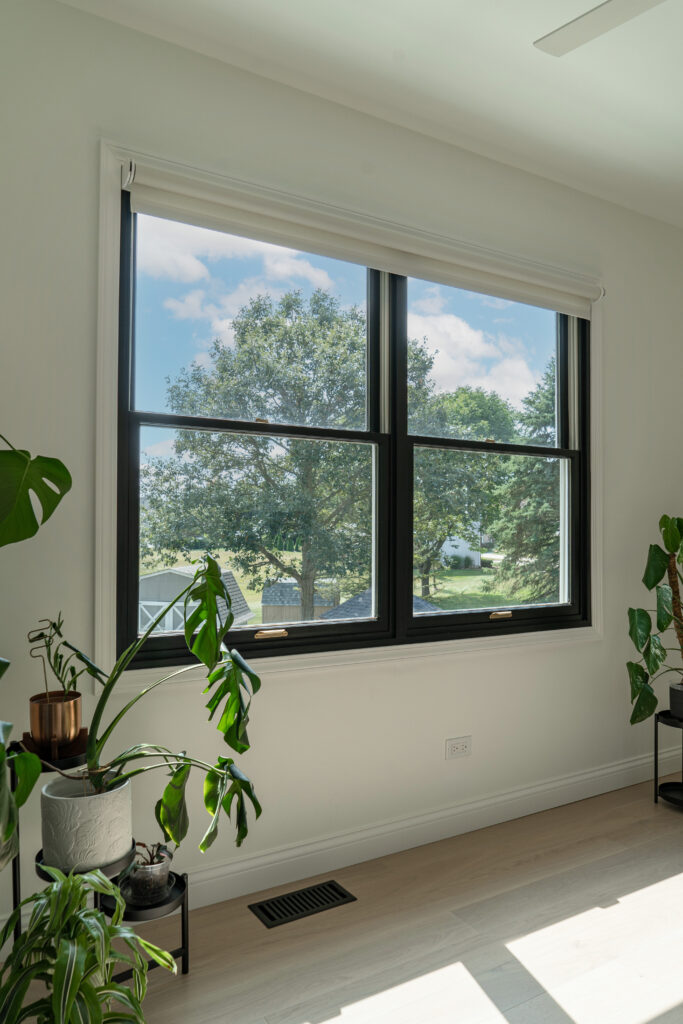
And with that our upstairs renovation / refresh is complete! In addition to refinishing the windows, we replaced all of the flooring and refinished all of our interior wood doors.